Starting a guest check
Aloha Cloud offers several methods for starting a new order, determined by whether you use Quick Service or Table Service.
This document discusses the following:
- Starting a guest check (Quick Service mode)
- Starting a tab (Table Service)
- Starting a tab using Assign+Hold (Table Service)
- Starting a table (Table Service
- Overriding the open check limit
Starting a guest check (Quick Service)
When using Quick Service, a new guest check appears on the order entry screen as soon as you log in.
- Log in to the POS.
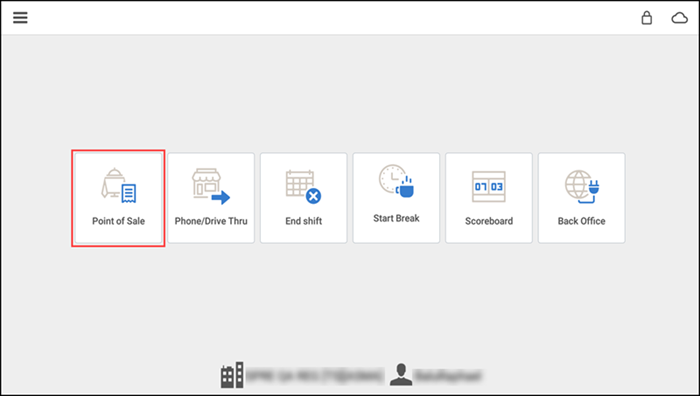
- Tap Point of Sale. The order entry screen appears with a blank guest check active on the order entry screen.
- Begin taking the customer order.
Starting a tab (Table Service)
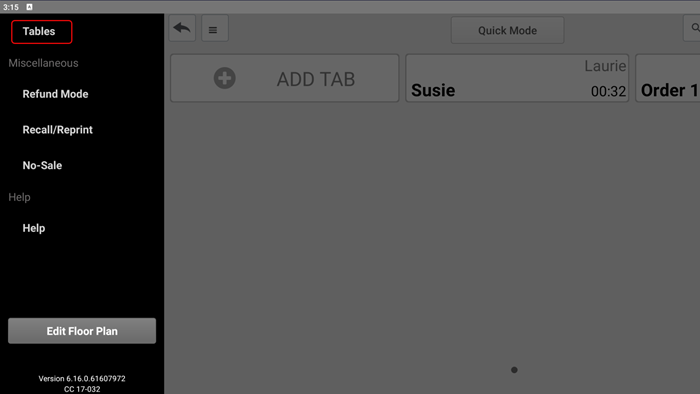
Table Service offers the ability to start a tab, such as in a bar environment. Tap ADD TAB to start a tab for a customer without seating a customer at a table. Tap 'Sort by' on the POS entry screen to toggle between sorting all orders by first name or by time, from oldest to newest.
- Log in to the POS.
- Tap Point of Sale. The TABS screen appears.
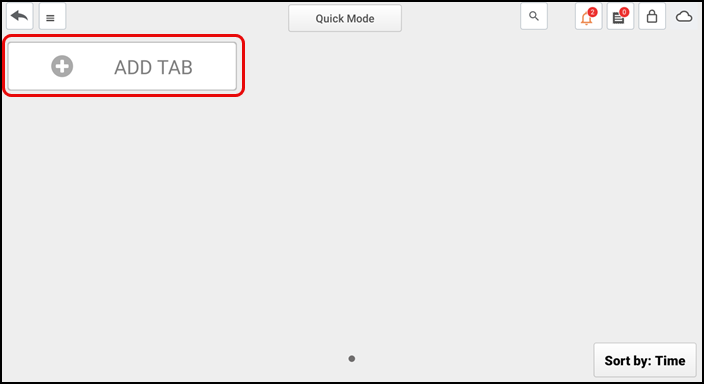
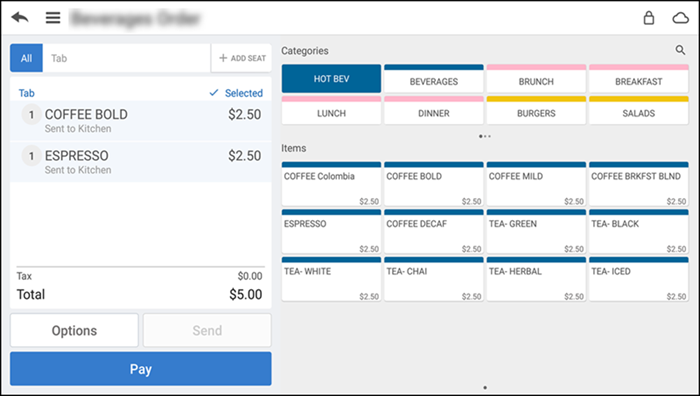
- Tap ADD TAB. A blank check appears on the order entry screen.
- Begin entering items for the order.
- Click the back arrow. The Name Order screen appears.
- Type a name for the tab or select/add a customer.
- Click Save to return to the TABS screen. The new tab appears on the screen.
Note: When you finalize the order, a prompt to assign a customer to the ticket appears.
Starting a guest check using Quick Mode
Use Quick Mode to quickly enter orders, collect customer information, and accept payments in the POS app. Quick Mode does not utilize table set up and customer seat ordering.
- Log in to the POS.
- Tap Point of Sale.
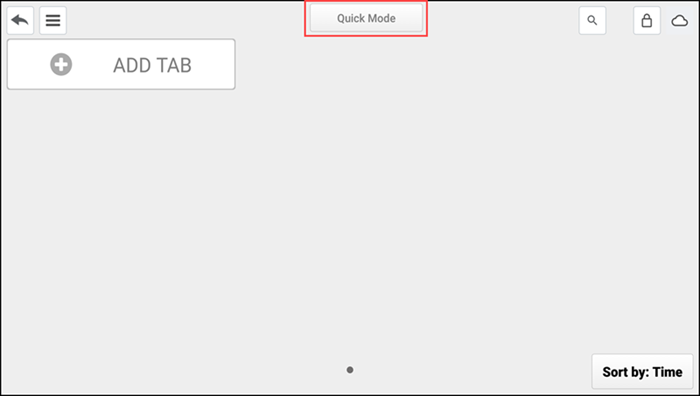
- Tap Quick Mode located at the top center of the TABS screen to view a blank guest check on the order entry screen.
- Begin adding items to the check.
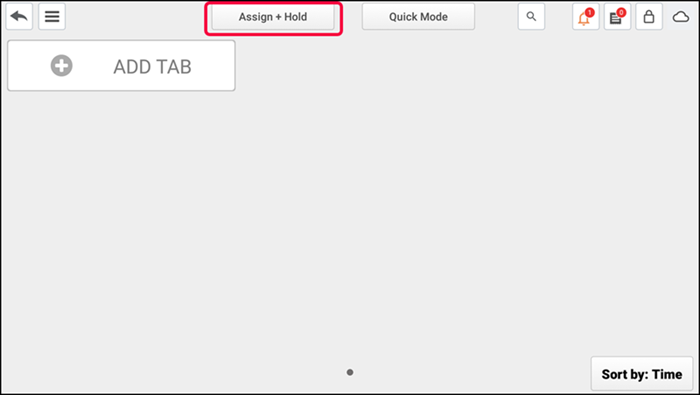
Starting a tab using Assign+Hold (Table Service)
You can instantly open and name tabs using the customer's card on the dedicated tab screen. This automatically generates a tab with the cardholder's name, minimizing manual inputs and ensuring accuracy.
Note: This feature is only supported for Table Service using the Connected Payments Gateway processor.
-
Navigate to the TABS screen.
-
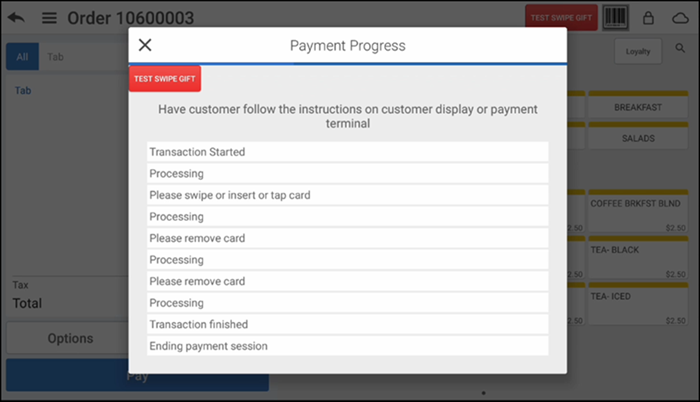
Tap Assign + Hold. The order entry screen with the Payment Progress window appears.
-
Slide/Tap/Insert card to save customer card information.
Note: Sliding a card holds the customer card details and assigns the card to the tab/order but the order name does not change. Tapping or inserting a card holds the customer card details, assigns the card to the tab/order and the order name changes to use the cardholder's name.
-
Begin entering items for the order.
-
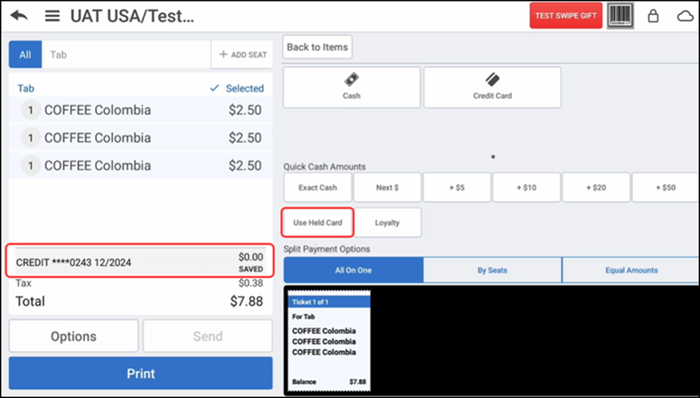
When the guest is ready to close out the tab, tap Pay to access the payment types.
-
Tap Use Held Card to proceed with the payment and close the ticket.
Starting a table (Table Service)
When using Table Service, you must start a table and select the table at which the guest is seated. You are the owner of that table, which makes you financially responsible for the check at that table.
- Log in to the POS.
- Tap Point of Sale.
- Tap the menu icon to access a slide out menu.
- Tap Tables.
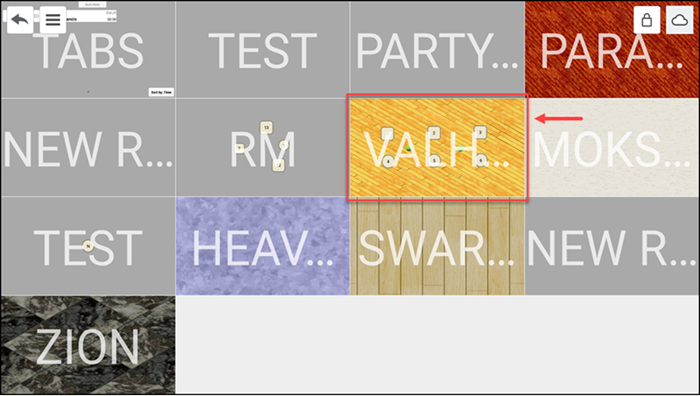
- Tap the desired room.
- Tap the room again to gain access to the tables in the room.
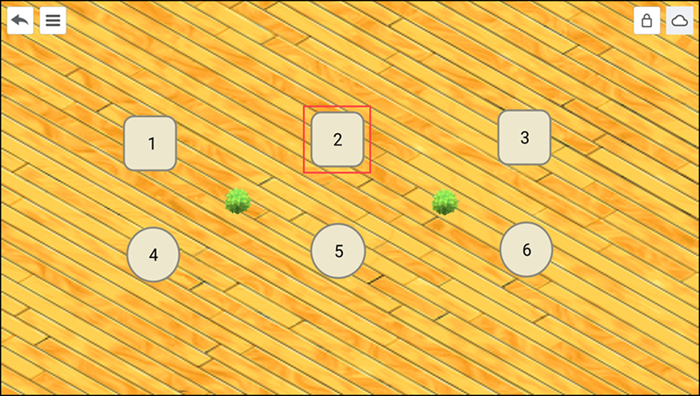
- Tap the table at which the guest is sitting. The order entry screen appears with a new open guest check, ready for you to enter items for the first seat.
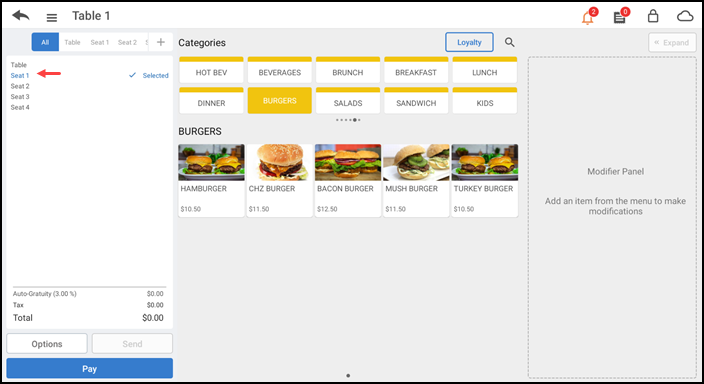
- Add the items for the guest in Seat 1.
- Tap each of the other seats and enter the respective items.
- Click the back arrow two times to return to the home screen or tap the menu icon and tap Tabs to return to the TABS screen. The table now appears with your name on the Working with Tables screen.
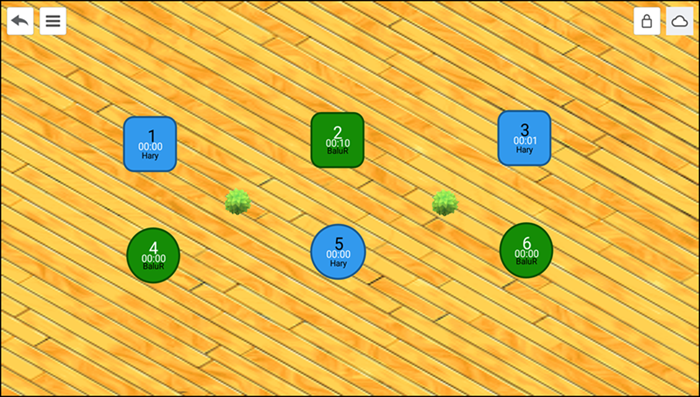
Note: You must add at least one item to the check for the system to lock down that table as being owned by you. Your tables appear in green; tables assigned to other servers appear in blue.
Overriding the open check limit
If a maximum number of open checks limit is set, when you exceed the limit, a message appears on the order entry screen. An employee with sufficient permissions must override the limitation to continue and allow you to open another check. For example, if the maximum number of open checks is 'three,' you receive the notification that you have exceeded the limit when you attempt to save check 'four.' For more information, refer to Limiting open check.
To override the open check limit:
-
Log in to the POS.
-
With the guest check active, save the ticket. If you exceed the maximum open check limit, a message letting you know you have exceeded the open check limit appears followed by the Manager Approval Needed screen.
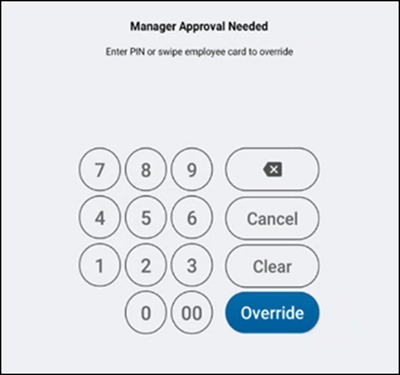
-
Ask an employee with sufficient permissions to authorize the operation.
-
An employee with adequate permissions enters their PIN and taps Override to continue with the operation.
-OR-
Tap Cancel to close the Manager Approval Needed screen.
See also: