Setting up kitchen routing
Use Setings & Privacy > Kitchen Routing Setup to create and manage your kitchen routing groups, printing devices and to set up kitchen expo station.
This document discusses the following:
Configuring kitchen routing
Kitchen routing groups control how menu items are printed/presented on kitchen devices. You must log in using Company View (All Stores) to create kitchen routing groups. Then log in using a specific site and define printer routing specific to that site.
Setting up a kitchen routing group
- Log in to Back Office using Company View (All Stores) or using specific store.
- Select Settings & Privacy > Kitchen Routing Setup.
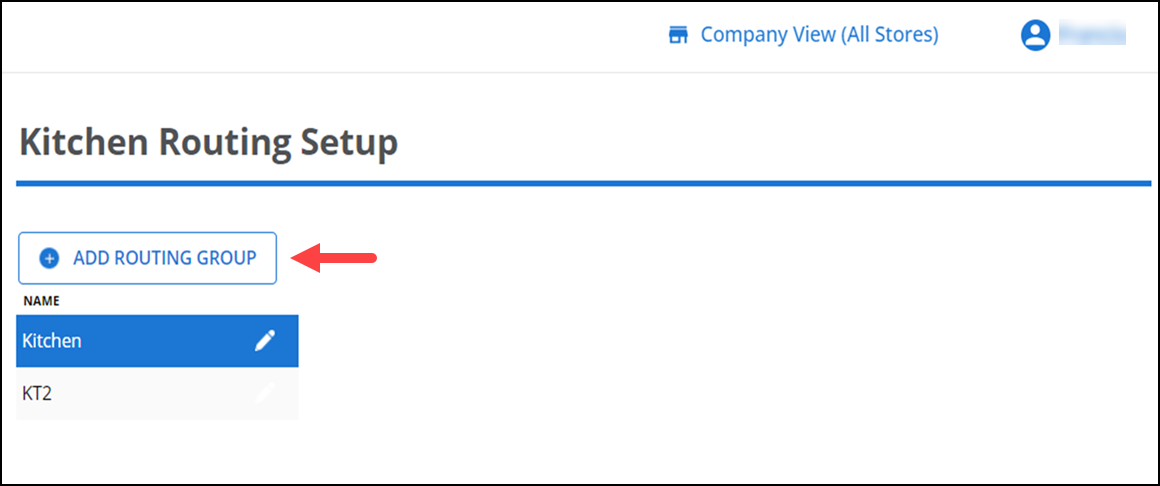
- Click ADD ROUTING GROUP.
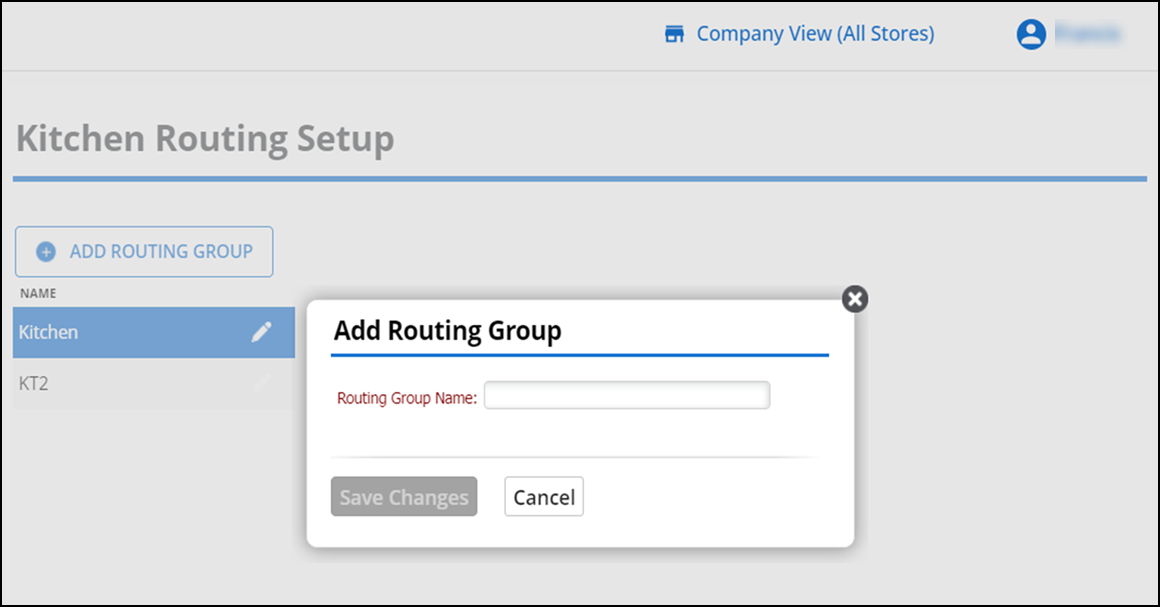
- Type a name for the routing group.
- Click Save Changes.
- Continue to the next procedure.
Adding a kitchen device
Kitchen devices such as kitchen display system (KDS) and printer integrates with your restaurant POS account to digitally display and print order details to your kitchen staff. The kitchen display system follows the kitchen routing, configured in Back Office so that kitchen staff know full details about the items to prepare. Pre-requisites to run the kitchen display system are as follows:
- Restaurant point of sale subscription.
- A subscription to the Kitchen Display System app.
- The Kitchen Display System app that comes pre-installed on your kitchen display device, or it is downloaded from the Apple App store or from the Google Play app market.
- Additional kitchen display system devices to run the Kitchen Display app.
- A connected in-store server.
- A stable, password protected wireless network with Internet access.
- Access to Back Office (for kitchen device setup).
To add kitchen devices (kitchen display system / printers):
-
Log in to Back Office using a specific store.
-
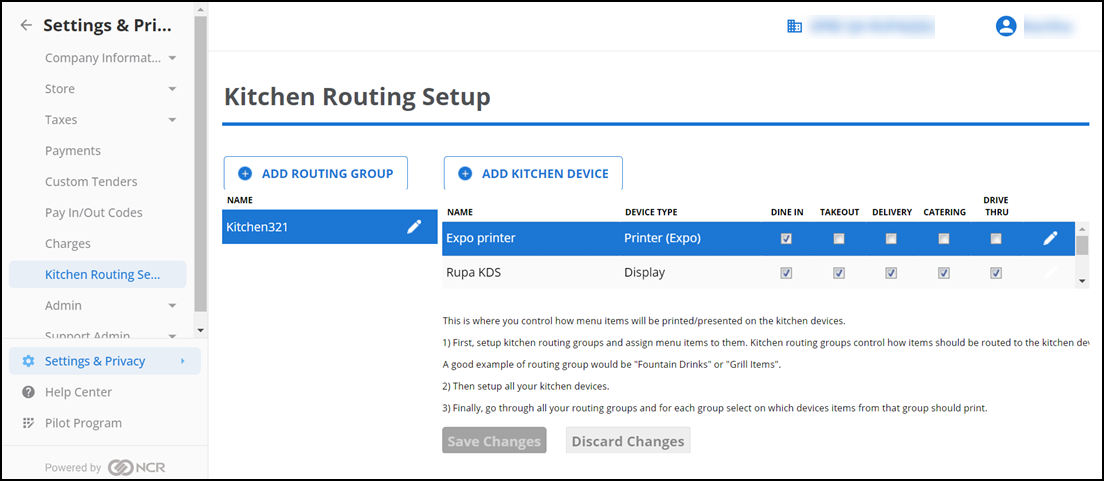
Select Settings & Privacy > Kitchen Routing Setup.
-
Select the desired kitchen group.
-
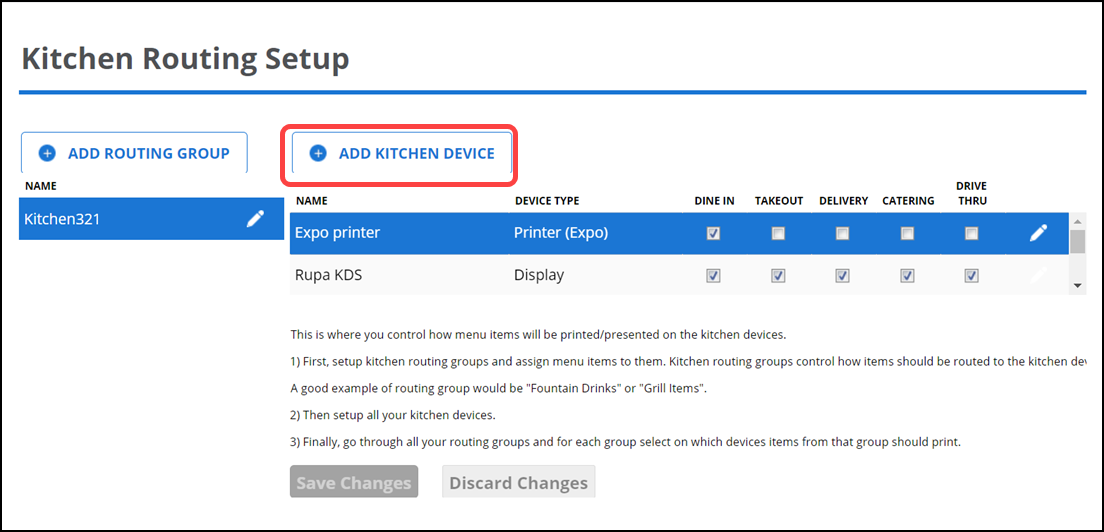
Click ADD KITCHEN DEVICE.
-
Type a name for the kitchen device. Give the device a distinct name to indicate the location of the station, such as Grill.
-
Select Expo Device to add a new expo device, or leave to default to add a new device as Printer/KDS.
-
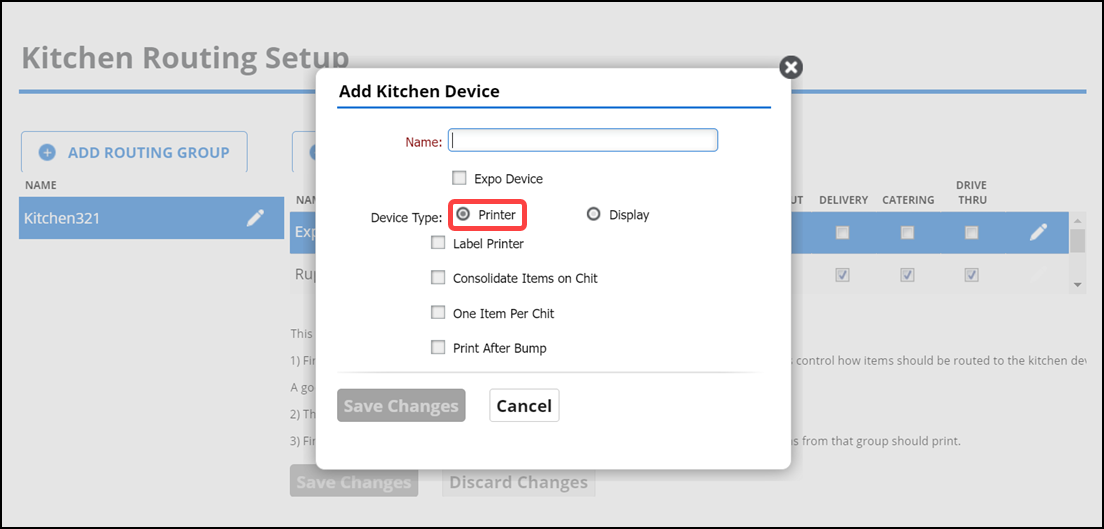
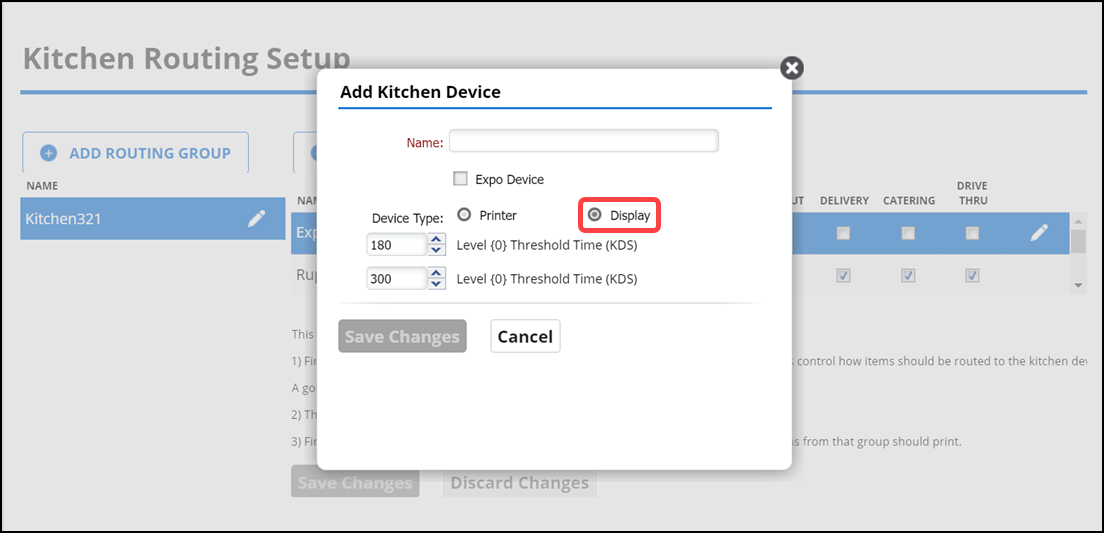
Select Printer or Display as the Device Type. If you choose Printer:
Select Label Printer, if applicable.
Select Consolidate Items on Chit to combine like items on a kitchen chit, if required.
For example, with consolidate on, the system prints:
(2) Cheesburger
NO LETTUCE
With consolidate off, the system prints:
Cheeseburger
NO LETTUCE
Cheeseburger
NO LETTUCE
Select One Item Per Chit, if required. This is to have only one menu item print on each kitchen chit.
Select Print After Bump, if required. This is to print the kitchen chit after the ticket/items are bumped from the KDS, instead of printing once sent to the kitchen. This helps in reducing kitchen chit overcrowding.
Note: For KDS, if you select 'Print After Bump,' the kitchen chit for voided items, voided tickets, and ADD-ONs does not print.
Note: The 'Print After Bump,' option is available only to customers with the kitchen display system (KDS) subscription.
-
If you choose Display, select Level 1 and Level 2 threshold time values.
-
Click Save Changes.
Note: You must set up menu items and categories before enabling any of these options.
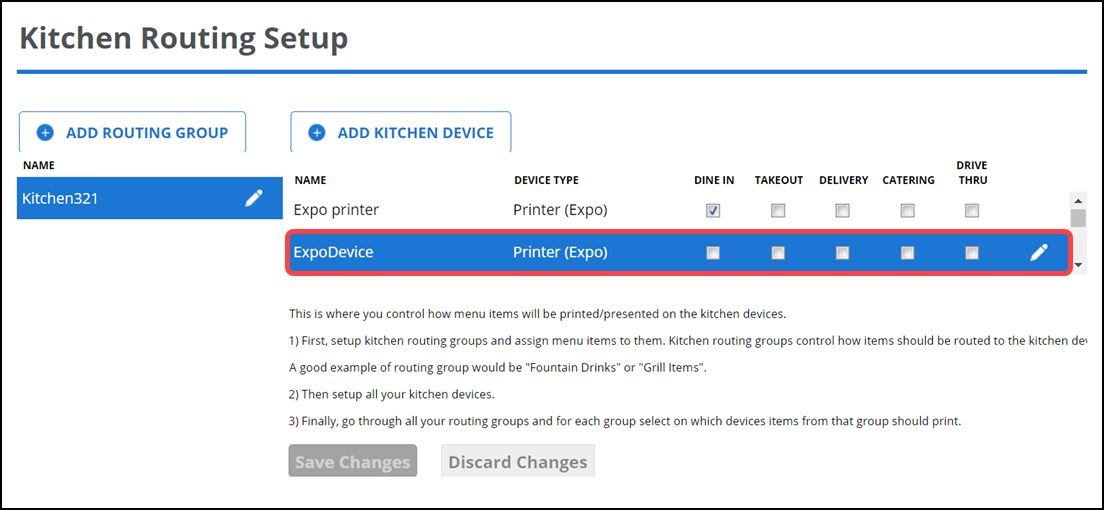
To associate a kitchen routing group with each device and order mode:
- Select a kitchen routing group from the list of routing groups on the left side of the screen.
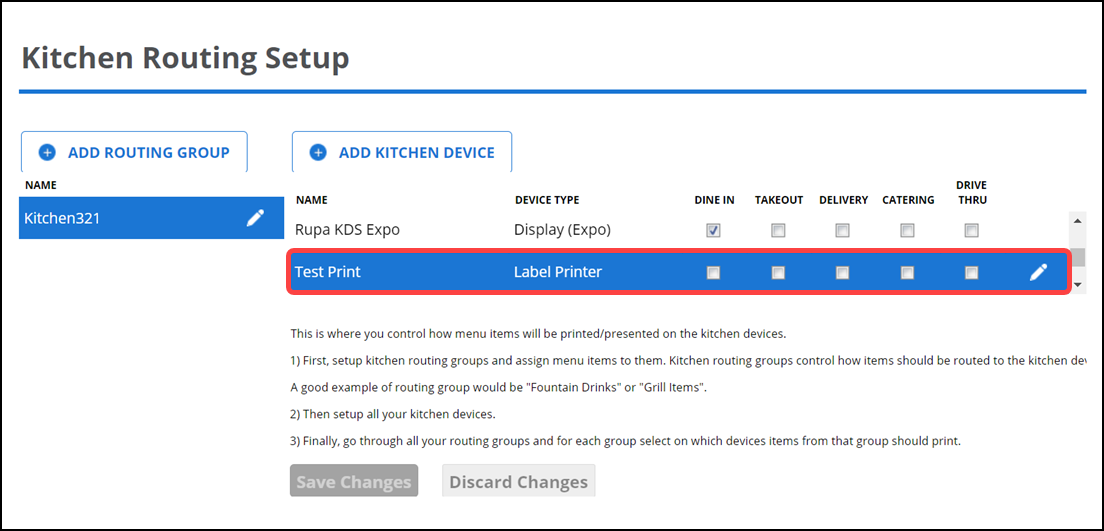
- For each device, select required order modes that route items to that device in that kitchen routing group.
- Click Save Changes.
- Exit Kitchen Routing.
Configuring kitchen expo station
An Expo Station is the place where the expeditor stands and from where he/she coordinates the kitchen staff and also keeps the communication with the staff servers who take the food from the kitchen to the tables. Users can configure one or more Kitchen Display Screens as a KDS Expo screen consolidating kitchen ticket items for restaurants improving order accuracy and speed of service. Users will also be able to choose which order modes to display on the Expo screen providing enhanced flexibility keeping the staff focused on the order types that matter for their station. You can configure expo station by logging in using a specific site or store.
Note: The Expo Station configuration will only work if there is at least one routing group configured under Kitchen Routing Setup.
To add kitchen expo station:
-
Log in to Back Office using a specific store.
-
Select Settings & Privacy > Kitchen Routing Setup.
-
Select the desired kitchen group.
-
Click ADD KITCHEN DEVICE. The Add Kitchen Device screen appears.
-
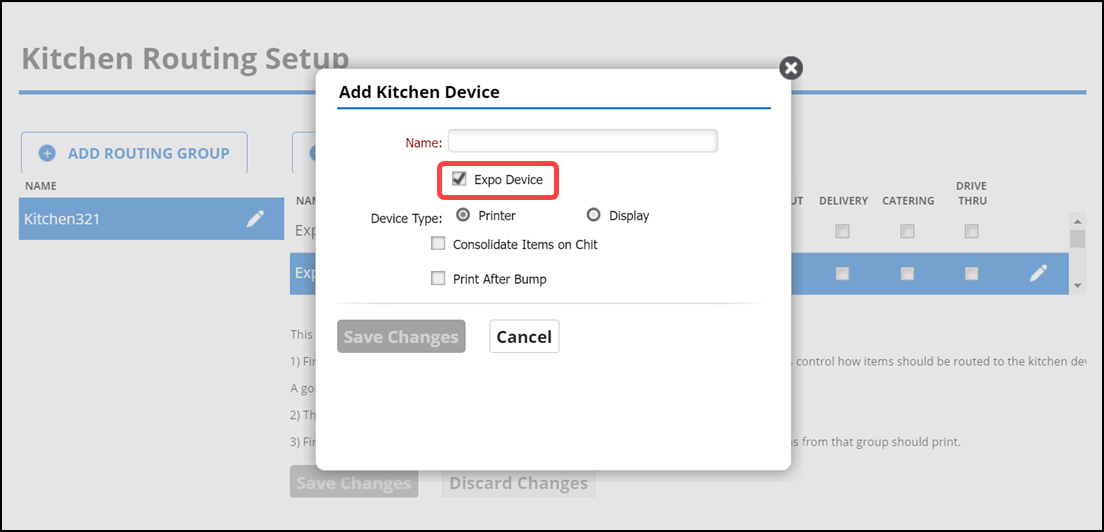
Select Expo Device to add the expo device to your store.
-
Type a name for the kitchen expo device. Give the device a distinct name to indicate the location of the station, such as Grill.
-
Select Printer or Display as the Device Type. If you choose Printer:
Select Label Printer, if applicable.
Select Consolidate Items on Chit to combine like items on a kitchen chit, if required.
Select One Item Per Chit, if required.
Select Print After Bump, if required. The Expo station only prints the kitchen chit once the entire order is bumped from the Expo. This helps in reducing kitchen chit overcrowding.
Note: For Expo, it prints the kitchen chit for void tickets, ADD-ONs, and more, regardless if 'Print After Bump is selected.
-
If you choose Display, select Level 1 and Level 2 threshold time values.
-
Click Save Changes.
-
Exit Expo Station.
To associate a kitchen expo device and order mode:
- Select a expo device from the list of devices on the left side of the screen.
- For each device, select required order modes that route items to that device.
- Click Save Changes.
- Exit Expo Station.