Working with discounts
Use Menu > Discounts to incentivize customers to come to your store and purchase more items. The system allows both item level and ticket level discounts. You can also promote your discounts in email marketing messages to your customers. Create discounts at the company level and they apply across all stores.
Adding a discount
You can set up item and ticket-level discounts. This allows employees to apply a single discount to each item and an overall discount to an entire sale in the POS app. With our system, your discounts will 'stack,' allowing both types of discounts to be applied to an item. Item-level discounts will always be applied first, followed by ticket-level discounts.
Note: You can only assign one item-level discount to an item, and you can only assign one ticket-level discount to a ticket. You can assign an item-level discount to item(s) and a ticket level discount to the same ticket.
-
Log in to Back Office using Company View (All Stores). Select a specific site to create discounts at the store level.
-
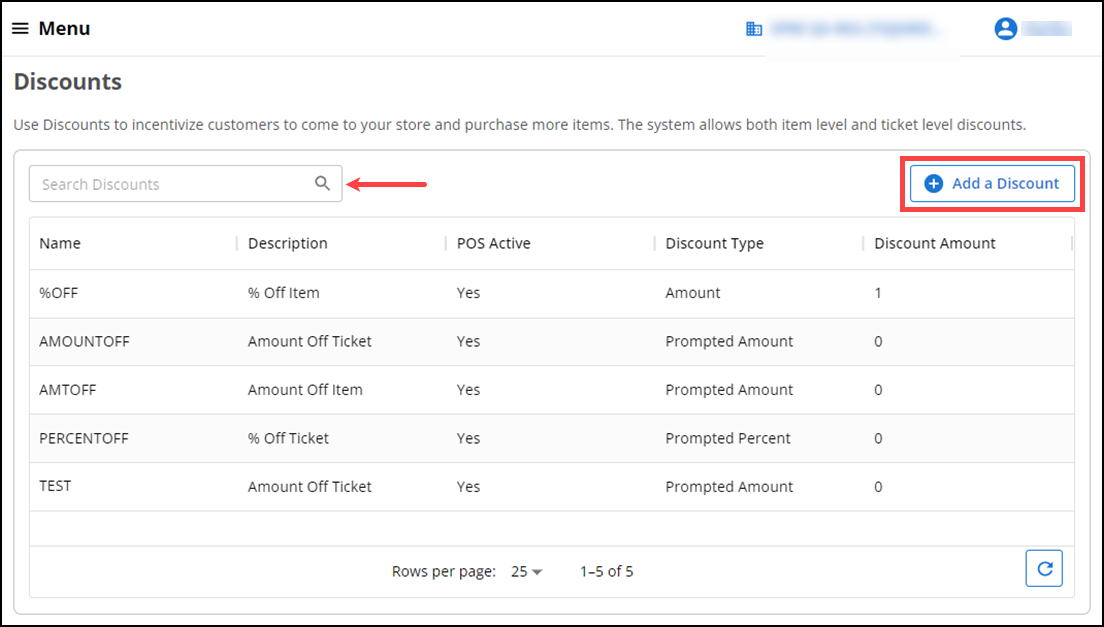
Select Menu > Discounts. The Discounts screen appears.
-
Click Add a Discount. The Discount Detail screen appears.
-
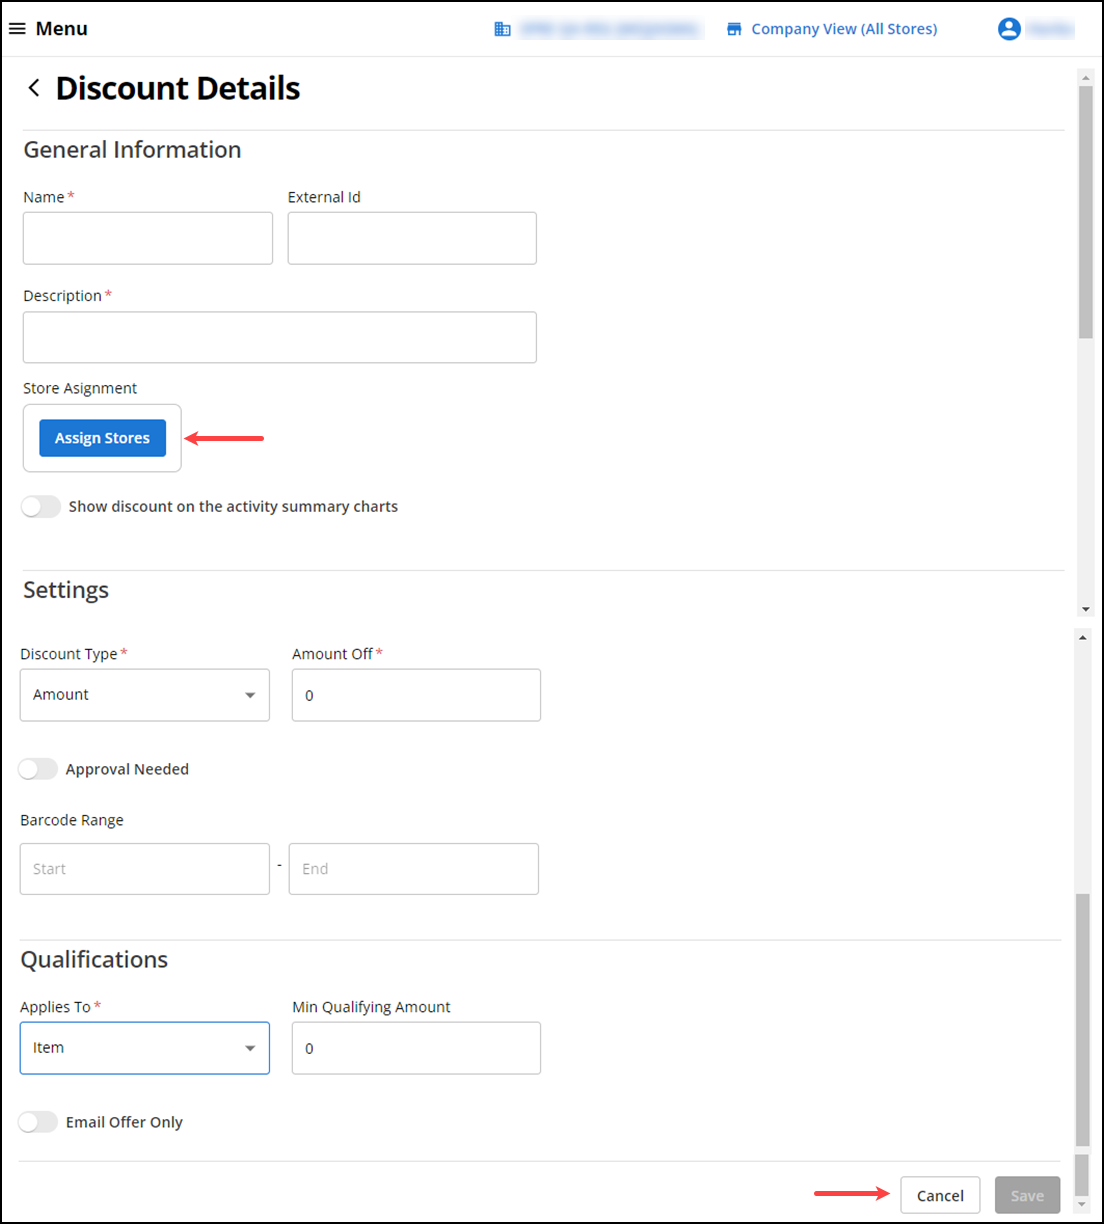
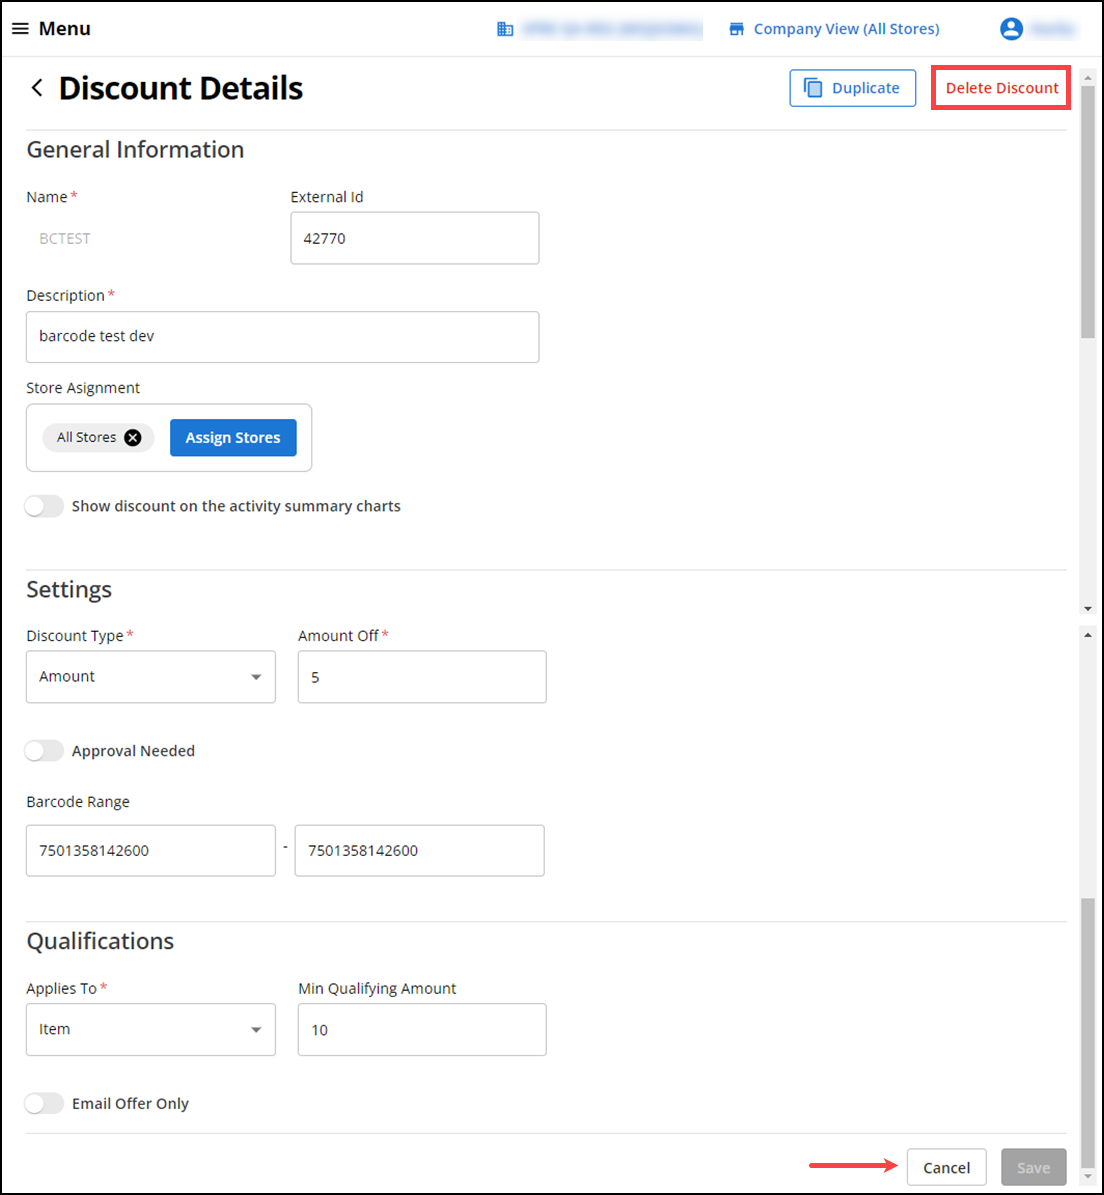
Under the General Information group bar:
- Type a name for the discount. For discounts you plan to include in bar codes as part of email marketing, the name should not contain any spaces.
- (Optional) Type an external ID (optional) for the discount. If you leave this blank, the system automatically assigns an external ID to the discount when you save the record.
- Type a description for the discount.
- (Optional) Click Assign Stores (for multi-store environment) and select Assigned next to each store for which to make the discount available. Select POS Active to indicate the discount is active on the POS device at the store. You can also select either or both of these options for All Stores.
- (Optional) Clear Show the discount on Activity Summary charts to not have the discount calculated as part of the totals on the Activity Summary page. For example, you may not want to have Employee Discounts appear as part of the Discounts and Promotions calculation on the Activity Summary page to give you a more accurate reflection of the effectiveness of your discounts and promotions.
-
Under the Settings group bar:
-
Select the Discount Type from the drop-down list. Your choices are:
Amount — Allows you to enter a fixed dollar discount amount.
Percent — Allows you to enter a fixed discount percentage.
Prompted Amount — Allows you to change the discounted amount during a sale.
Prompted Percent — Allows you to change the discount percentage during a sale.
Set Item Price — Allows you to enter a discount price to apply to an item. For example, if you sell many types of beers with different prices, you can create a special item price such as 'All Bottled Beer, $3.00 All Day Tuesday.'
-
Based on the 'Discount Type' selection, type the Amount or Percentage for the discount.
-
(Optional) Select Approval Needed for a manager to authorize the discount on the POS.
-
(Optional) Type the starting and ending barcode range for the discount. Apply the following rules to the barcode range: The barcode range must involve at least 1 alphanumeric character and not more than 20 characters.
The length of the start and end of the barcode strings must be the same.
The barcode end range must be the same or greater than the barcode start range.
The barcode ranges do not need to be unique across promotions.
-
-
Under the Qualification group bar:
-
Applies To — Select either Item, Ticket, or Gift Card to specify the level at which to apply the discount.
-
Min Qualifying Amount — Type the Minimum Item Price required, Minimum Sale Amount or Minimum Amount to apply the discount to Item, Ticket or Gift Card respectively.
-OR-
Leave the amount as $0.00, if a minimum item price, sale amount or minimum amount is not required to apply the discount.
-
Select Email Offer Only to use the discount in your email marketing feature.
-
-
Click Save.
Duplicating a discount
You can quickly duplicate existing discounts at a company or store level.
- Select Menu > Discounts. The Discounts screen appears.
- Select the discount to duplicate. The Discount Detail screen appears with a Duplicate button in the top right corner.
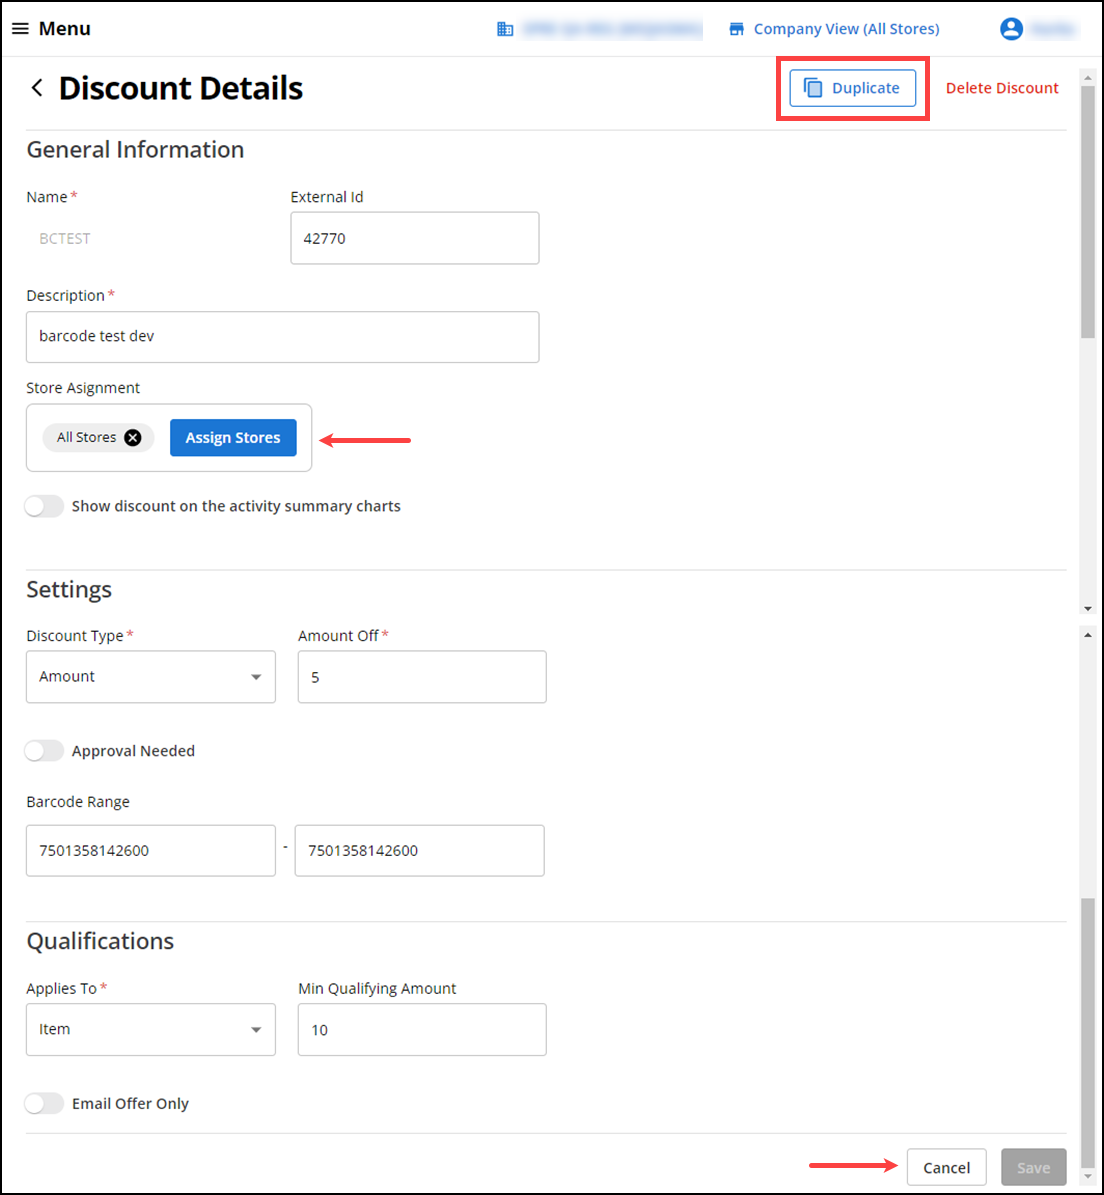
- Click Duplicate. A newly created discount record appears with everything pre-populated except for Discount Name and External ID.
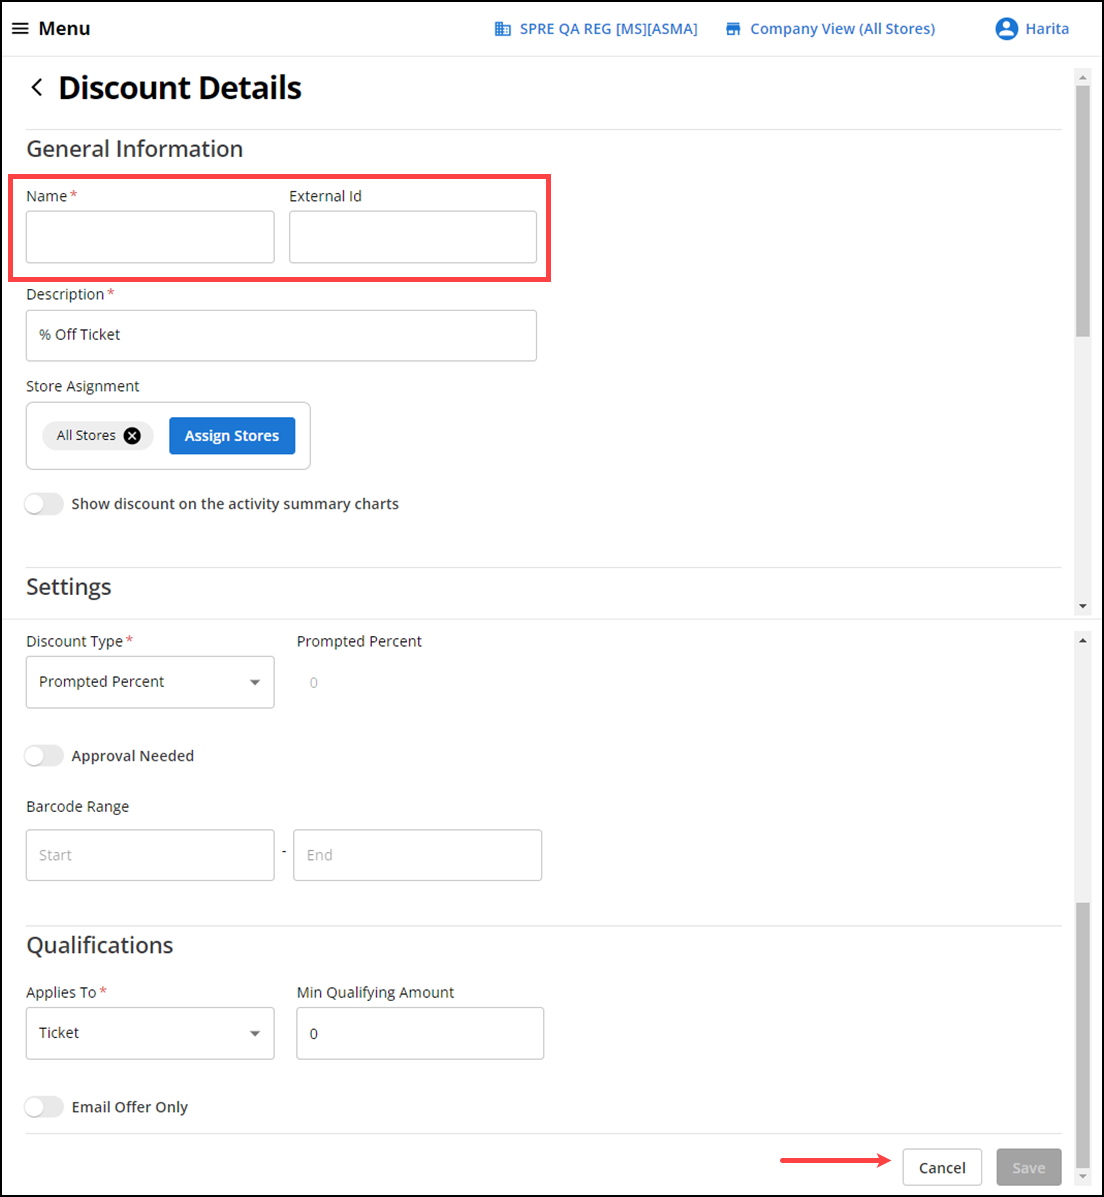
- Enter the details for the discount.
- Click Save.
Editing or deleting a discount
You can edit an existing discount or remove a discount which you no longer want to maintain.
- Log in to Back Office using Company View (All Stores).
- Select Menu > Discounts. The Discounts screen appears.
- Select the discount in the list. The Discount Detail screen appears.
- Do one of the following:
-
To remove the discount, select Delete Discount and confirm the removal. If the selected discount is tied to a marketing email, the system lets you know, so you can determine if you still want to remove the discount.
-OR-
-
Edit the details for the discount and click Save.
Note: Removing a discount is a "soft delete", meaning that while the discount is removed from your view, all data and activity associated with that discount still appears in reports, transactions, etc.
-
View video
Please allow time for the "Creating Discounts in Aloha Cloud" video to load.