Creating items
Use Menu > Categories & Items to create new individual items, or a list of imported items, for your store or for a specific store in a multi-store environment. You can add items to an existing category or to a new category. Items you create can also include modifiers and variations. Items you add are included on the POS.
To create items:
-
Log in to Back Office using Company View (All Stores).
-
Select Menu > Categories & Items.

-
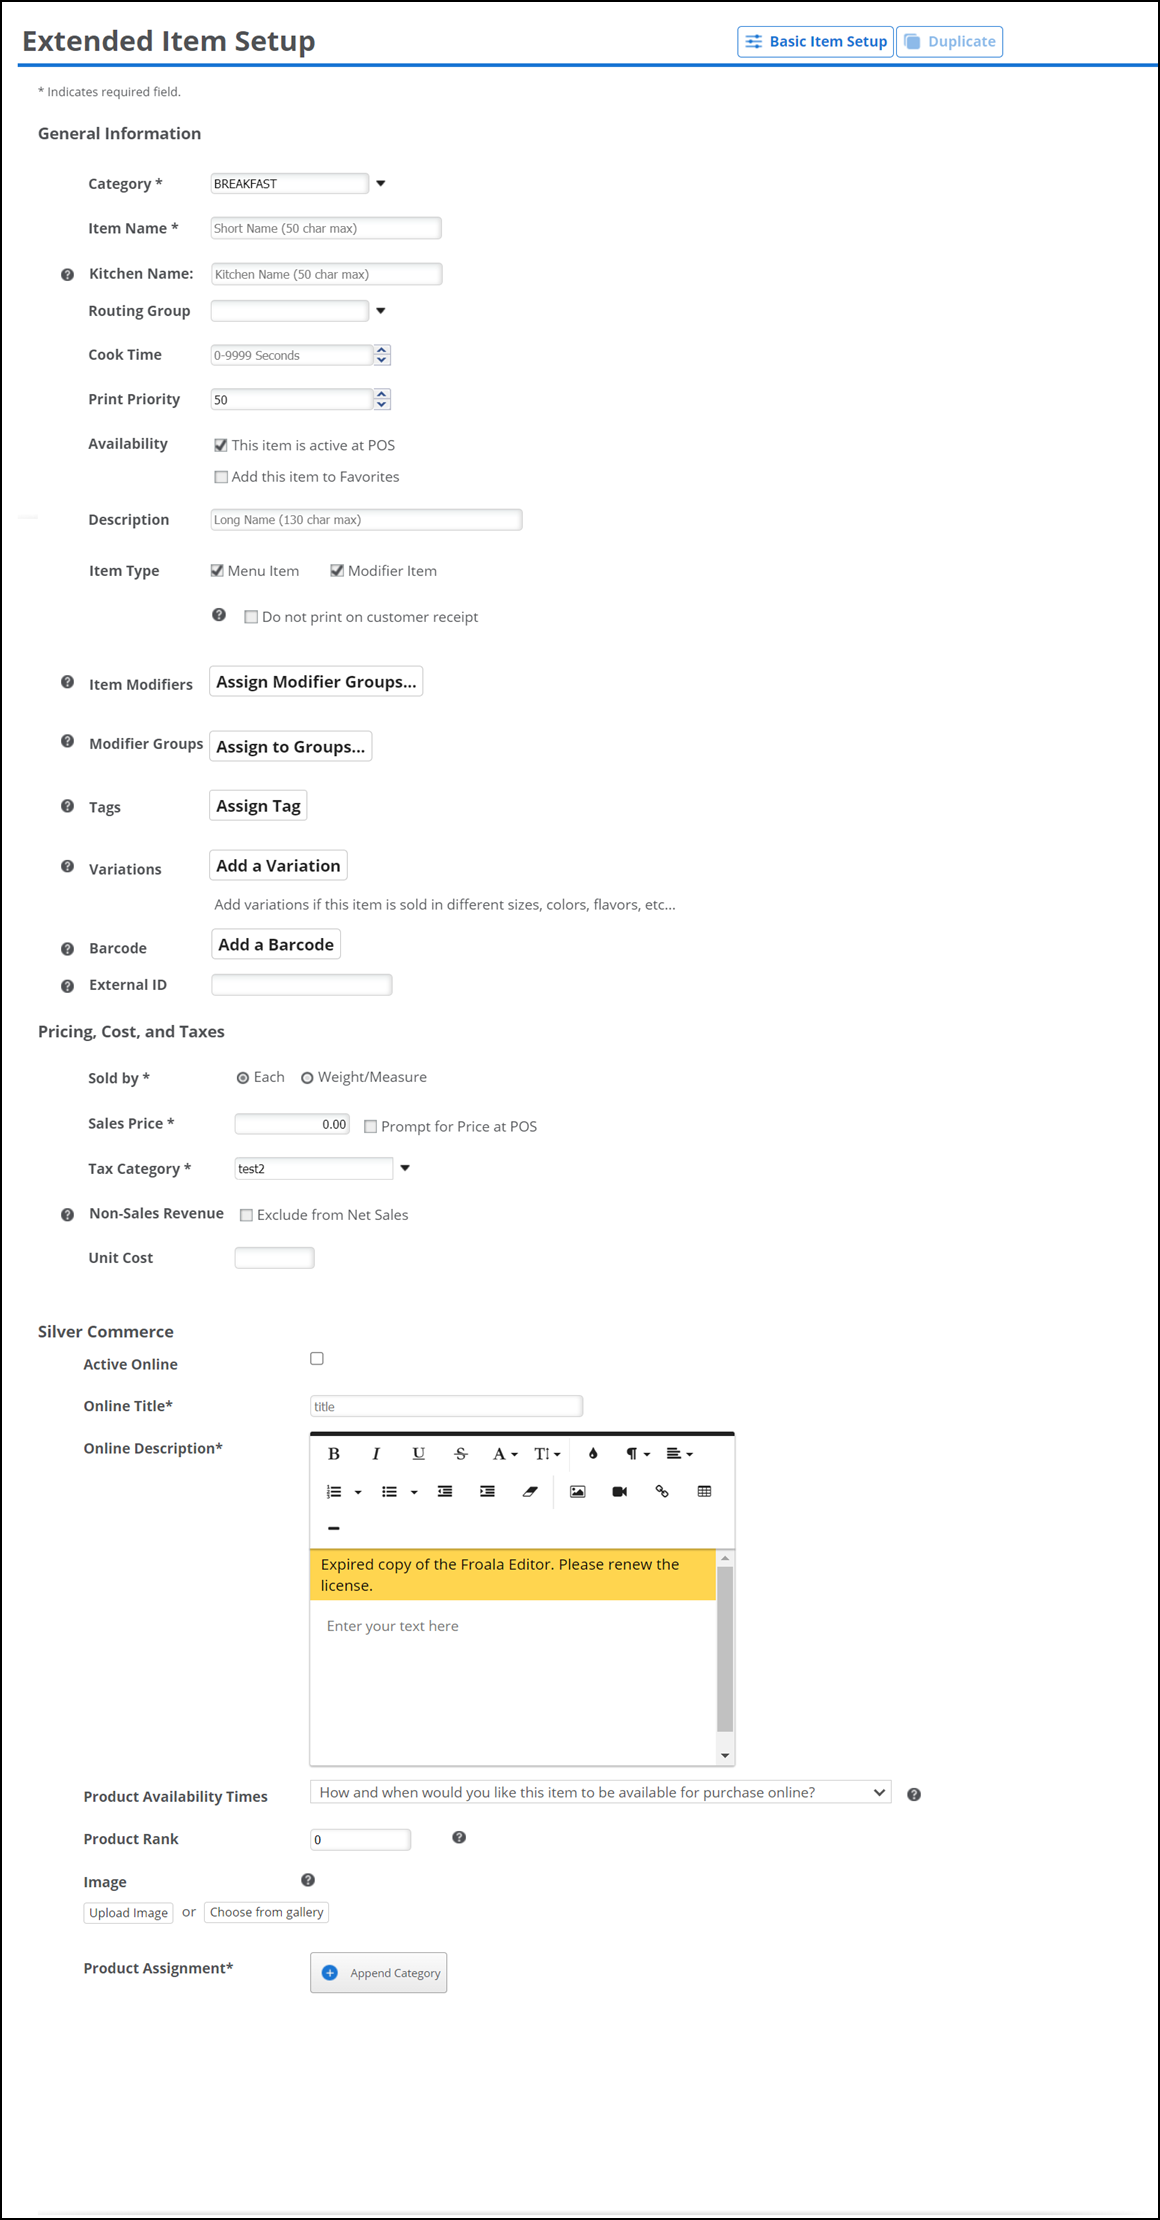
Click Add Item. The Extended Item Setup screen appears. This screen allows you to add variations and modifiers to an item.
-
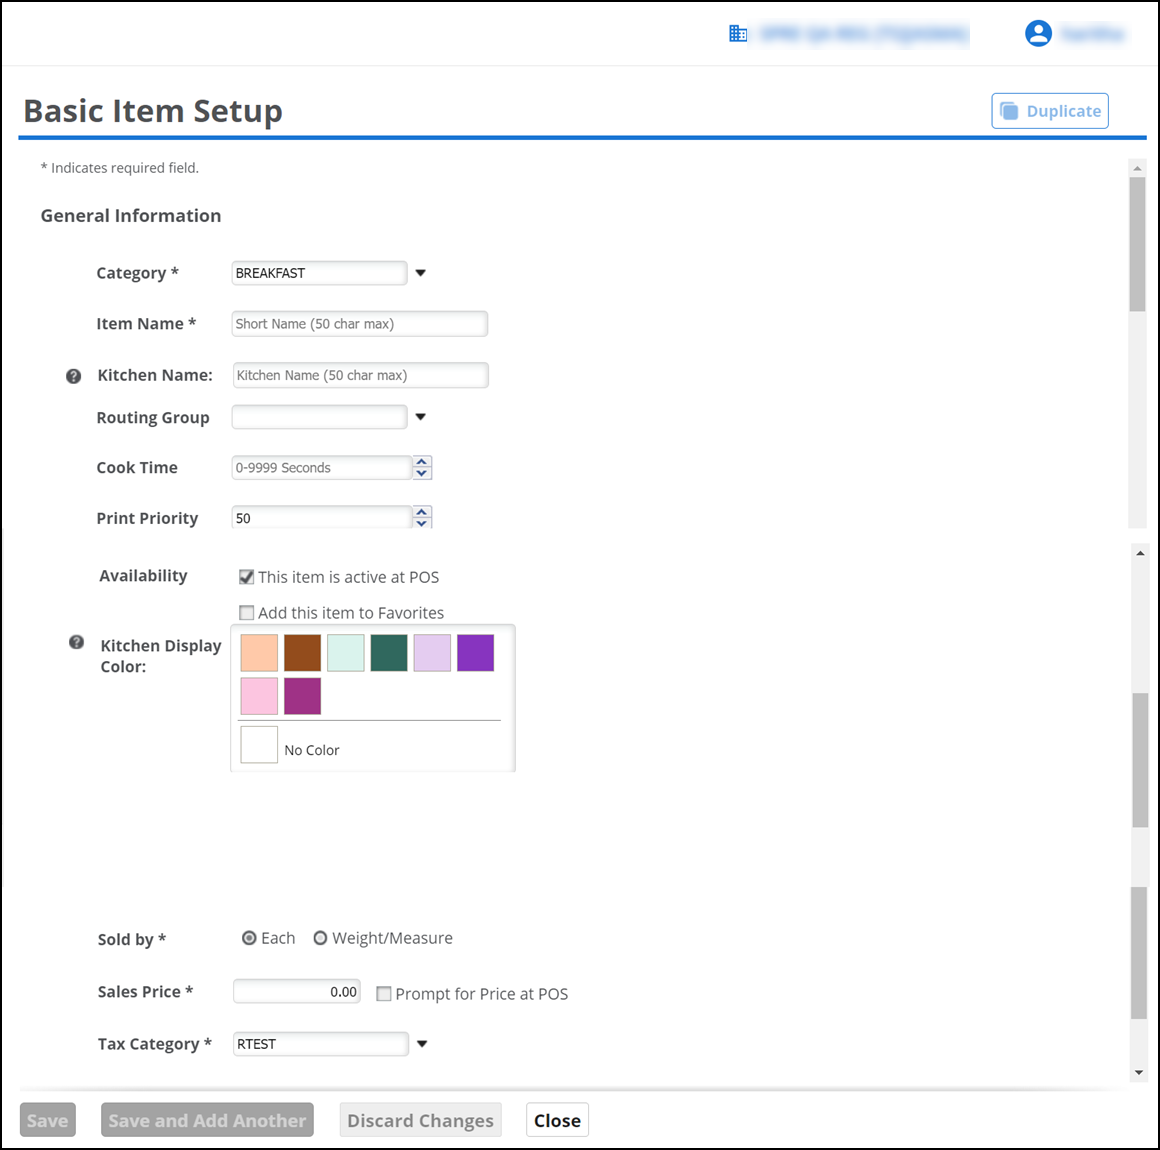
If variations and modifers are not required for this item, click Basic Item Setup to use the Basic Item Setup screen.
If you need to add variations or modifiers, click Extended Item Setup at the bottom of the screen to toggle back to the Extended Item Setup screen.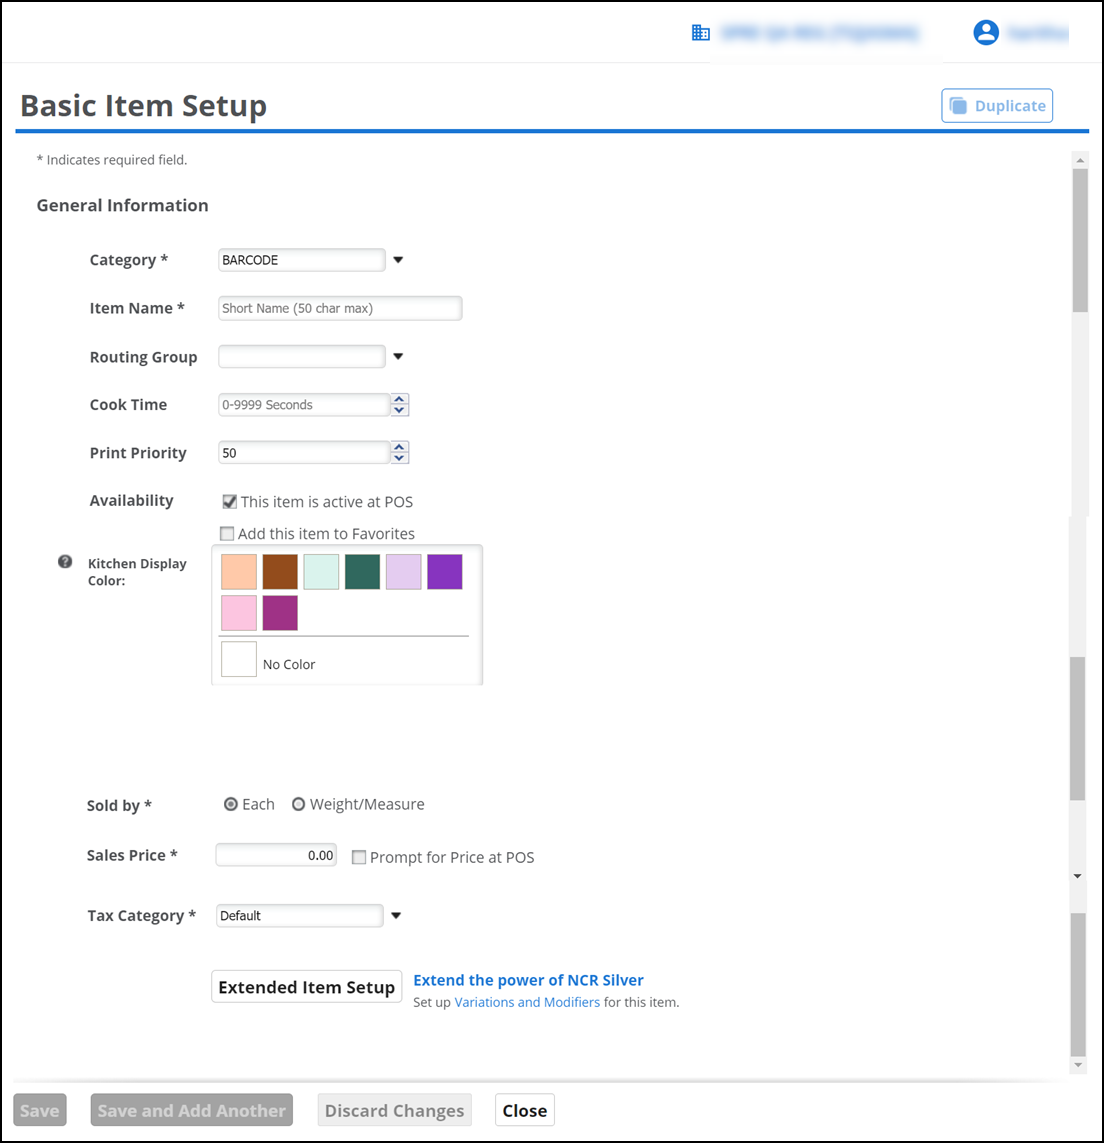
-
Select a Category from the drop-down list, or select << Add New >> at the top of the drop-down list, to create a new category.
-
Type a name for the item in the Add a Category dialog box and click Save Changes. The maximum number of characters allowed is 50. The item name appears on the POS app on the order entry screen.
-
Type a Kitchen Name for the item. The kitchen name is sent to the KDS (Kitchen Display System) and kitchen printer replacing the item name. The kitchen name is open character, meaning it is not limited to the English language, and the maximum number of characters allowed is 50.
-
Select a routing group from the drop-down list.
-
Enter item Cook Time value in seconds. The maximum cook time allowed for an item is 9999 seconds.
-
Assign a print priority number to the item. Print priority enables the system to sort items and modifiers on the kitchen chit based on their print priority rather than the order in which you enter them.
- '1' is the highest priority and '100' is the lowest priority.
- If two items contain the same print priority, they appear on the kitchen chit in the order entered on the POS.
- The system sorts the modifiers under the associated parent item.
- In Table Service, the system sorts the items on the kitchen chit first by seat and then by print priority.
-
(Multi-Store only) Click Assign Stores to select the stores for which to make the item available and click Done. On the item screen, the system identifies the stores to which you assigned the item. If the item is available to all stores, select All Stores.
-
(Optional) Type a description. The maximum number of characters allowed is 130.
-
Select Menu Item or Modifier Item. Select both options if the item serves both purposes.
- Select Menu Item to assign modifier groups to the item. Click Assign Modifier Groups, choose the appropriate groups, and click Done.
- Select Modifier Item to assign the item to one or more groups. Click Assign to Group, make the appropriate selections, and click Done.
- Select Do not print on customer receipt to print modifiers on the kitchen chit only and suppress the modifiers on the customer receipt. This is enabled for modifiers with $0 price only.
-
(Optional) Select Kitchen Display Color to add/assign color codes to items, categories, modifiers, and modifier groups. The assigned color code appears on the kitchen display system (KDS).
-
(Optional) Click Add Image to upload and assign an image to an item. The image preview appears, once the upload is successful.
Tip: The supported file formats are JPG, PNG, and JPEG. The recommended aspect ratio is 16:9 and the file size should not be more than 5 MB.
-
(Optional) Click Assign Tag to assign a tag to the item.
-
Click Add a Variation, to add a variation, such as size, color, or flavor. Each item can have up to three variations.
-
(Optional) Click Add a Barcode to associate multiple barcodes with the item, or click Edit Barcodes to edit the barcodes already associated with the item. You can associate a maximum of four barcodes with an item.
-
(Optional) Assign an External ID to the item. It is not necessary to enter an External ID number.
- If you leave External ID blank, the system populates the External ID with a system-assigned Master Item ID when you save the item record.
- If you enter a number for the External ID, the External ID number for the item will be different than the Master Item ID number.
-
Select the method by which to sell the item, either Each or Weight, next to 'Sold by.'
-
Enter a Sales Price for the item. Select the check box Prompt for Price at POS to prompt for the item price at the point-of-sale.
-
(Optional) If you are using the count by item guest counting method, enter the Guest Count for this item.
-
Select a Tax Category from the drop-down list.
-
(Optional) If the item is sold at the POS but should not be included in the Net Sales calculation, select Exclude from Net Sales.
-
(Optional) Add the Unit Cost for calculating cost and margin.
-
Click Save. The item gets assigned to the selected category.
Note: If the next item you are creating is similar to the one just created, click Duplicate in the top right corner to create a new record, then make the changes necessary for the new item, such as item name.
Editing multiple items/batch update
This feature allows you to select a group of items and do the updates to them at once without open each individual item record. Item attributes which can be changed using this feature are price, category, tax category, printer group, vendor, and availability at POS. This feature can also be used to delete multiple items at one time.
To edit multiple items:
-
Log in to Back Office using Company View (All Stores).
-
Select Menu > Categories & Items.
-
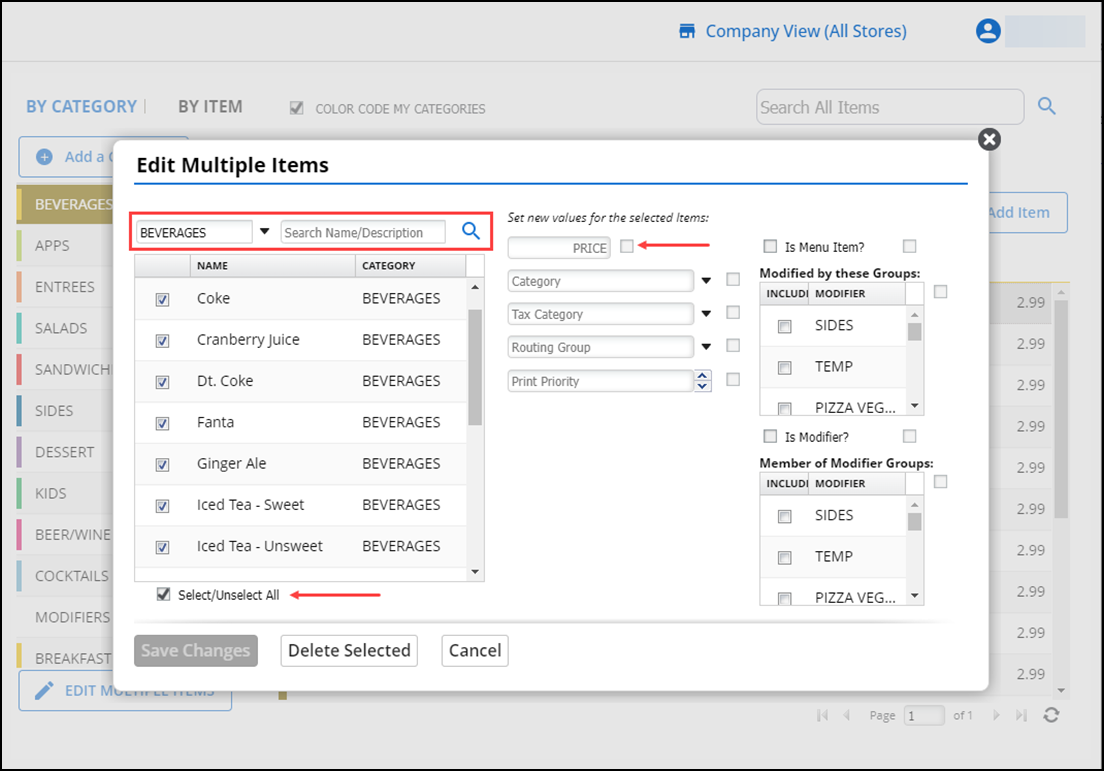
Under your category list, click EDIT MULTIPLE ITEMS. The Edit Multiple Items screen appears.
-
Click Search Category and select a specific category from the drop-down list, or type a text string in Search Name/Description and click the search icon to the right to locate the items to update.
-
Select the check box next to each item to change or select Select/Unselect All to easily select or clear every item appearing in the list.
-
Select the new values for the selected items from the options on the right.
-
Click Save Changes.
-
On the confirmation message, press OK to save or Cancel to go back and make additional changes.
Warning: Using this feature to update the prices for items priced by variation will result in all variation prices being updated to the entered price.
Importing items
Using Back Office you can manually create categories, items, and modifiers, however, you can import your menu from a .csv file. Prior to importing a file, it is necessary to create tax categories and select one as your default.
To import the items:
-
Log in to Back Office using Company View (All Stores).
-
Select Menu > Categories & Items.
-
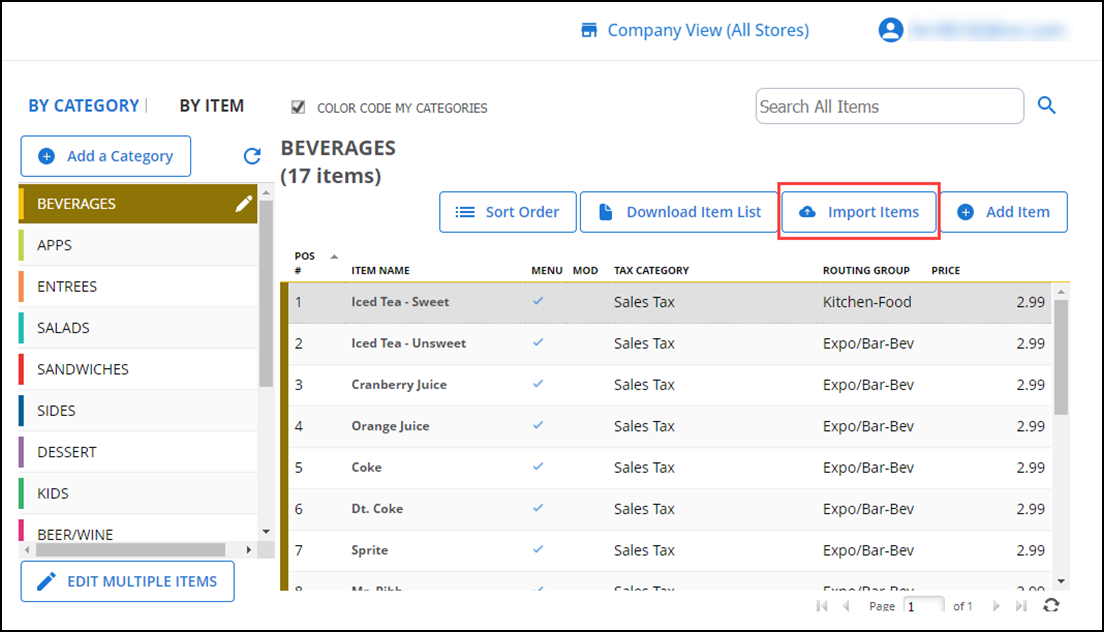
Click Import Items. The Import Items screen appears.
-
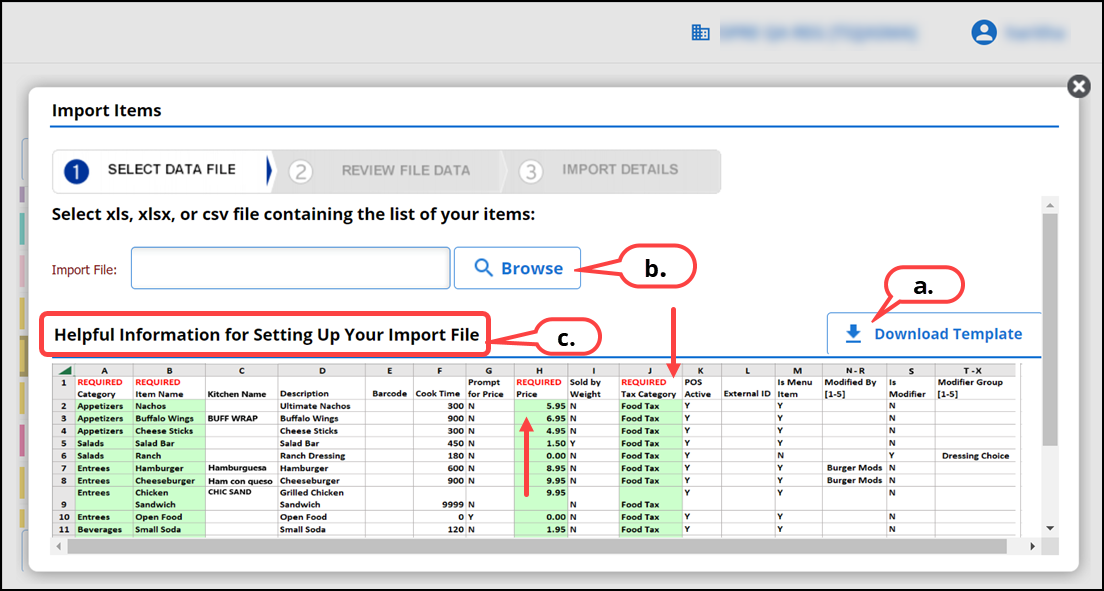
Perform the following on the Import Items screen:
- Click Download Template to download the template in .csv format to import the items in bulk.
- View the sample information for setting up import file.
- Verify the mandatory fields, (marked in red) while providing the information for items in the .csv file.
-
Click Browse to choose a file for items import.

Note: Though Back Office allows for unlimited modifier options, the import function only allows for five. You can add and check the sample information for setting up import file.

-
Click Review Item List. Back Office checks for import errors. The file processing window appears and navigates to the REVIEW FILE DATA tab.
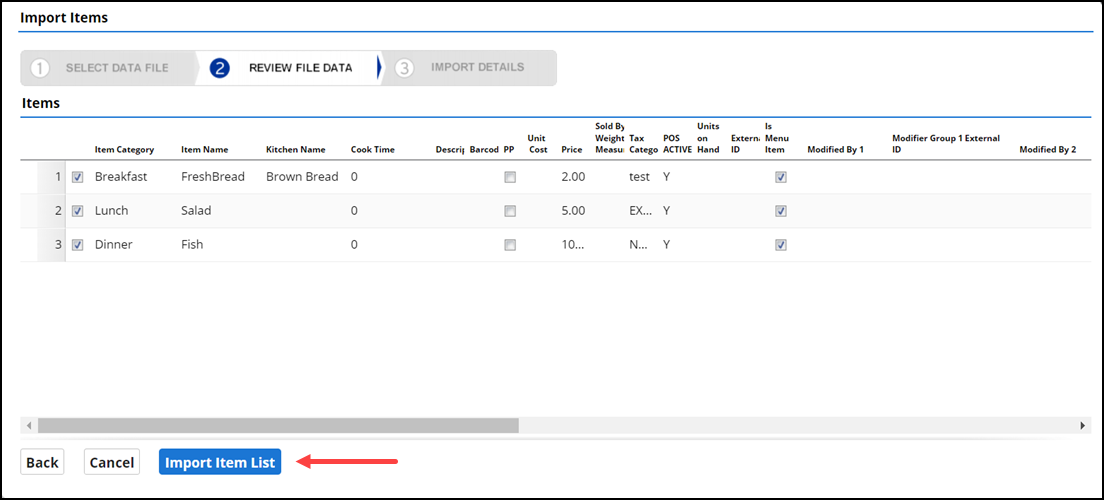
Note: Back Office places a red caution icon next to each row with an error. Click the icon to reveal the error. Other than tax category errors, you can either correct the error on the screen, or cancel the import, correct the error in the .csv file, and re-import the file.
-
Choose the required items for import form the displayed list. If required, modify the list.
-
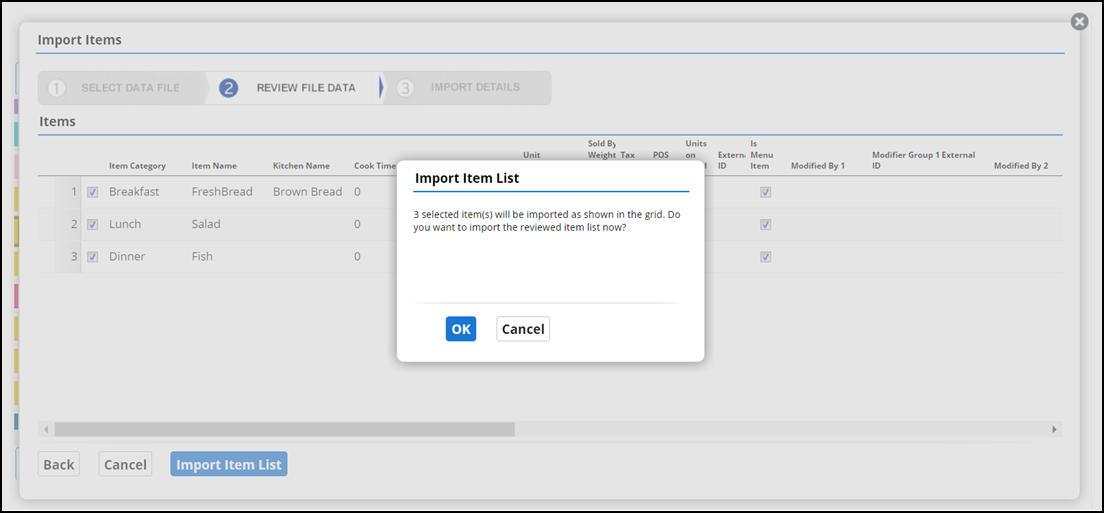
Click Import Item list. A confirmation window appears.
-
Click OK.
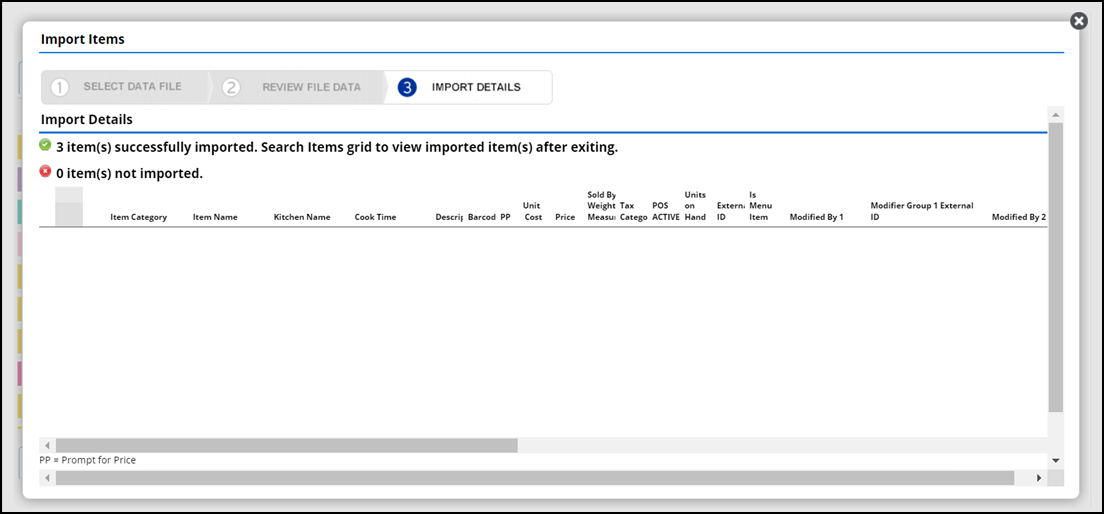
-
Click Re-Import Items.
-OR-
Click Exit to return to the Categories and Items screen.
View video
Please allow time for the "Adding a New Menu Item in Aloha Cloud" video to load.