Working with items
Some menu items include option modifiers, such as mustard or mayonnaise. Other items contain variables or forced modifiers that require you to make additional selections. You can also add notes, such as 'Rush!' to an ordered item.
This document discusses the following:
- Working with modifiers
- Working with variations.
- Holding and releasing an item
- Applying discount to an item
- Changing item price
- Repeating an item
- Clearing an item
- Voiding an item
- Grouping and ungrouping an item
- Changing the quantity of an item.
- Selling items by weight using a scale.
- Linking barcode to an item.
Working with modifiers
Modifiers exist to allow a server or cashier to provide specific instructions for how to prepare an item. This includes special requests, such as 'Lite Mustard' and 'No Mayo,' a requirement such as meat temperature, 'Steak - Medium Rare,' or an option on a side, such as 'Salad - Ranch Dressing.' Modifiers also allow you to charge extra for additional ingredients, such as 'Add Bacon.' Modifier groups enable you to easily locate modifier items on the Point-of-Sale (POS).
Using modifier descriptors
Aloha Cloud allows you to use pre-defined modifier descriptors (such as No, Add, Lite, and On Side.) to provide additional kitchen instructions to modifier selections.
-
Log in to the POS.
-
With the guest check active, tap an item to add it to the guest check.
-
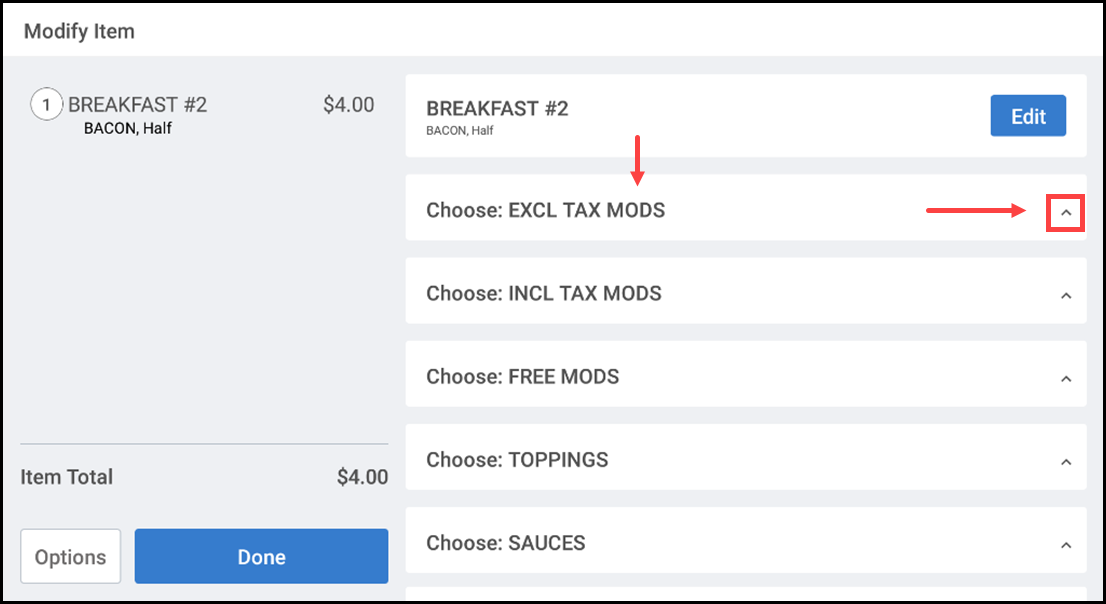
Tap the item in the guest check. The Modify Item screen appears. By default, the required modifier groups appear at the top during modifier selection and auto-collapse after the selection. Also, the optional modifier groups appear in collapsed view.
-
Expand the modifier group and make the optional modifier selections, if any.
-
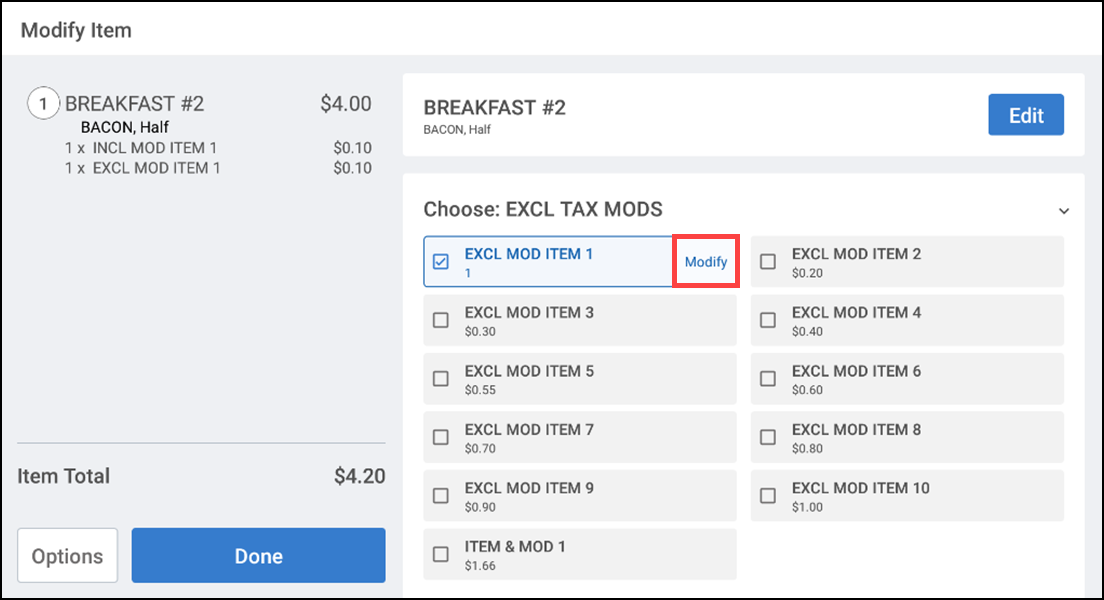
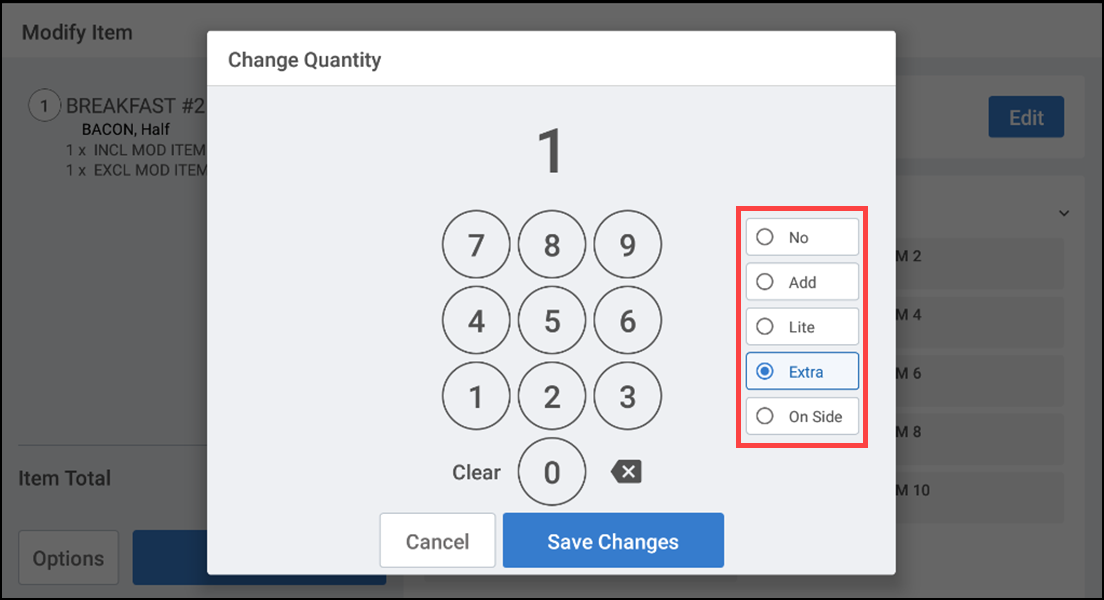
Tap Modify to change the quantity. The Change Quantity screen appears.
-
Tap No, Add, Lite, Extra, or On Side buttons and then make the customer selections.
Note: When you select 'No,' the keyboard to modify the quantity is disabled and the quantity is set to '1.' 'No' appears in red and bold within the item summary panel on the left.
-
Tap Save Changes.
Working with forced modifiers
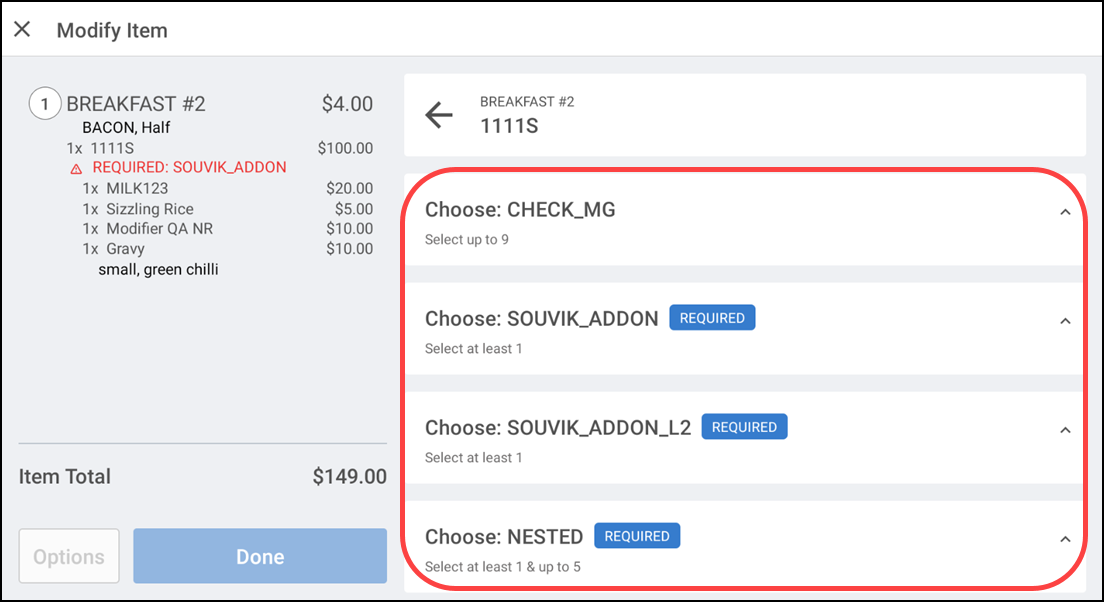
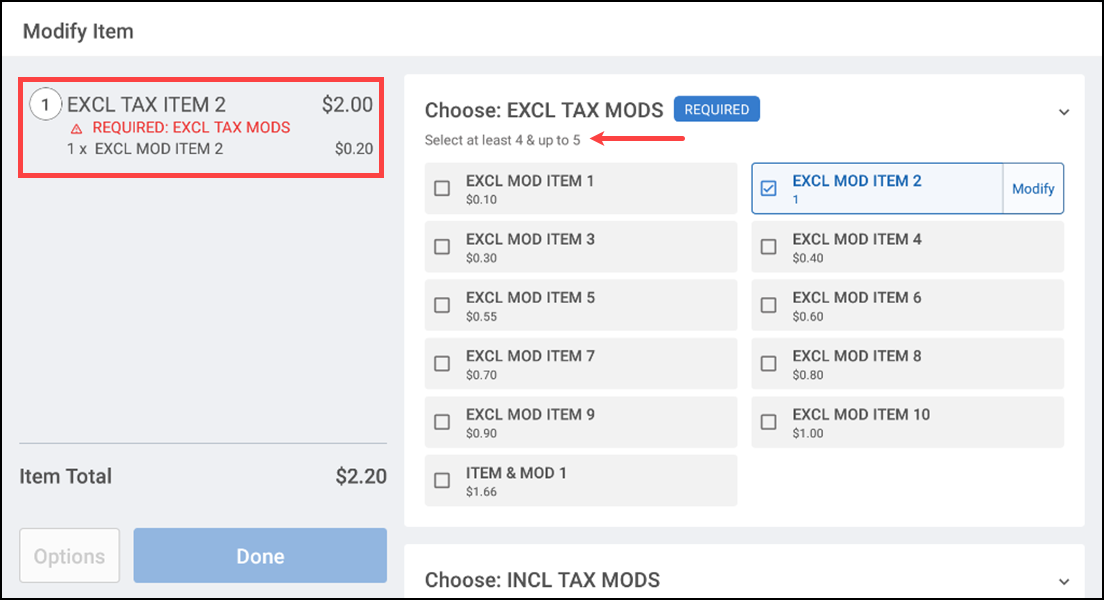
When you select an item with at least one forced modifier, the system defaults to the entry of the forced modifiers. You cannot leave the order until you select all outstanding forced modifiers. Items for which you must select a modifier, appears with a red badge; upon the successful selection of a modifier, a green badge appears. And for the optional modifiers, a badge does not appears.
-
Log in to the POS.
-
With the guest check active, tap an item to add it to the guest check. If forced modifiers exist for the item, the ' Modify Item' screen appears.
-
Make the forced modifier selections.
Some items contain default forced modifiers, such as ' Fries,' or ' Medium.' To change the default modifier, tap the modifier and then tap Delete. When you remove a default forced modifier, a red badge appears next to the forced modifier group of the item, and it is necessary to make another selection.
-
Make the optional modifier selections, if any. Tap the No, Add, Lite, Extra, or On Side buttons and then make the customer selections.
-
Tap Done.
Working with nested modifiers
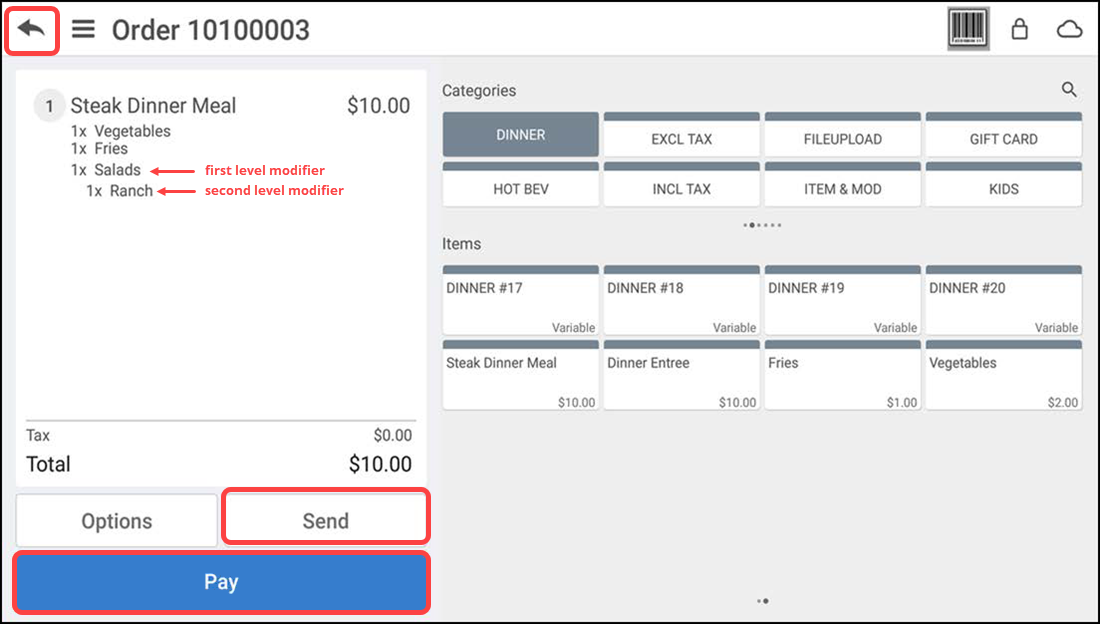
Nested modifiers allow you to modify menu items in the POS with up to two levels of modifiers. The first level modifies the item. The second level modifies the first level modifier.
Reference: Before you can apply nested modifiers to an item in the POS, you need to enable the feature in Back Office. Enabling the nested modifiers feature has no impact on your ability to configure nested modifiers in Back Office; however, if you do not enable the feature, you are unable to apply nested modifiers to an item in the POS. For more information, refer to "Nested Modifiers."
For example:
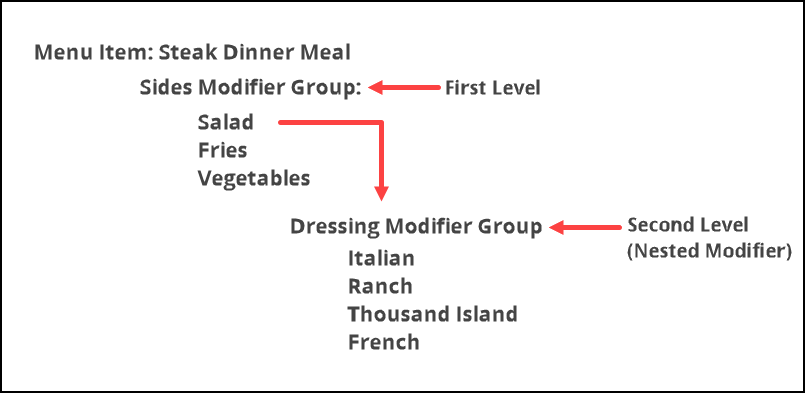
For the Steak Dinner Meal (menu item), once you select Salads (first level modifier group - SIDES), it directs you to choose a dressing modifier (second level modifier group - DRESSINGS).
-
Log in to the POS.
-
Tap Point-of-Sale and start a new order as normal.
-
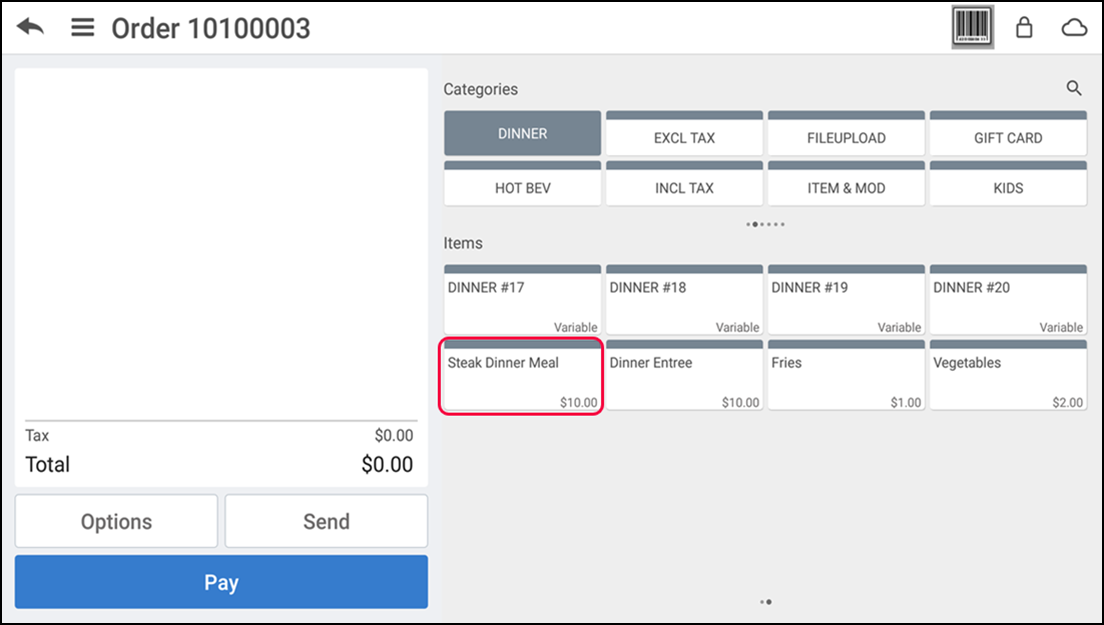
Select the category under which the Steak Dinner Meal menu item exists -OR- use the Search feature to locate the Steak Dinner Meal.
-
Tap the Steak Dinner Meal item to add it to the guest check. The Modify Item screen appears with the SIDES modifier items already added to the check. These items appear in blue to indicate they are already added; however, you can click Modify to change the quantity of each, up to a maximum of three. The DRESSINGS modifier group for the Salads item indicates it is still a required entry.
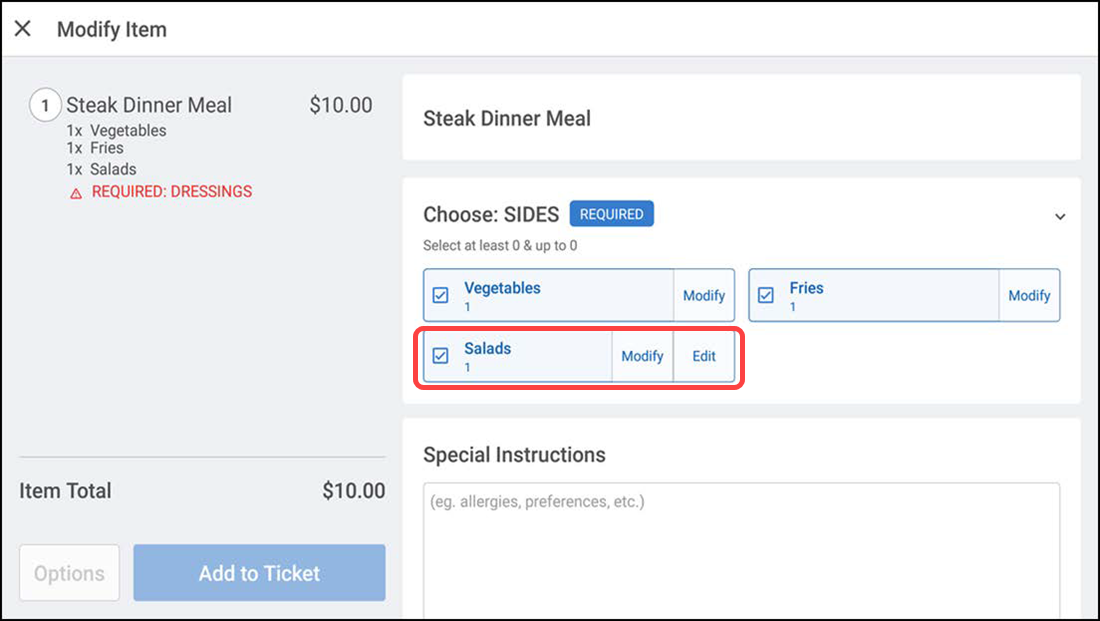
Note: The Edit button on a modifier selection indicates the modifier has second level modifiers you can apply to the item.
-
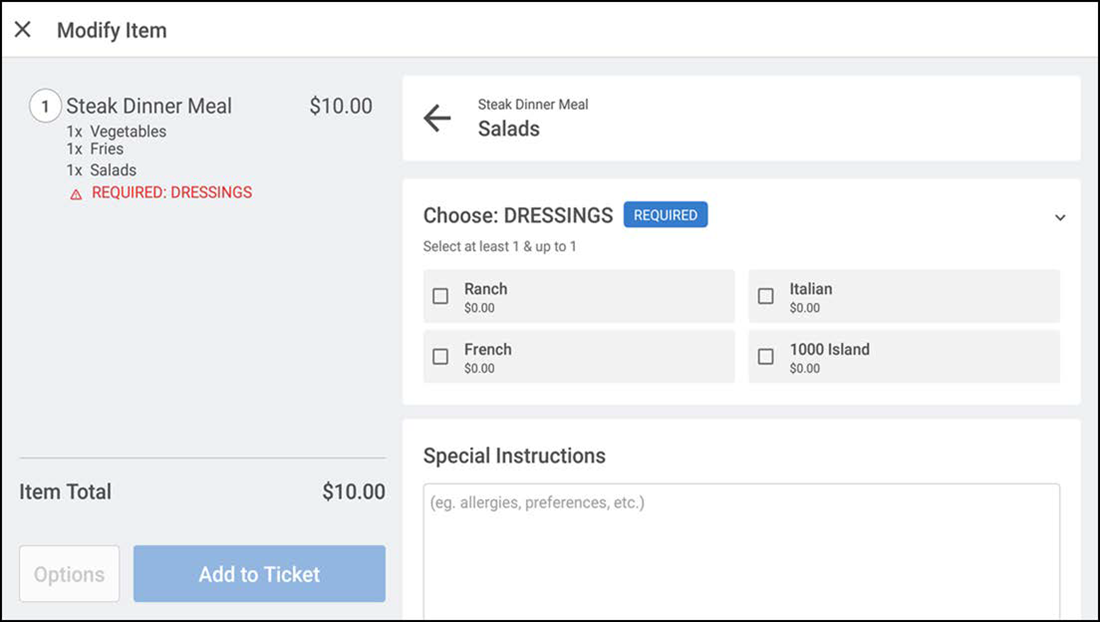
Tap Edit located on the Salads modifier in the Modify Item screen and the DRESSINGS modifier group appears.
-
Tap a dressing choice and tap Add to Ticket. The nested modifier appears indented under the second level modifier on the check, for easy identification.
-
Tap Send to send the order to the kitchen.
-
To keep the check open for later payment, tap the back arrow in the top left corner, type a name for the order or accept the system assigned order number, and tap Save Order. When the guest is ready to pay, select the check from the open orders screen, tap Pay, and close the check as normal -OR- to apply payment immediately, tap Pay and close the check as normal.
Working with variations
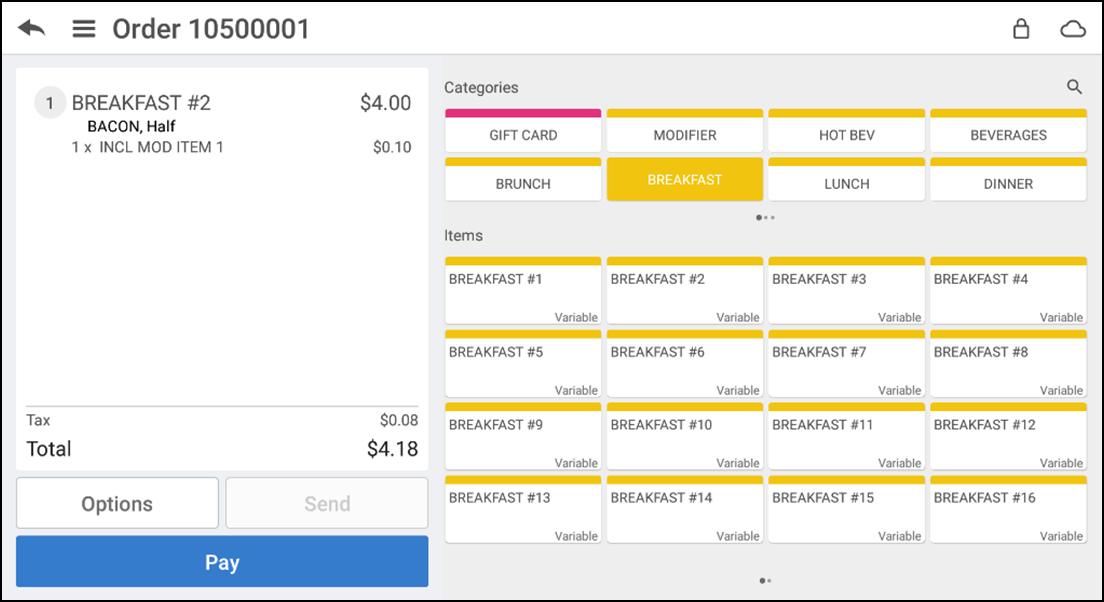
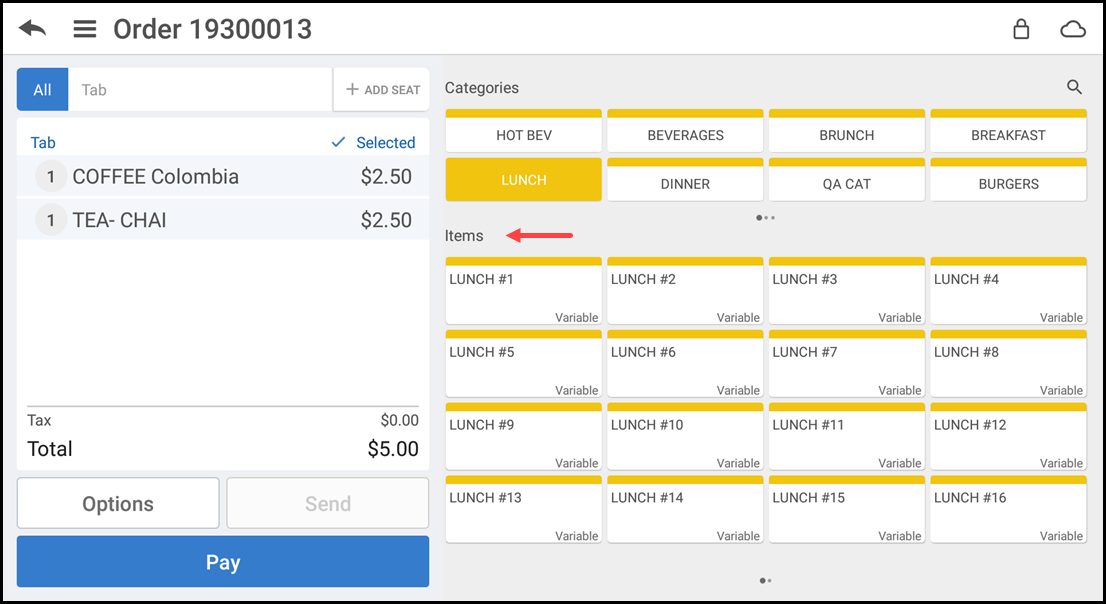
Items with variations appear with ' Variables' under the item name on the item menu. Items with variations require you to make selections prior to finalizing the order.
- Tap an item to add it to the guest check. If variations exist for the item, the modify item screen appears.
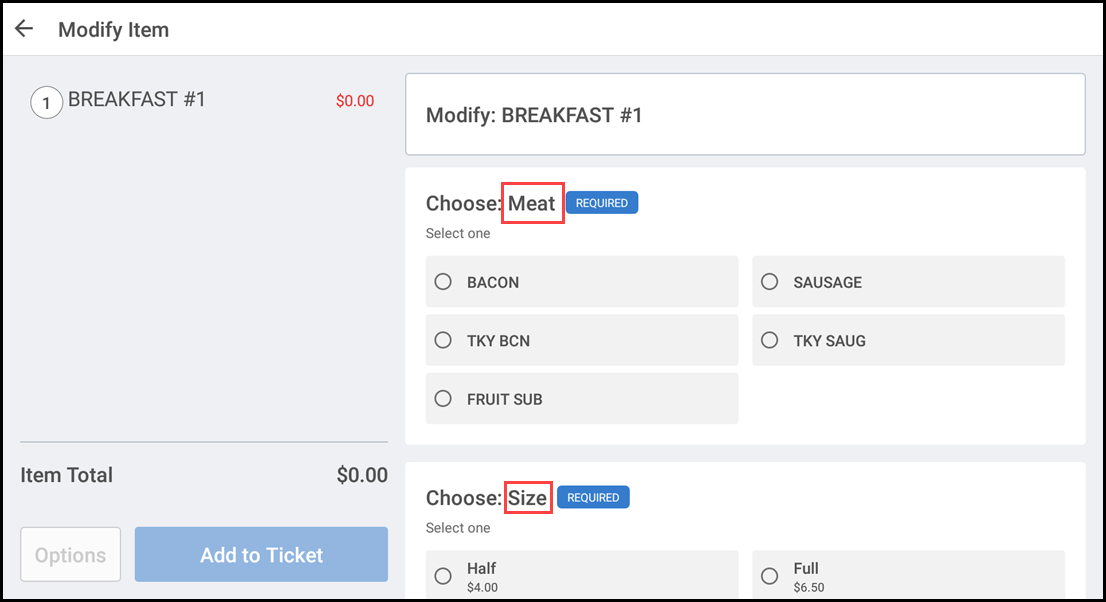
- Make the variation selections. The item with variation is added to the order.
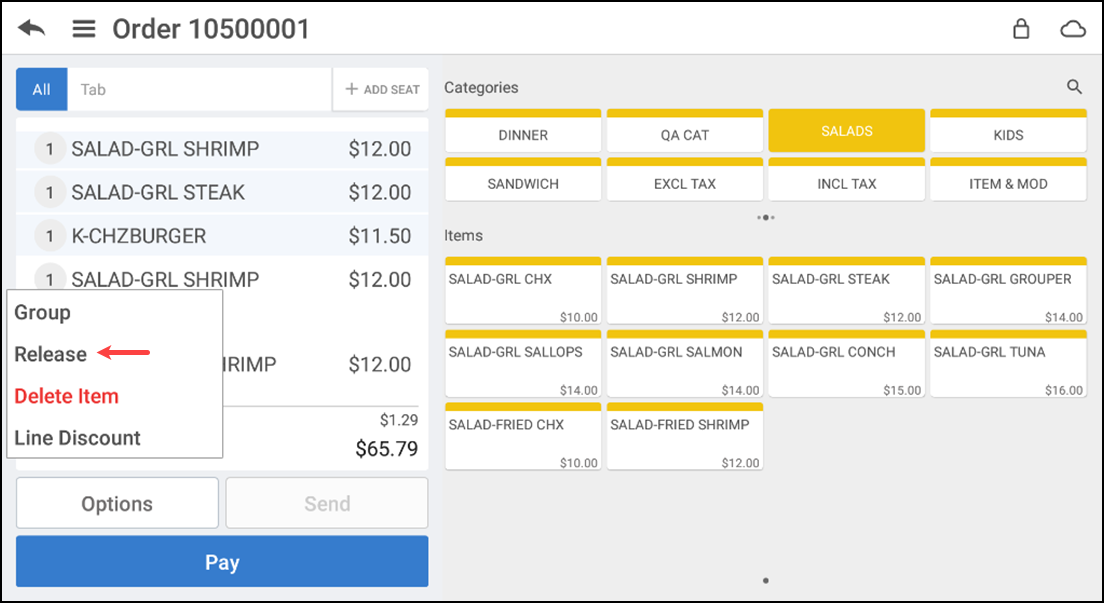
Holding and releasing an item
You can hold the selected item by this option.
Note: You can only hold/release the item(s) only which are unfinalized in the ticket. The finalized items in the ticket are not allowed to hold/release.
Tip: The finalized items (light blue color) and unfinalized (no color) items are separated with the color codes on the ticket entry screen.
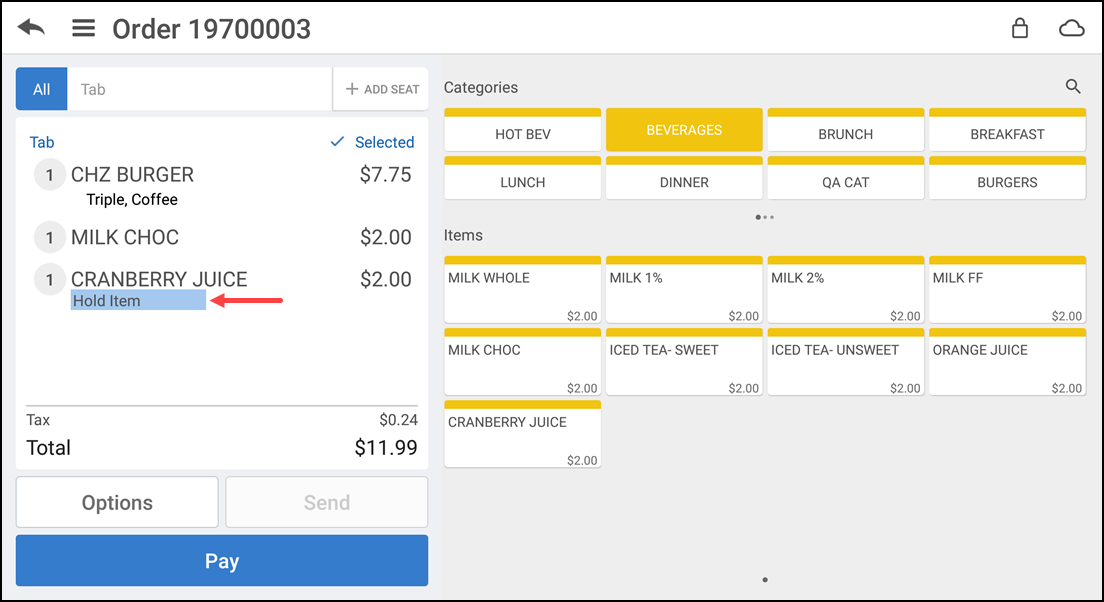
To hold/release an item:
- Log in to the POS.
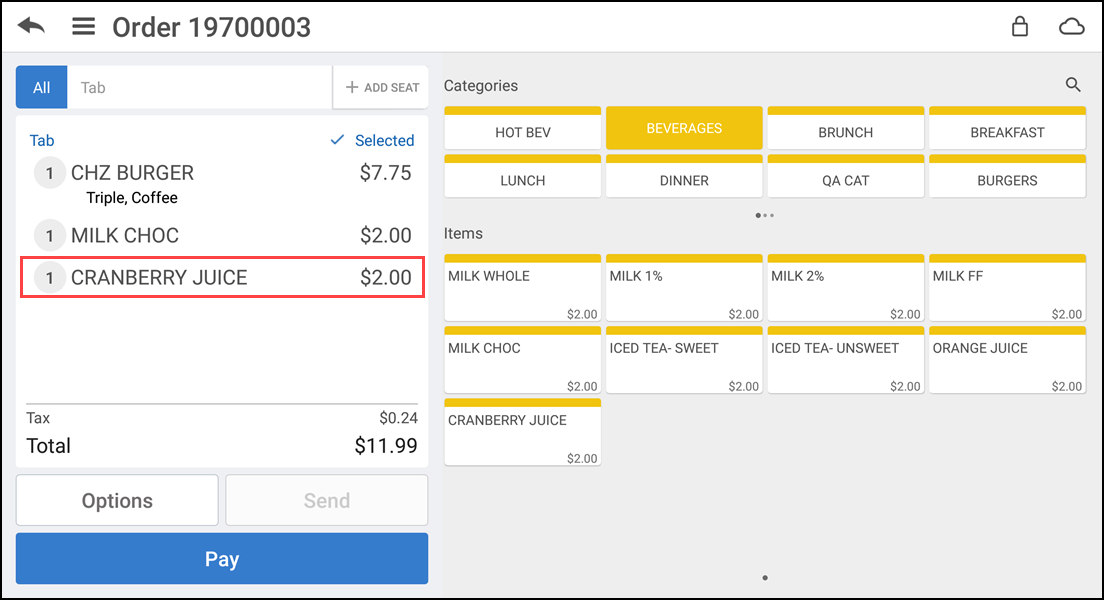
- Tap an item in the ticket entry screen. The Modify Item screen appears.
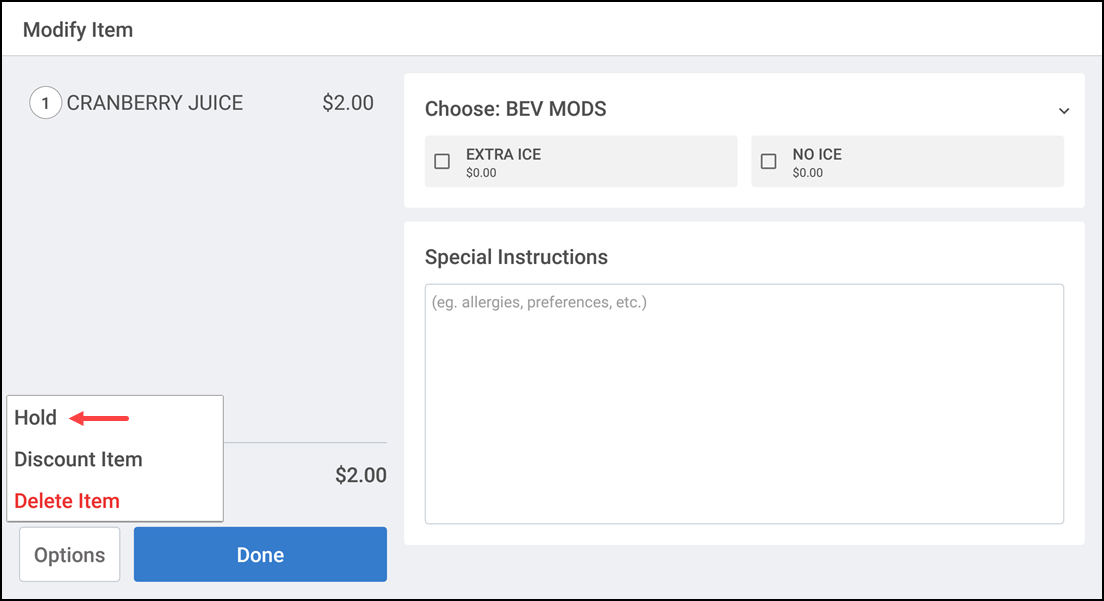
- Tap Options > Hold. The item status is updated to Hold Item.
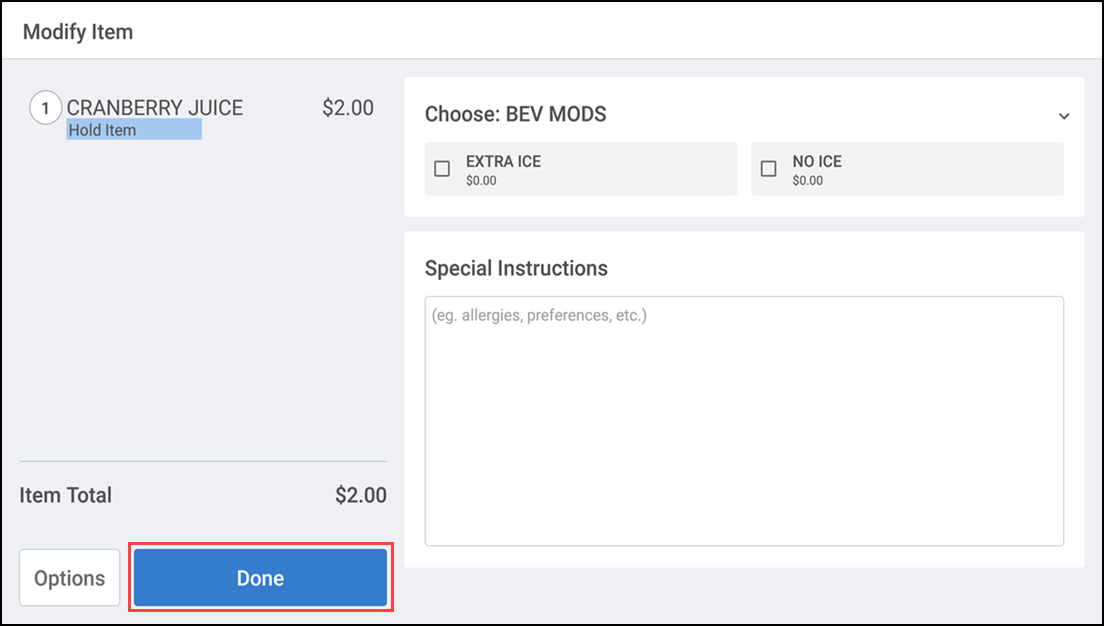
- Tap Done. The ticket entry screen appears.
- To release, select the item on hold.
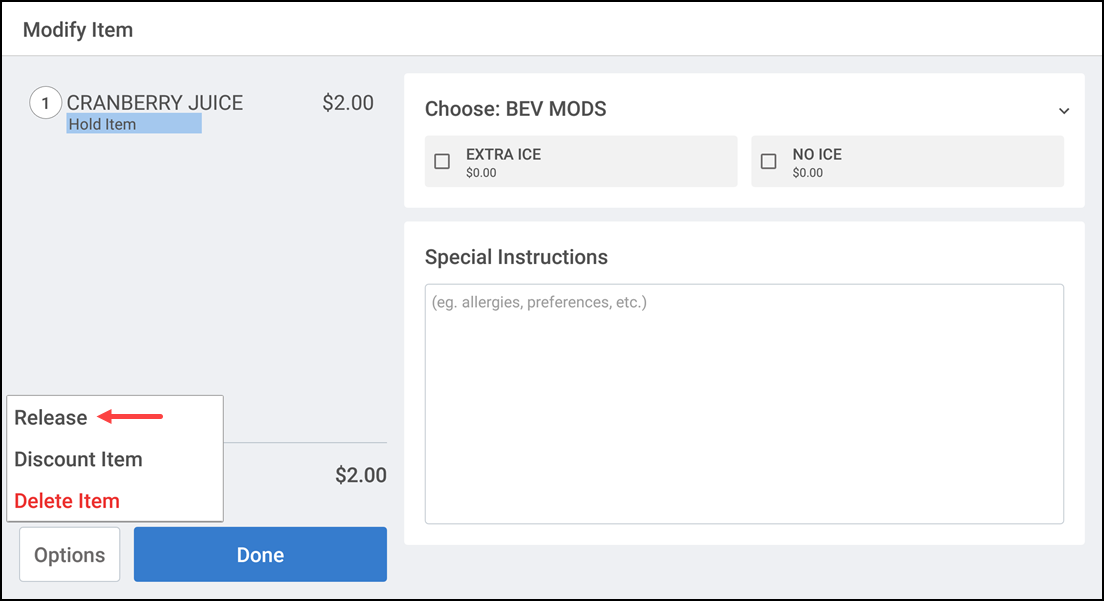
- Tap Options > Release.
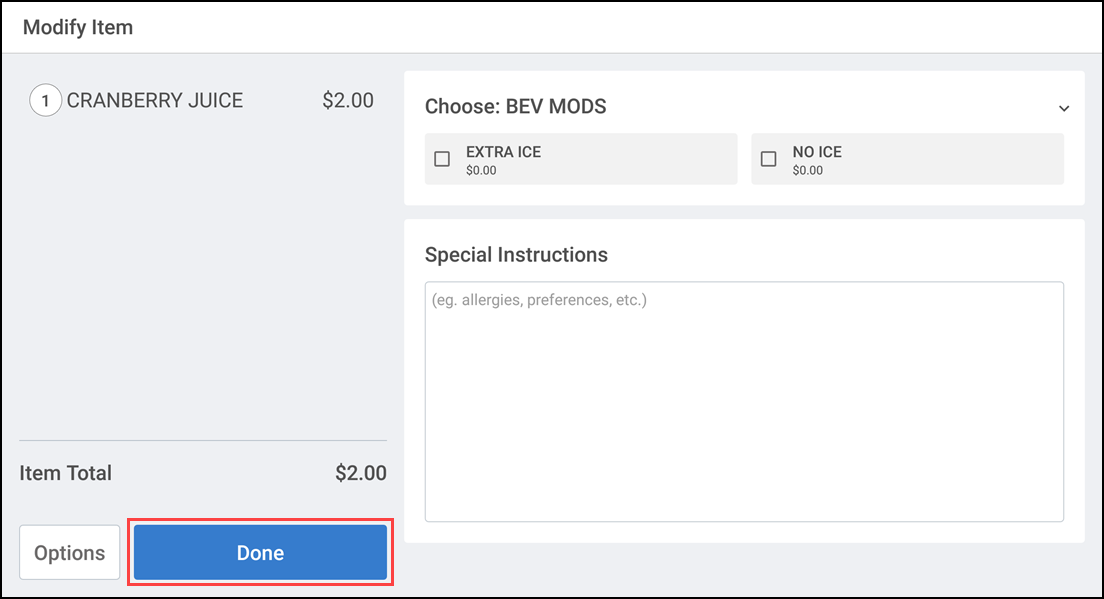
- Tap Done to return to the ticket entry screen.
-OR-
- Log in to the POS.
- Swipe the required unfinalized item in the ticket entry screen for the options to display.
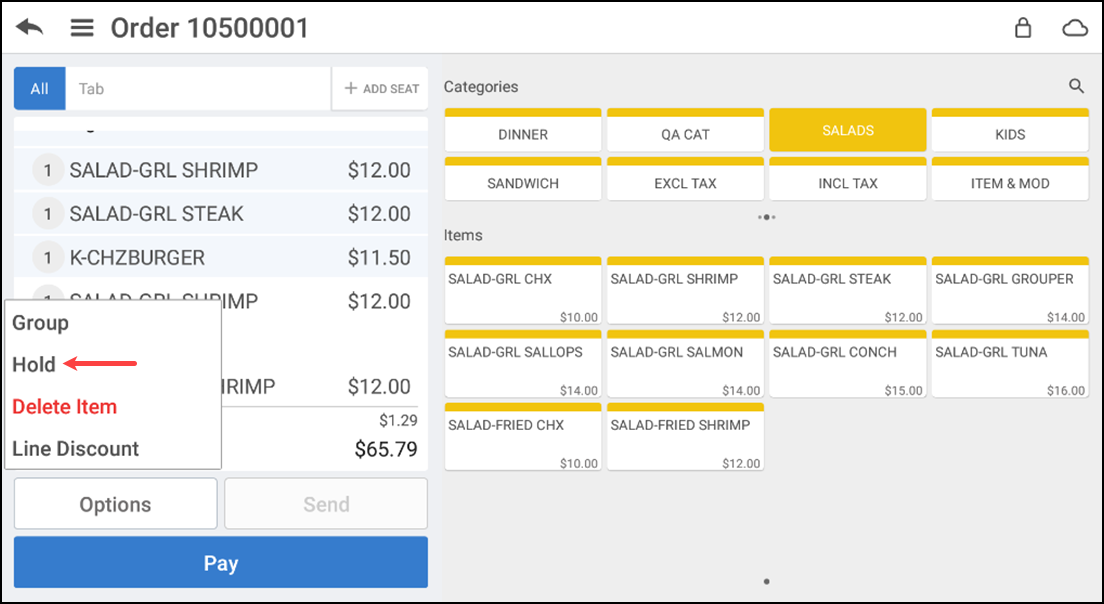
- Tap Hold. The item status is updated to Hold Item.

- Swipe the item and then tap Release to release the item on hold.
Applying discount to an item
You can apply the discount to the selected item by this option.
To apply discount to an item:
- Log in to the POS.
- Tap an item in the ticket entry screen. The Modify Item screen appears.
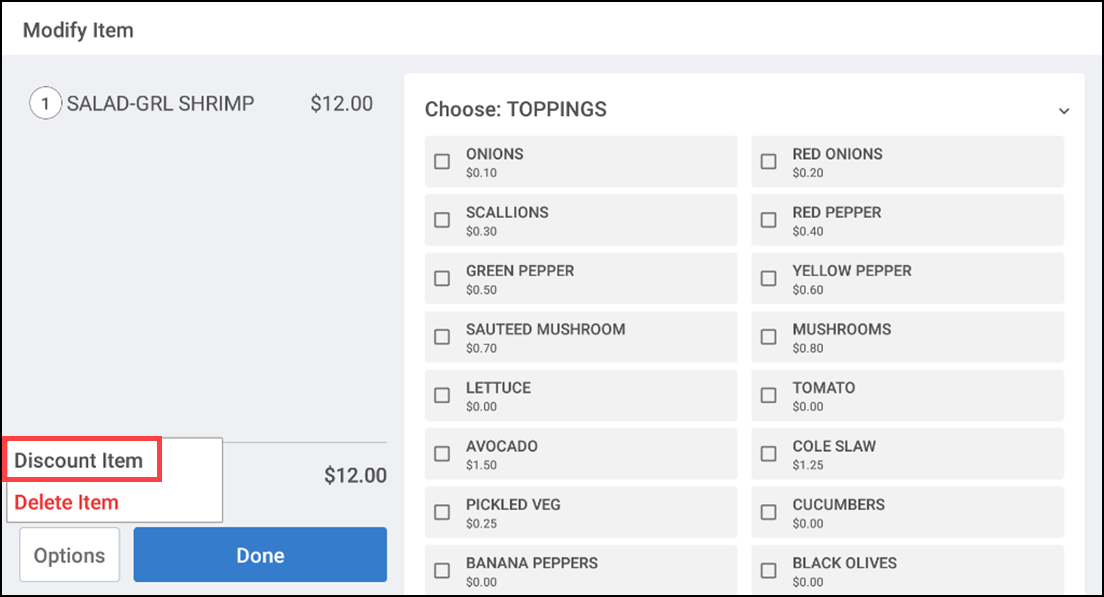
- Tap Options > Discount Item. The Select Item Discount screen appears.

- Select a discount from the list or search the discount in the search field.
- Tap Next. The selected discount is applied to the item.
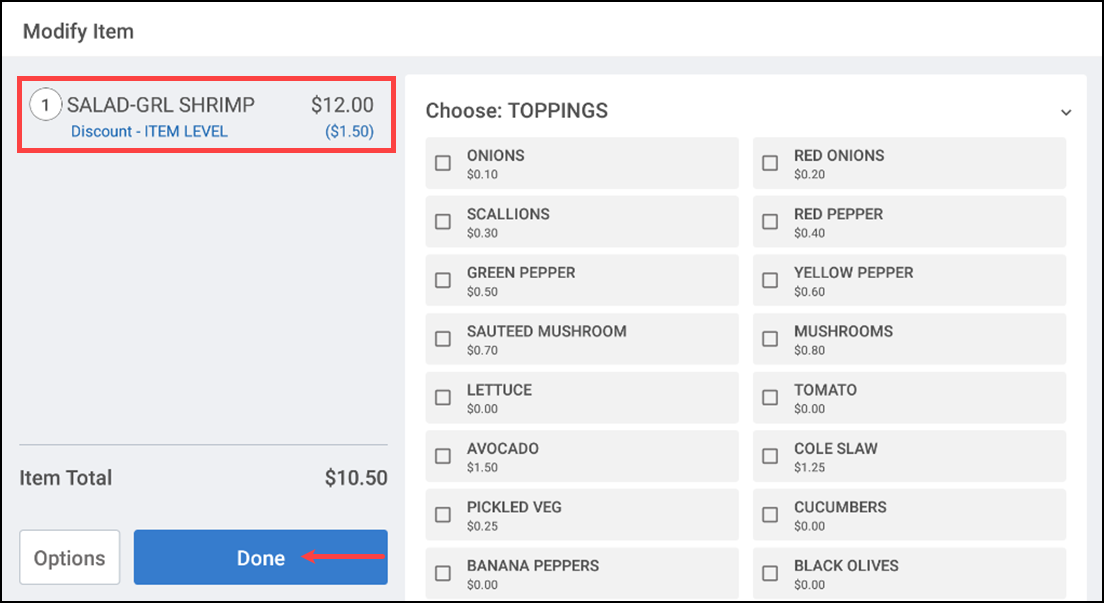
- Tap Done to return to the ticket entry screen.
-OR-
- Log in to the POS.
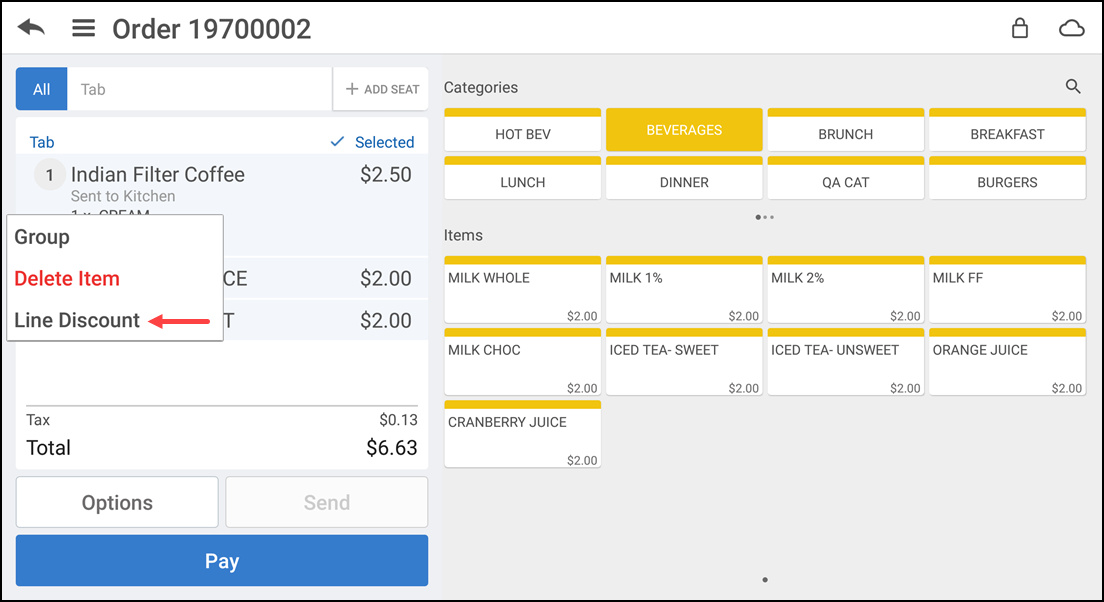
- Swipe the required item in the ticket entry screen for the options to display.
- Tap Line Discount.
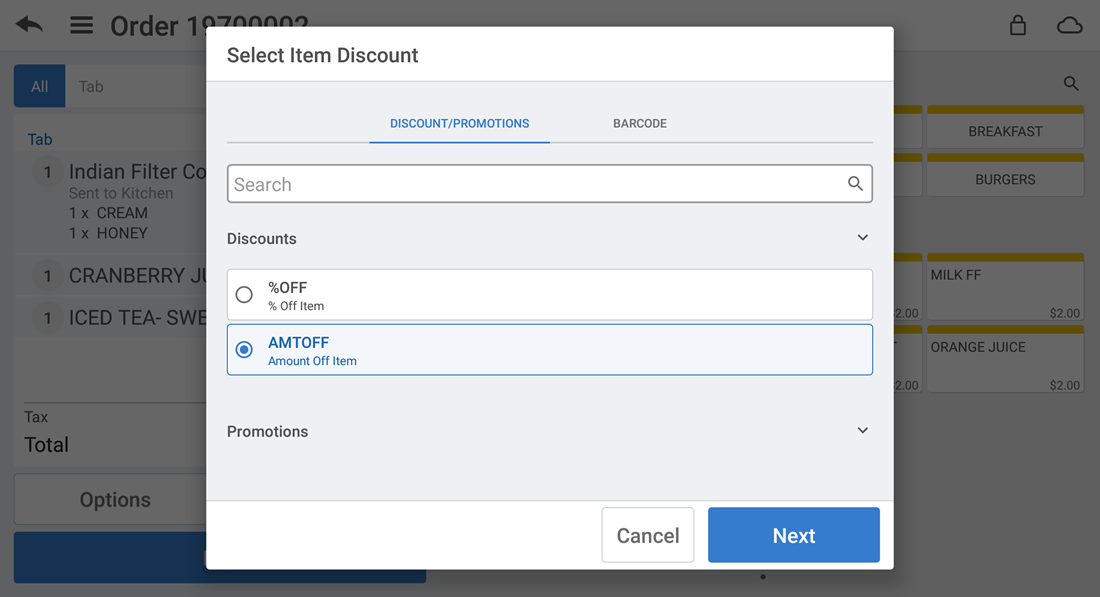
- Select a discount from the list or search the discount in the search field.
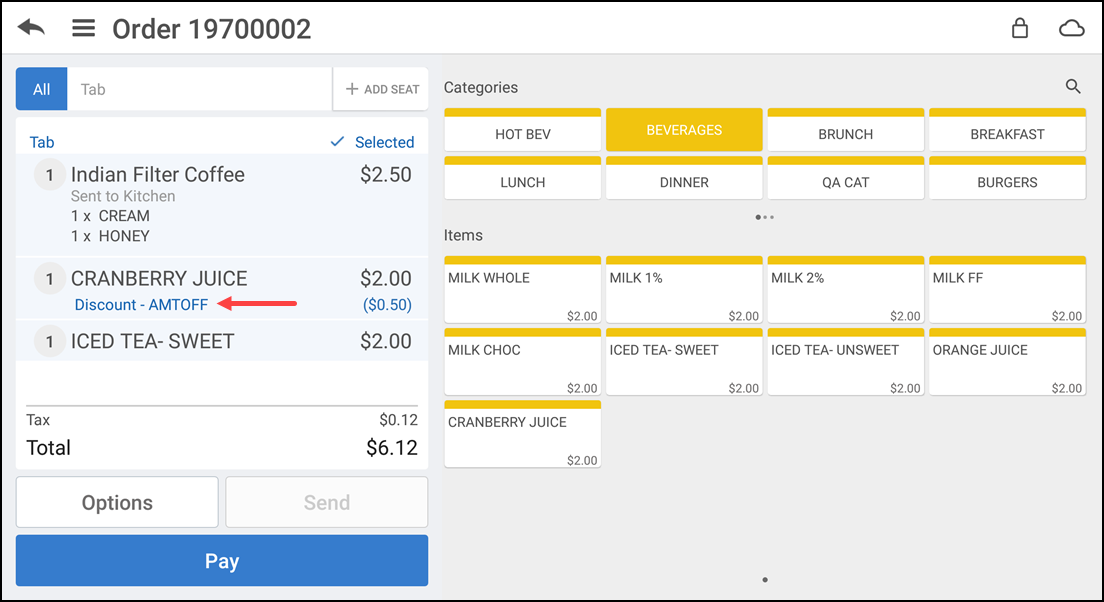
- Tap Next. The selected discount is applied to the item in the ticket entry screen.
Changing item price
You can change the assigned price for an item by this option. At Back Office, during the item creation, if you enable the option 'Prompt for Price at POS' then only it is possible to change price at POS for the related item. For more information, refer to Creating Items.
To change an item price:
- Log in to the POS.
- Tap an item in the ticket entry screen. The Modify Item screen appears.
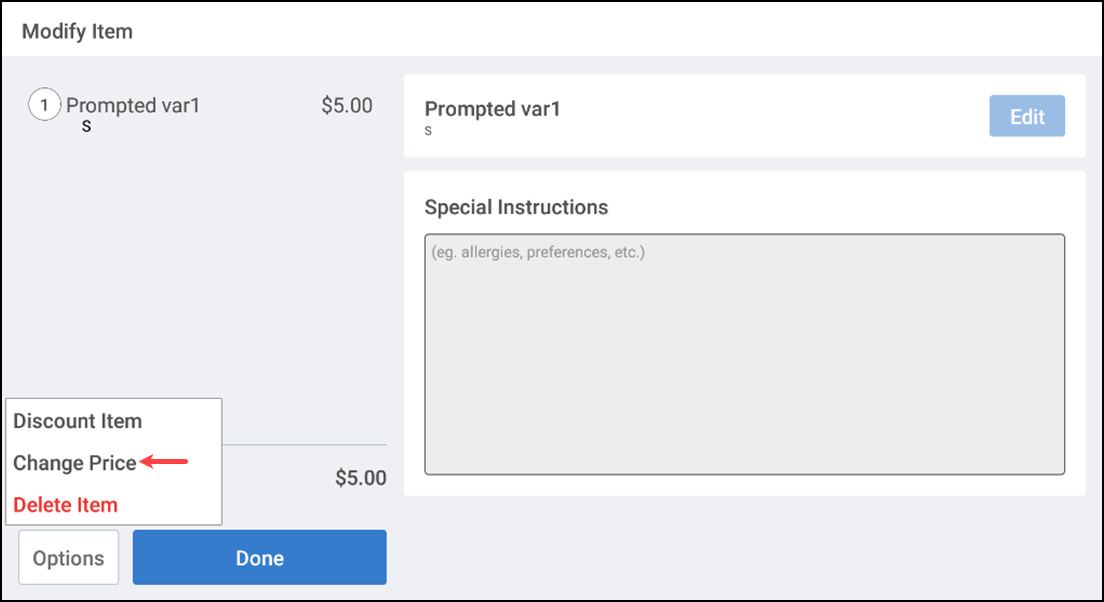
- Tap Options > Change Price. The Change price screen appears.
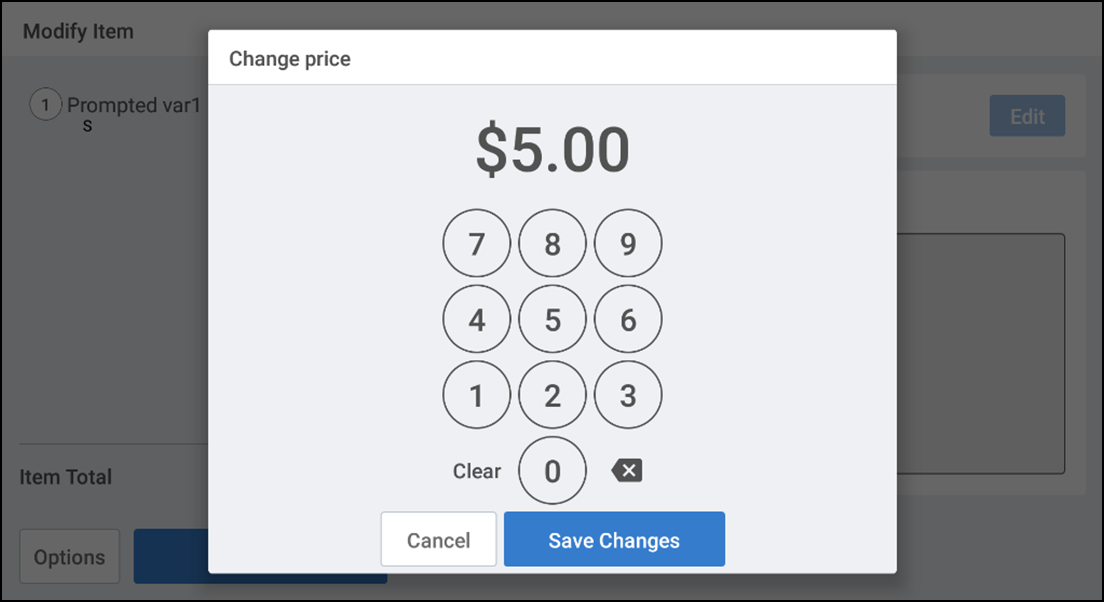
- Enter the desired price for the item.
- Tap Save Changes. The new price is assigned to the item.
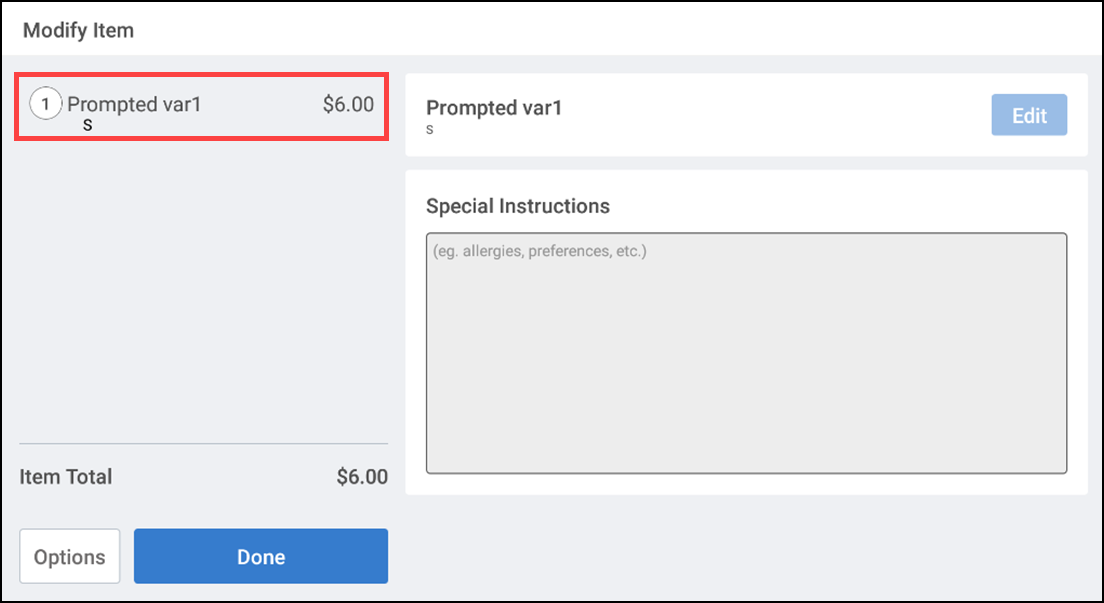
- Tap Done to return to the ticket entry screen.
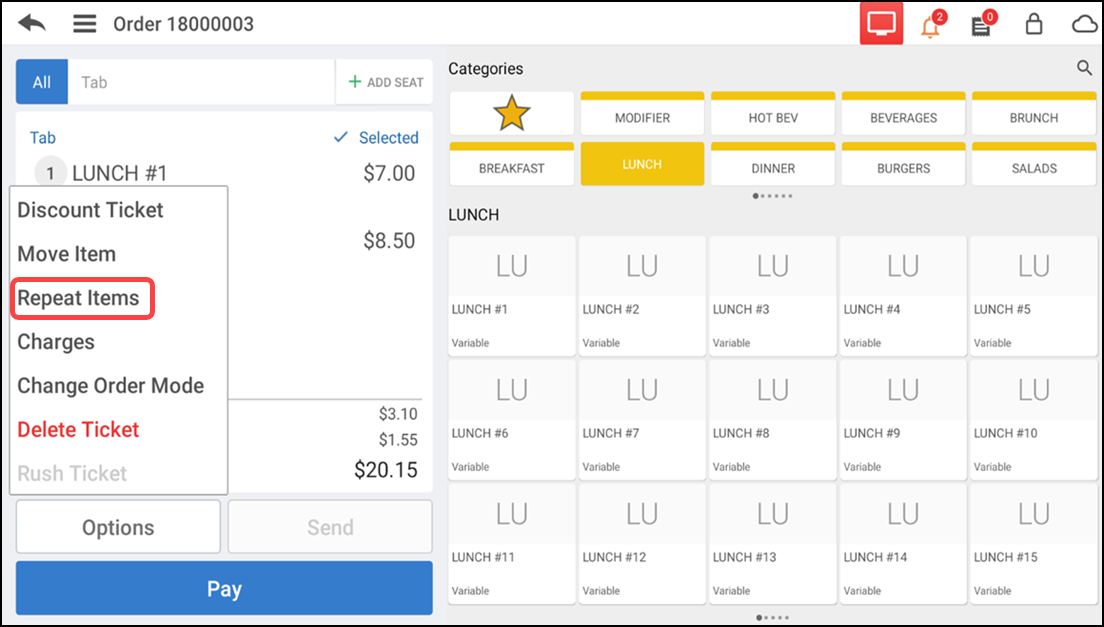
Repeating an item
Use Repeat Item to reorder an item or all items for an open order. This functionality allows you to easily reorder an item or an entire ticket with applied modifiers and variations. Additionally, you can group all the repeated items on the POS ticket entry screen. Once you repeat an item, the extended charges associated with the item are reapplied, but the charges, promotions, and discounts associated with the ticket are discarded.
To repeat an item/all items for an open order:
-
Log in to the POS.
-
Tap Point of Sale.
-
Add items to the ticket.
-
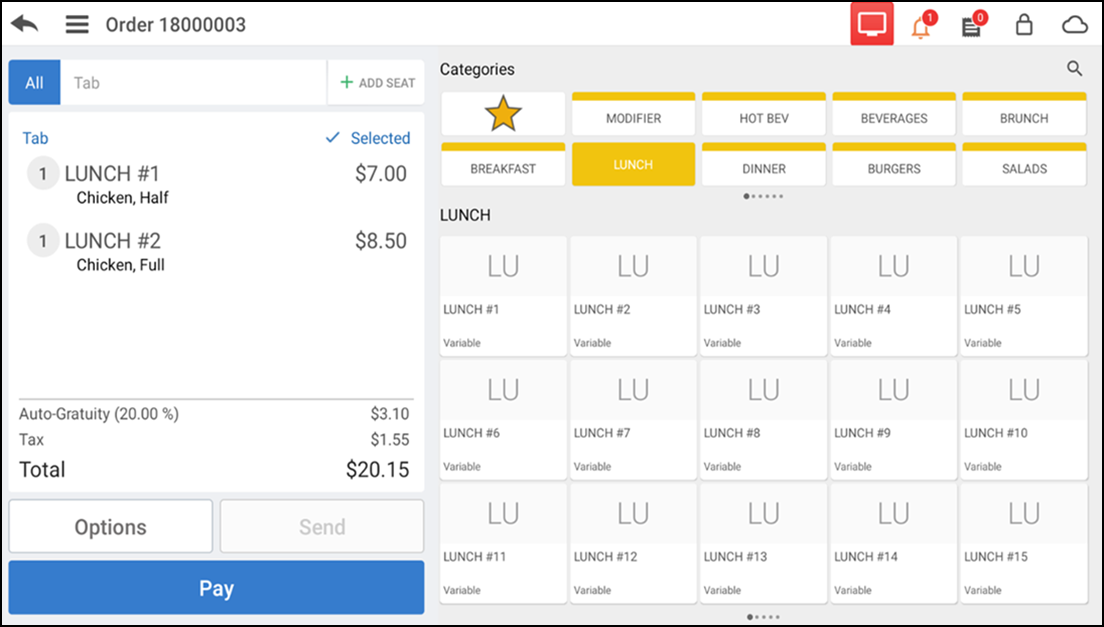
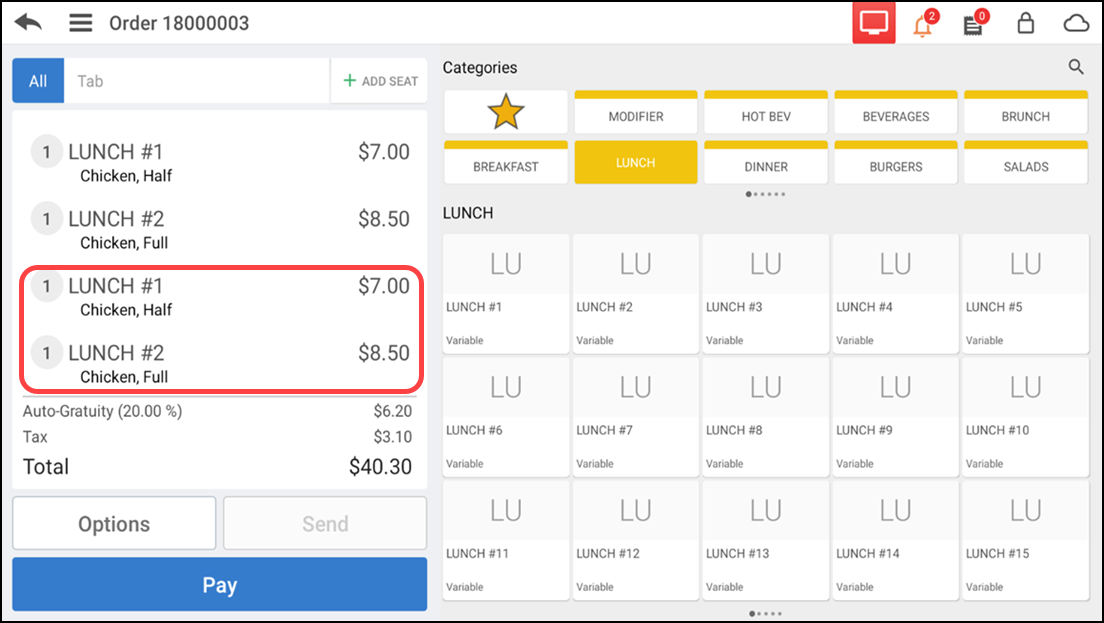
To repeat all items on the ticket, tap Options > Repeat Items.
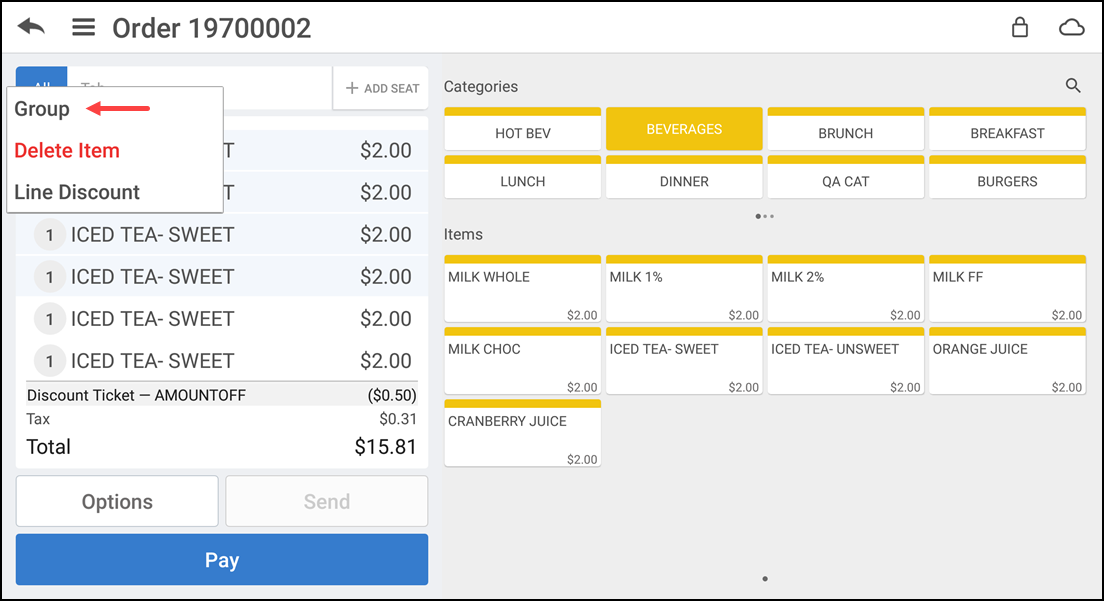
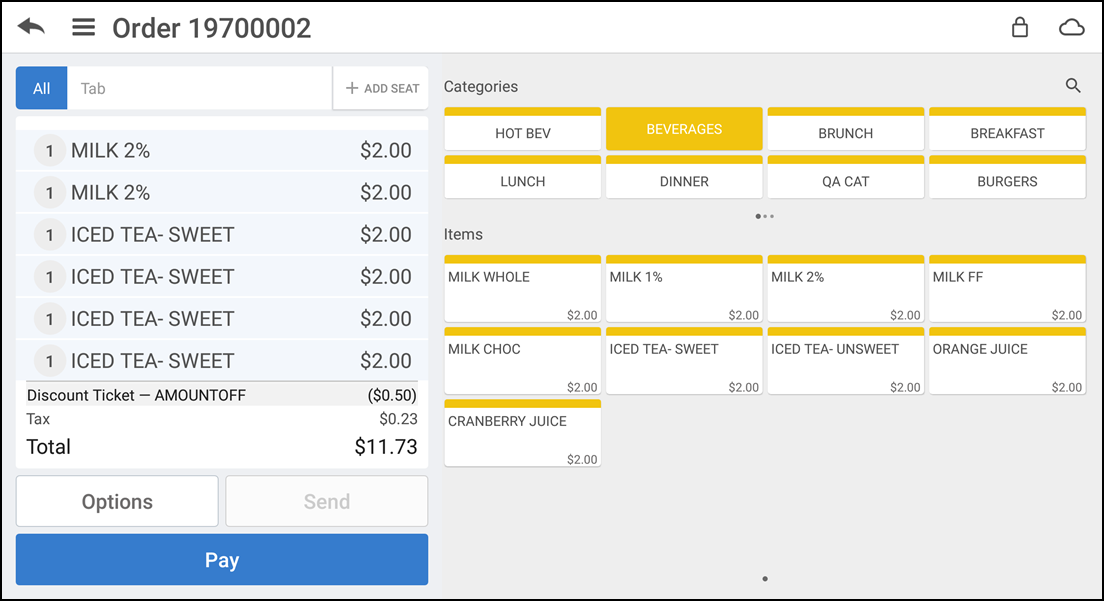
The image below shows a ticket with all items repeated.
-
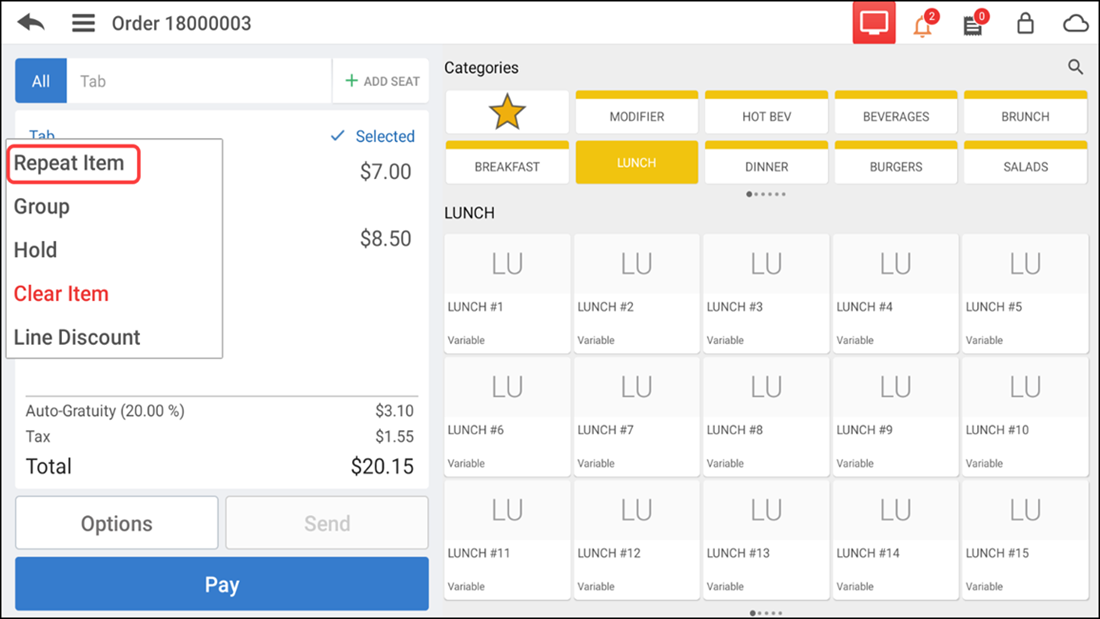
To repeat one item at a time, swipe the required item in the ticket entry screen and tap Repeat Item.
If an item is unavailable and you attempt to perform the 'Repeat Item' function, an error message appears.
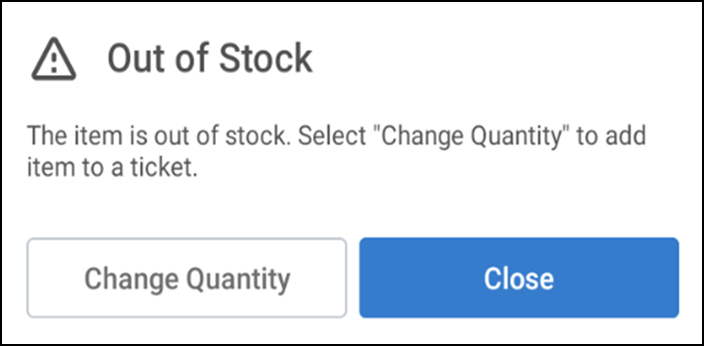
NOTE: Currently, the 'Repeat Item' function does not support weighted items.
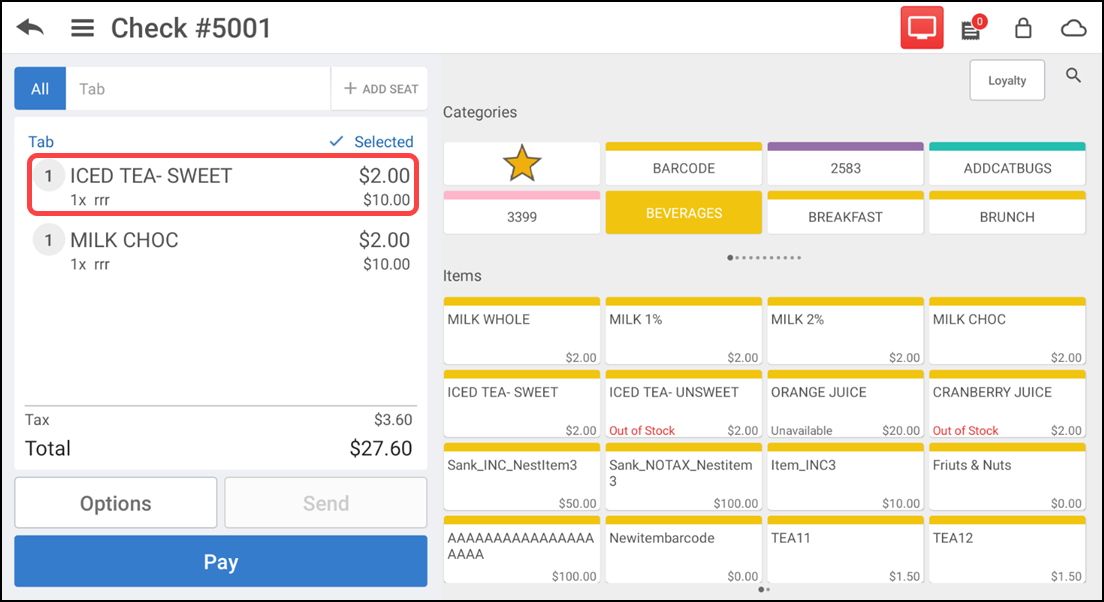
Clearing an item
You can clear an item from the Modify Item screen and also from the Ticket Entry screen using the Clear Item option.
To clear an item from the Modify Item screen:
-
Log in to the POS.
-
Tap an item in the ticket entry screen. The Modify Item screen appears.
-
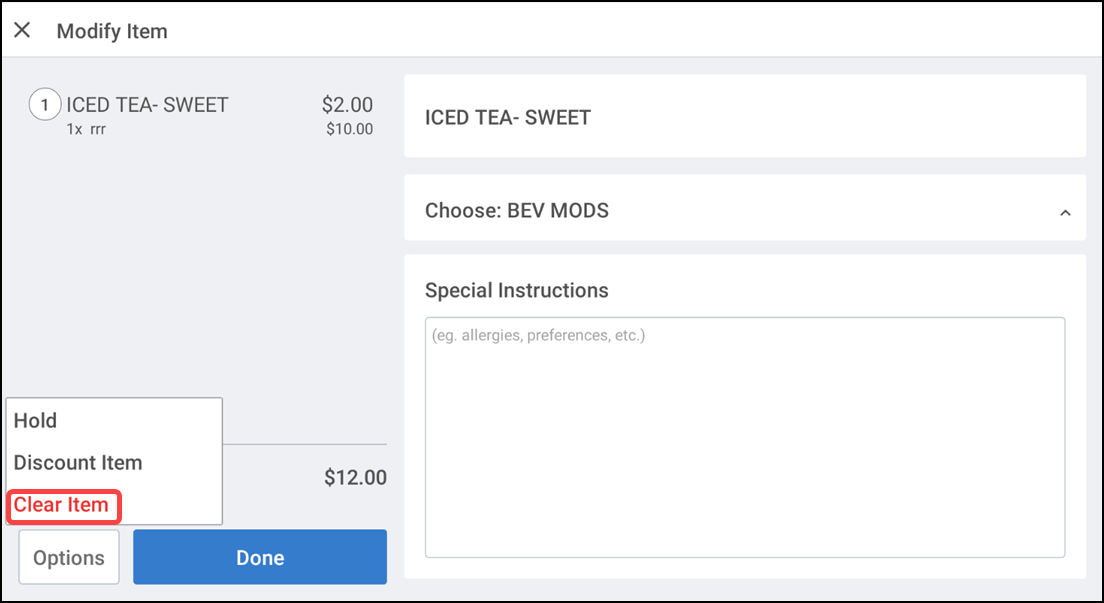
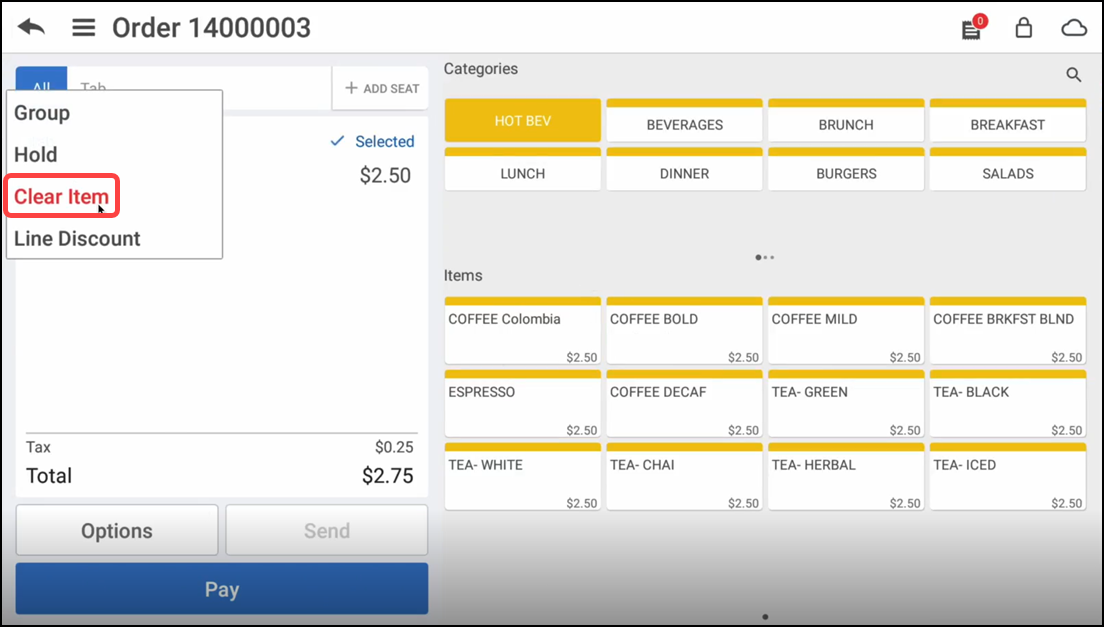
Tap Options > Clear Item. The 'Clear Item' confimation screen appears.
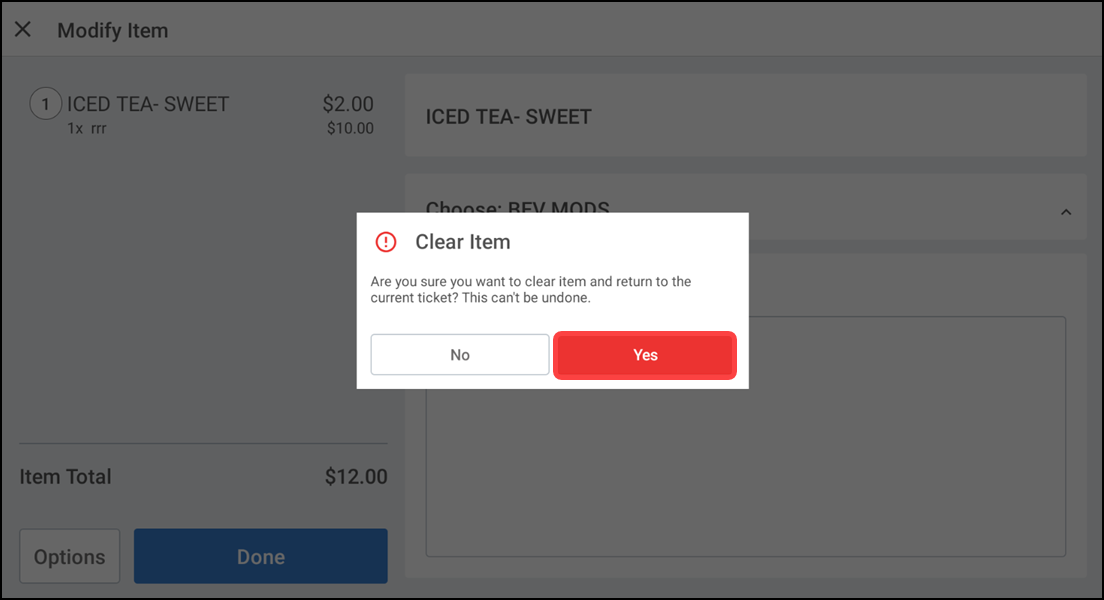
-
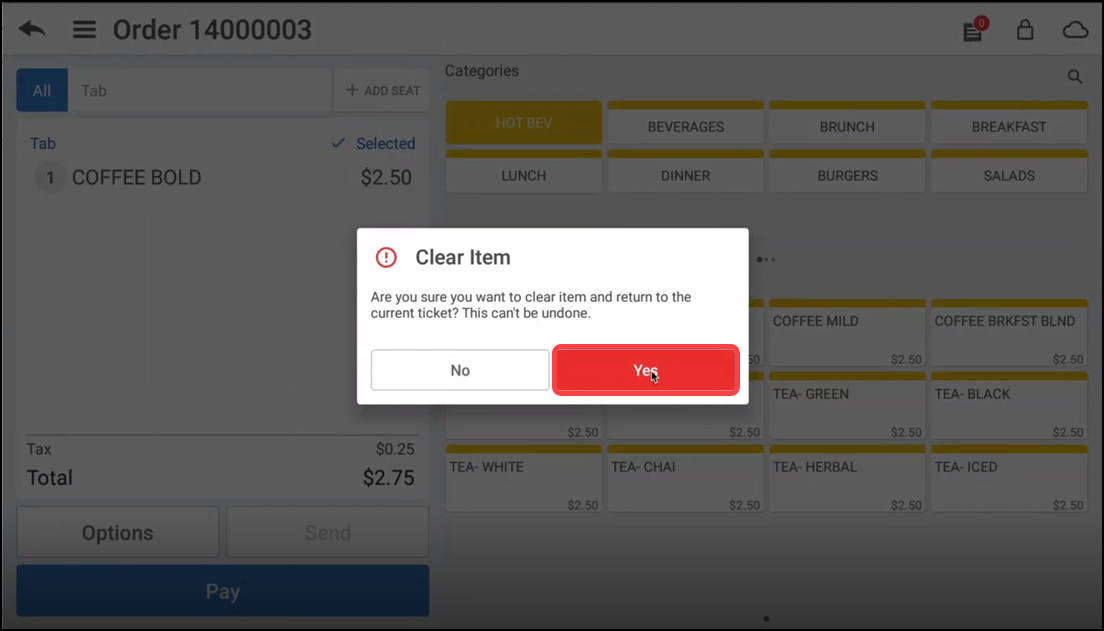
Tap Yes to clear the item and to return to the ticket entry screen.
Note: If you do not have permission to clear an item, the below message appears letting you know you do not have the sufficient permissions, followed by the supervisor's approval screen.
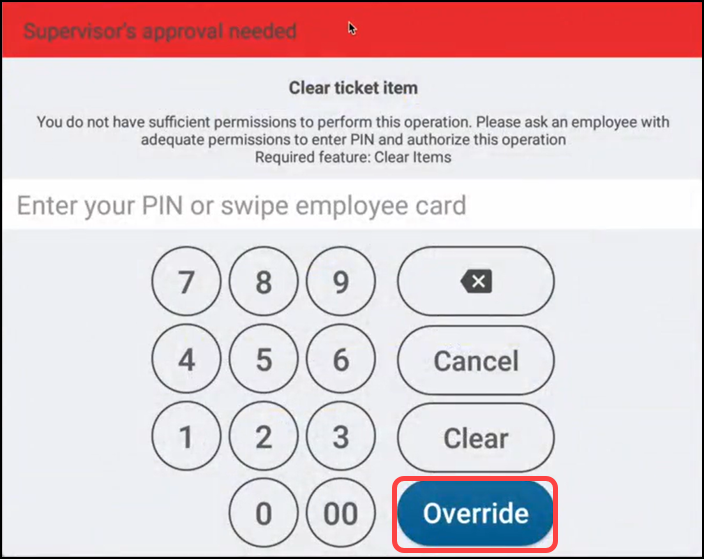
-
The supervisor enters their PIN and clicks Override to override the clear items permission.
-OR-
Tap Cancel to close the supervisor's screen and return to the ticket entry screen.
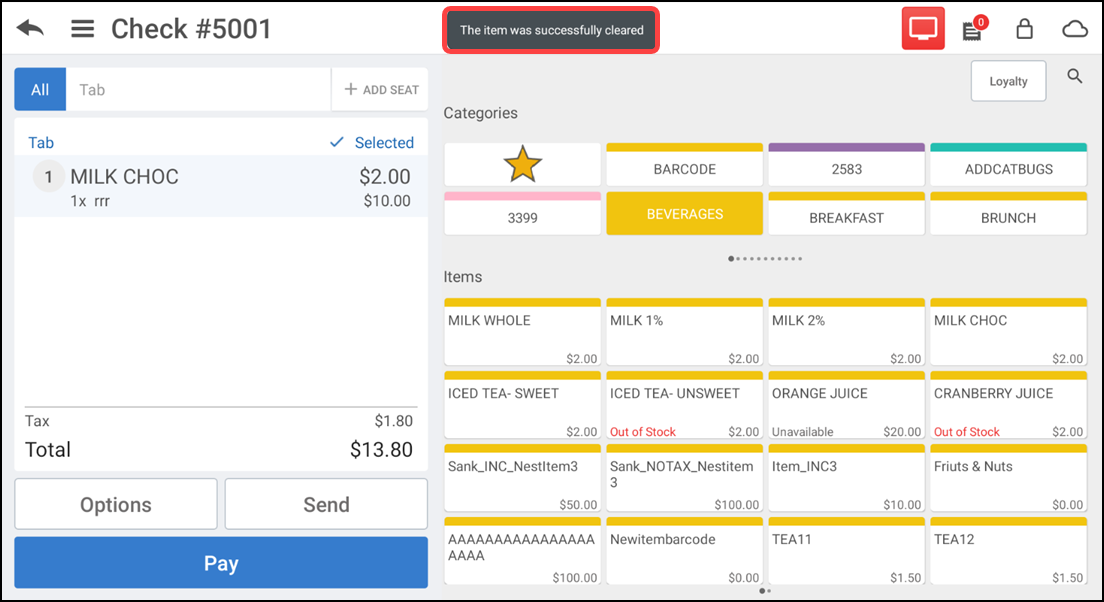
Once you clear an item, a message appears on the POS screen letting you know about the clear item status.
To clear an item from ticket entry screen:
-
Log in to the POS.
-
Swipe the required item in the ticket entry screen for the options to display.
-
Tap Clear Item. The 'Clear Item' confimation screen appears.
-
Tap Yes to clear the item and to return to the ticket entry screen.
Note: If you do not have permission to clear an item, a message appears letting you know you do not have the sufficient permissions, followed by the supervisor's approval screen.
-
The supervisor enters their PIN and clicks Override to override the clear items permission.
-OR-
Tap Cancel to close the supervisor's screen.
Overriding clear item limit
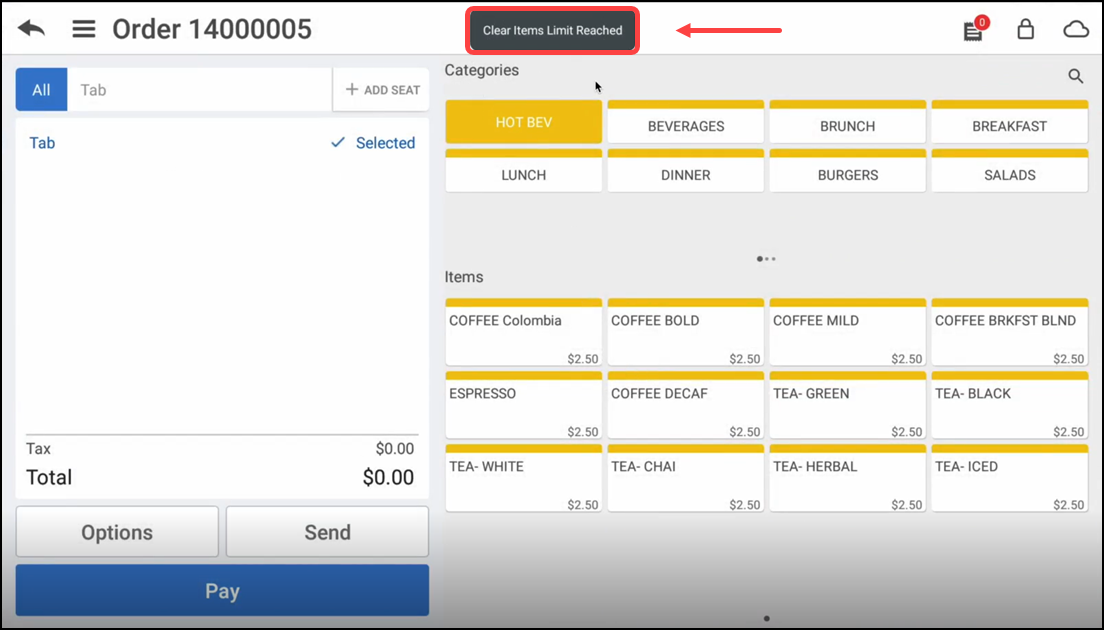
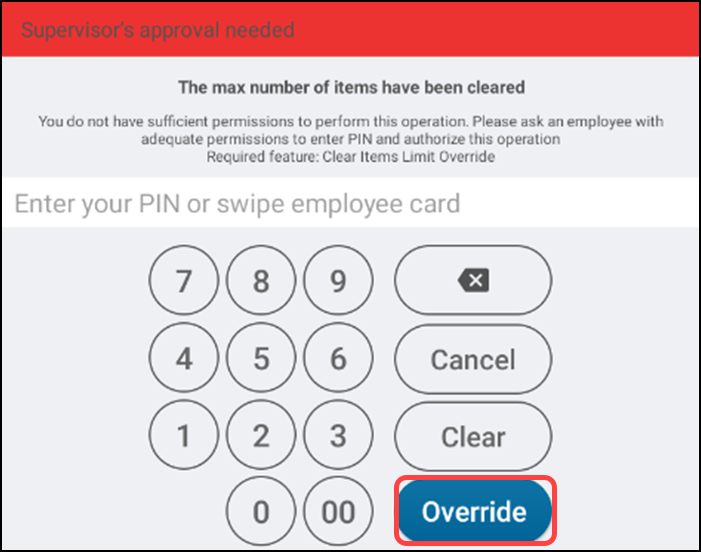
If maximum number of clear items limit is set, and when the limit is exceeded, a message appears on the POS screen informing about the clear item limit. A supervisor must override the limitation to continue.
To override the clear item limit:
-
Log in to the POS.
-
With the guest check active, continue to clear item(s). If you exceed the maximum clear item limit, the below message appears letting you know you have exceeded the clear item limit, followed by the supervisor's approval screen.
-
The supervisor enters their PIN and clicks Override to override the clear items permission.
-OR-
Tap Cancel to close the supervisor's screen and return to the ticket entry screen.
To clear an item from modify item screen:
-
Log in to the POS.
-
Tap an item in the ticket entry screen. The Modify Item screen appears.
-
Tap Options > Clear Item. The 'Clear Item' confimation screen appears.
-
Tap Yes to clear the item and to return to the ticket entry screen.
Note: If you do not have permission to clear an item, the below message appears letting you know you do not have the sufficient permissions, followed by the supervisor's approval screen.
-
The supervisor enters their PIN and clicks Override to override the clear items permission.
-OR-
Tap Cancel to close the supervisor's screen and return to the ticket entry screen.
Once you clear an item, a message appears on the POS screen letting you know about the clear item status.
To clear an item from ticket entry screen:
-
Log in to the POS.
-
Swipe the required item in the ticket entry screen for the options to display.
-
Tap Clear Item. The 'Clear Item' confimation screen appears.
-
Tap Yes to clear the item and to return to the ticket entry screen.
Note: If you do not have permission to clear an item, a message appears letting you know you do not have the sufficient permissions, followed by the supervisor's approval screen.
-
The supervisor enters their PIN and clicks Override to override the clear items permission.
-OR-
Tap Cancel to close the supervisor's screen.
Overriding clear item limit
If maximum number of clear items limit is set, and when the limit is exceeded, a message appears on the POS screen informing about the clear item limit. A supervisor must override the limitation to continue and allow the employee to clear another item.
To override the clear item limit:
-
Log in to the POS.
-
With the guest check active, continue to clear item(s). If you exceed the maximum clear item limit, the below message appears letting you know you have exceeded the clear item limit, followed by the supervisor's approval screen.
-
The supervisor enters their PIN and clicks Override to override the clear items permission.
-OR-
Tap Cancel to close the supervisor's screen and return to the ticket entry screen.
Voiding an item
You can void an item from the ticket entry screen using the Void Item function. To use this function, the item must be in the ordered state (sent to the kitchen). The POS recognizes the term Void once an item is sent to the kitchen or the ticket is paid. If a ticket is not paid or sent to the kitchen, use the Delete function.
To void an item:
- Log in to the POS.
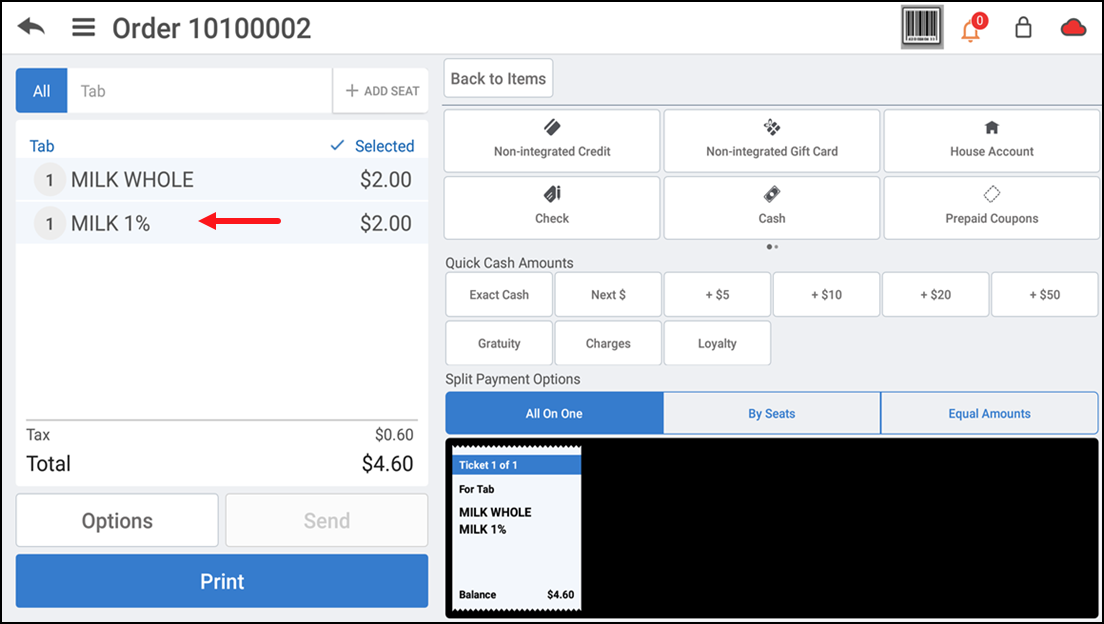
- With the guest check containing the item to void active, tap the item in the ticket entry screen. The Modify Item screen appears.
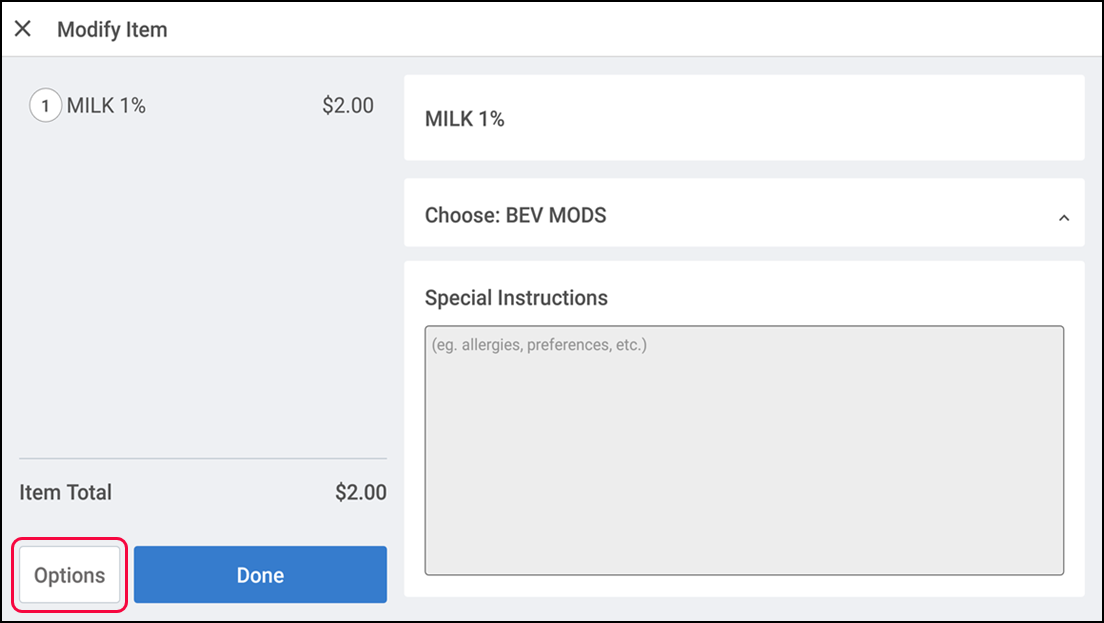
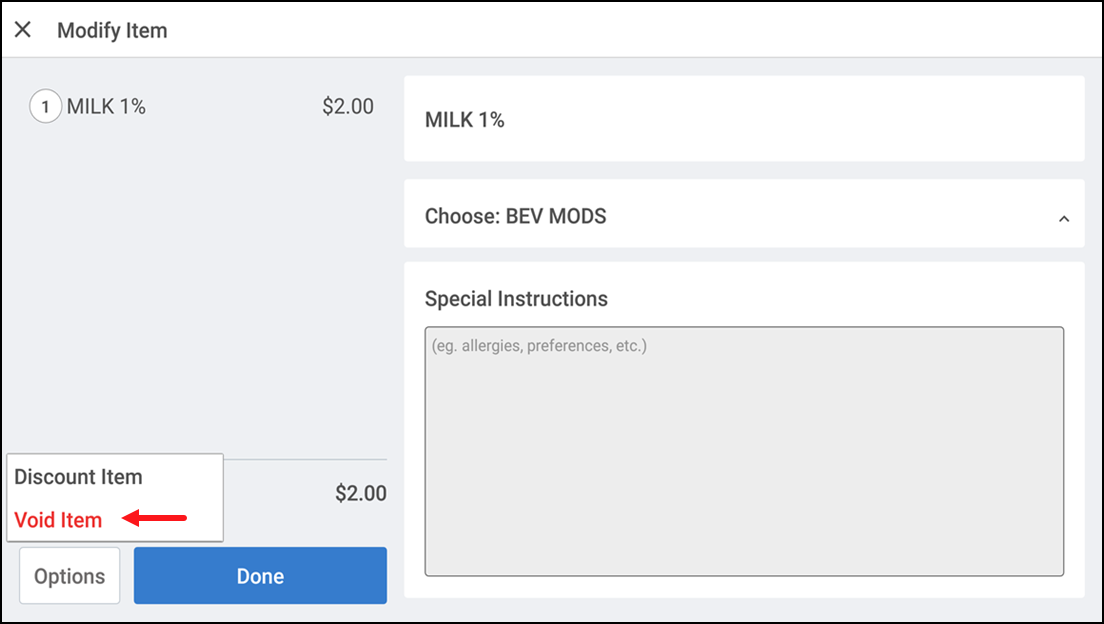
- Tap Options > Void Item. The Select Void Reason Code screen appears.
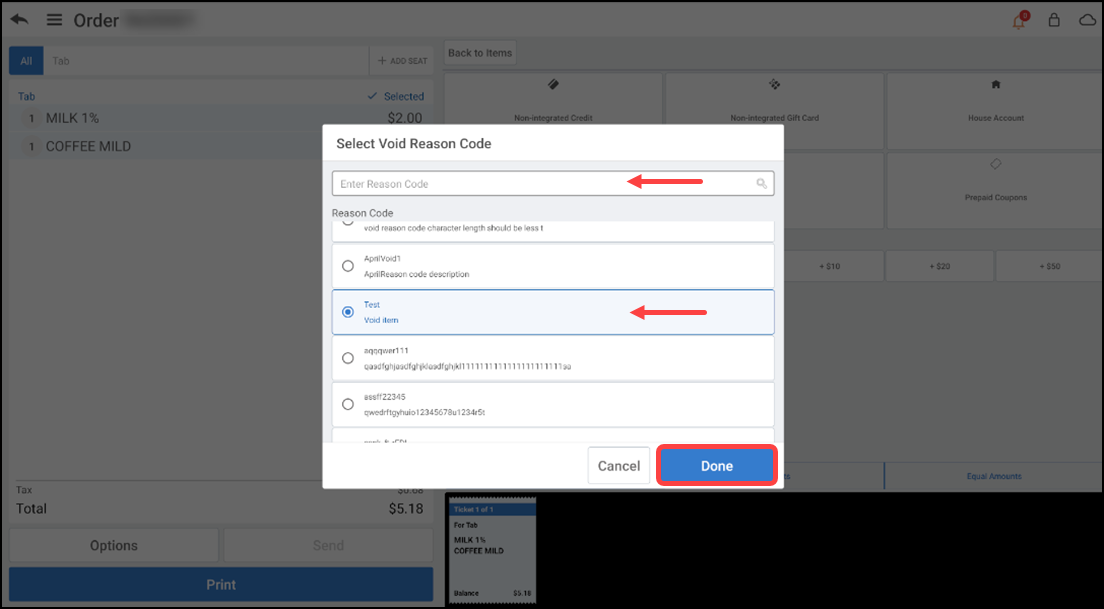
- Enter a void reason code and tap search icon to find the pre-defined reason code -OR- select a reason code from the list.
- Tap Done to void an item and to return to the ticket entry screen.
-OR-
- Log in to the POS.
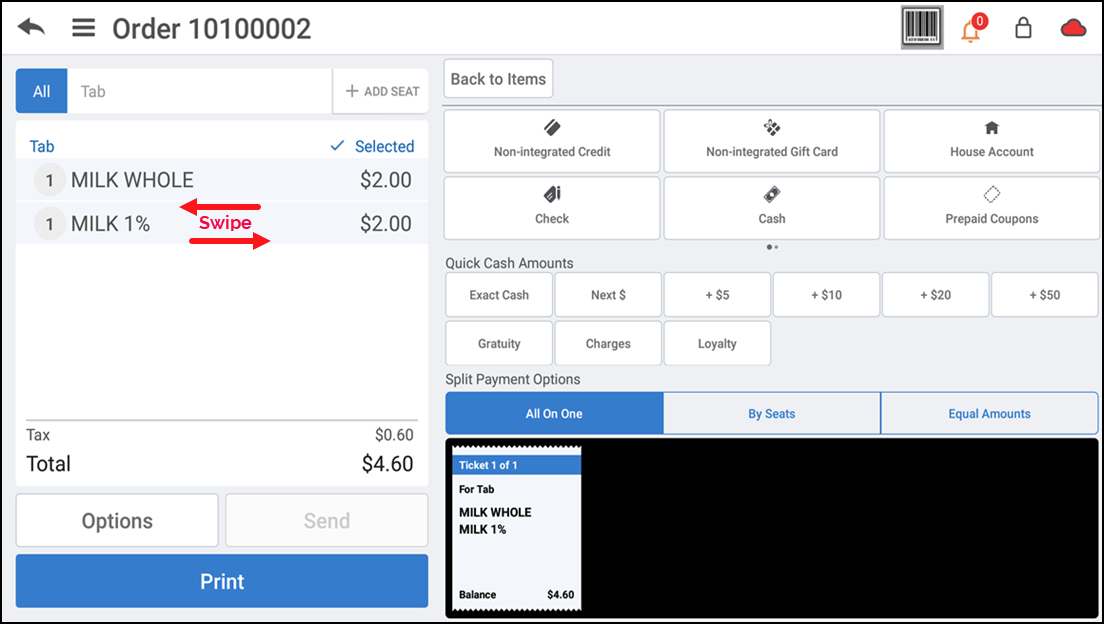
- With the ticket containing the item to void active, swipe the required item in the ticket entry screen. The Modify Item screen appears.
- Tap Void Item. The Select Void Reason Code screen appears.
- Enter a void reason code and tap search icon to find the pre-defined reason code -OR- select a reason code from the list.
- Tap Done to void an item and to return to the ticket entry screen.
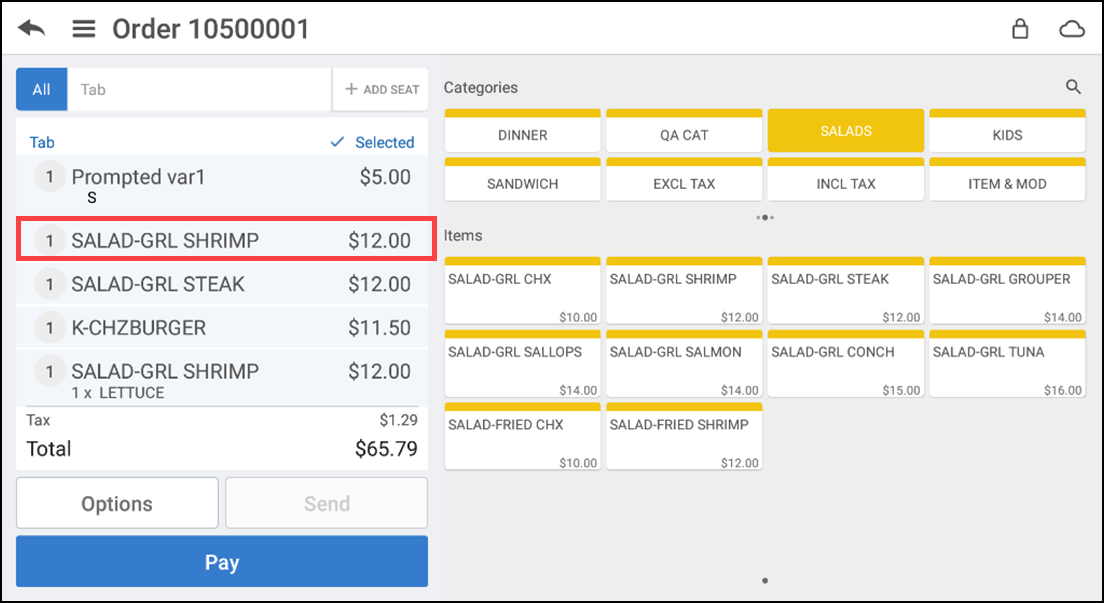
Grouping and ungrouping an item
You can group an item in the ticket entry screen, if the same item is selected more than once.
To group/ungroup an item:
-
Log in to the POS.
-
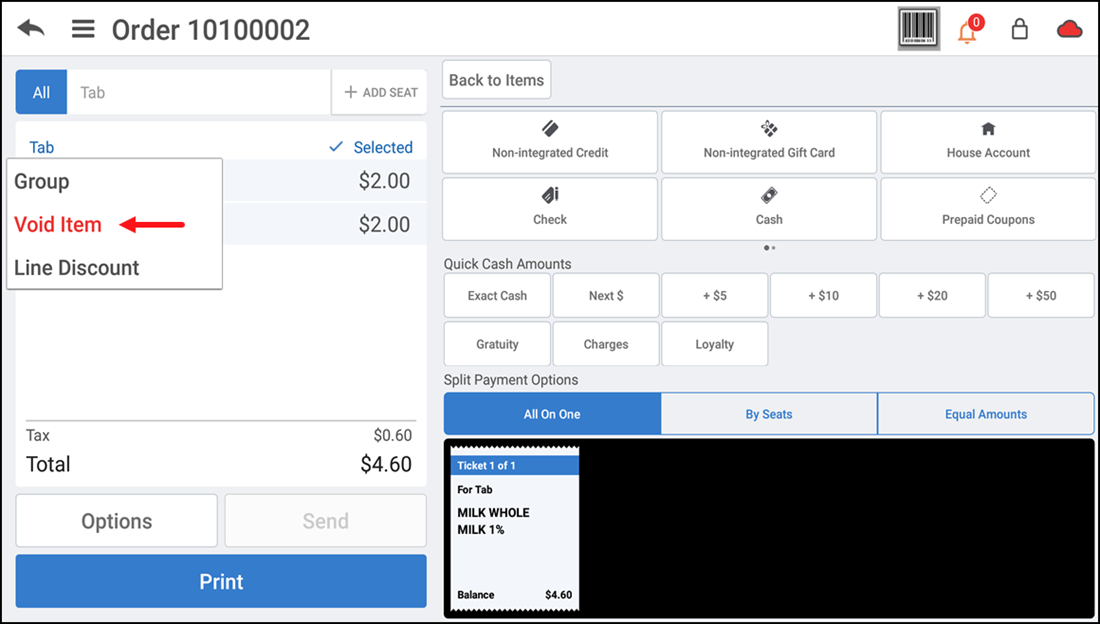
Swipe the required item in the ticket entry screen for the options to display.
-
Tap Group.
The similar items are grouped together.
-
Tap Ungroup to seperate the same items again in the ticket entry screen.
Note: Aloha Cloud POS restricts grouping/ungrouping items for a split payment from the payment screen.
Changing the quantity of an item
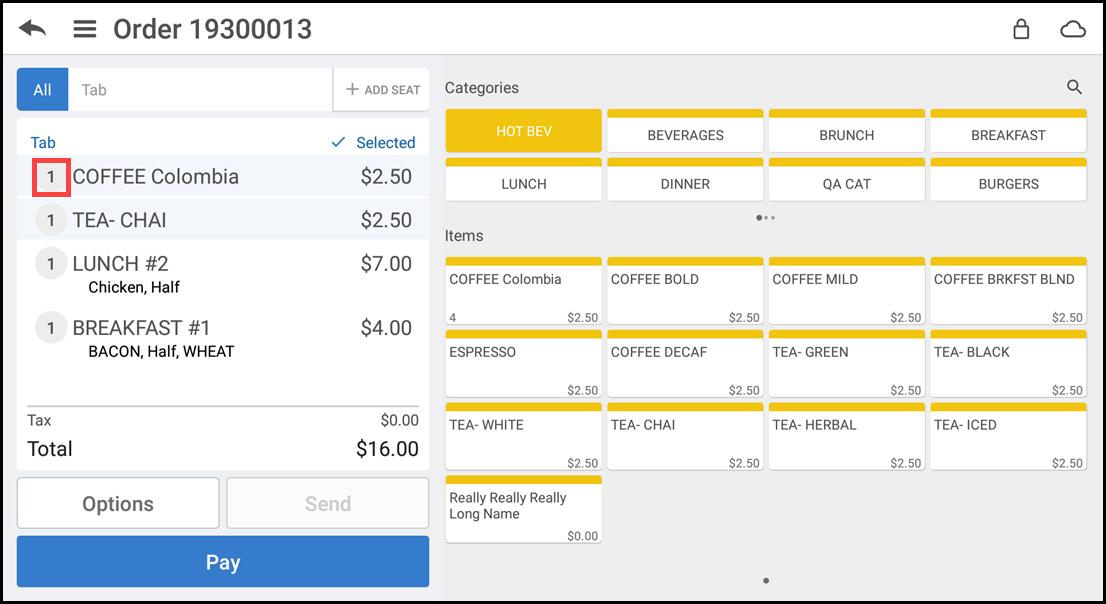
- In the guest check, tap the quantity to the left of the item description.
- A numeric keypad appears.
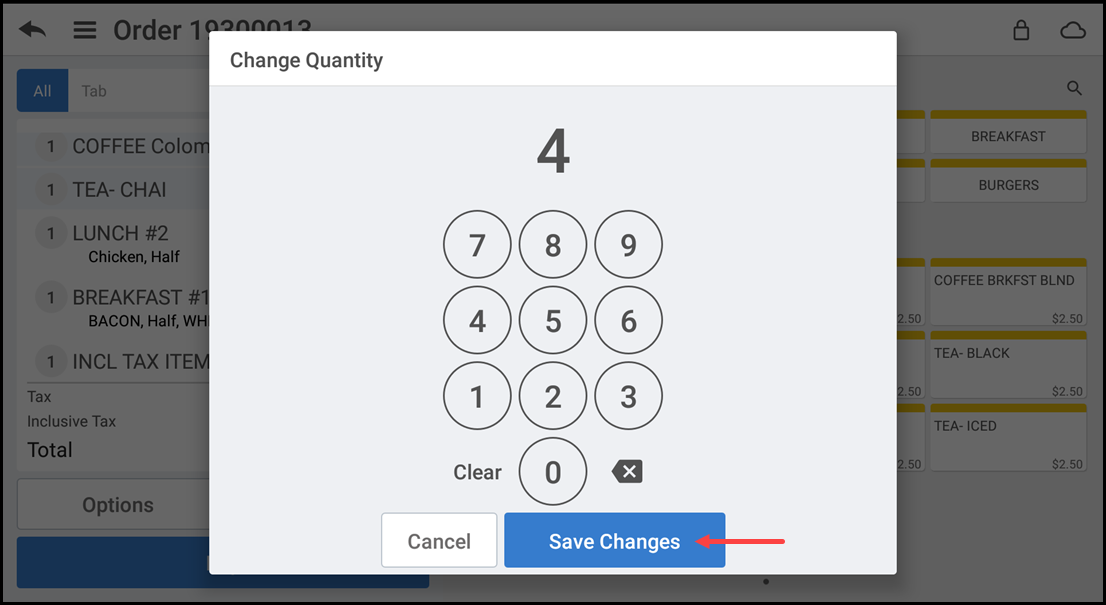
- Enter the new quantity for the item.
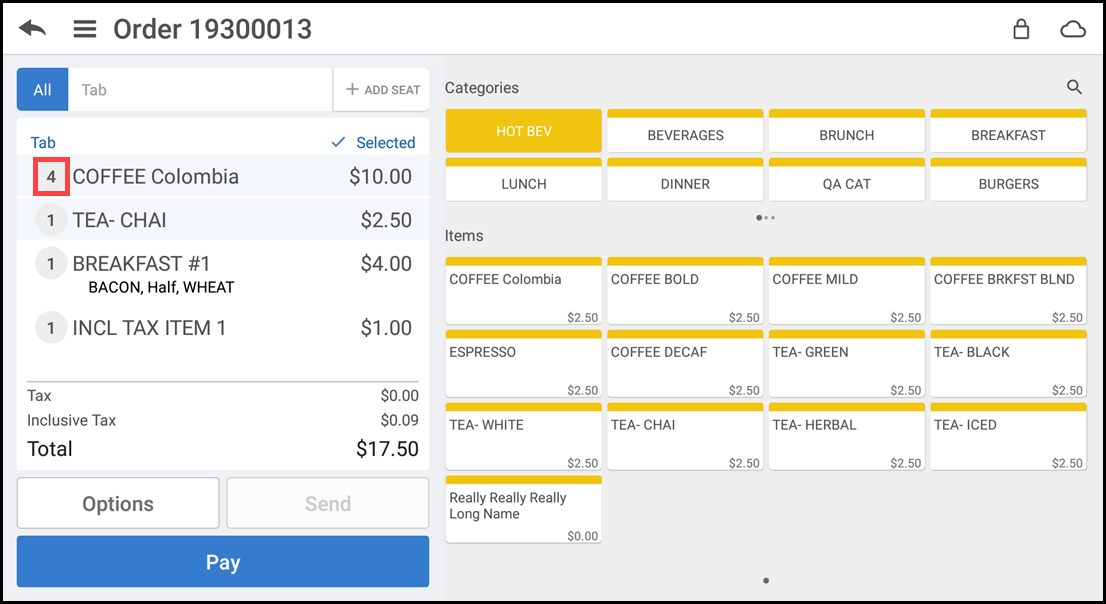
- Tap Save Changes. The quantity is added to the item.
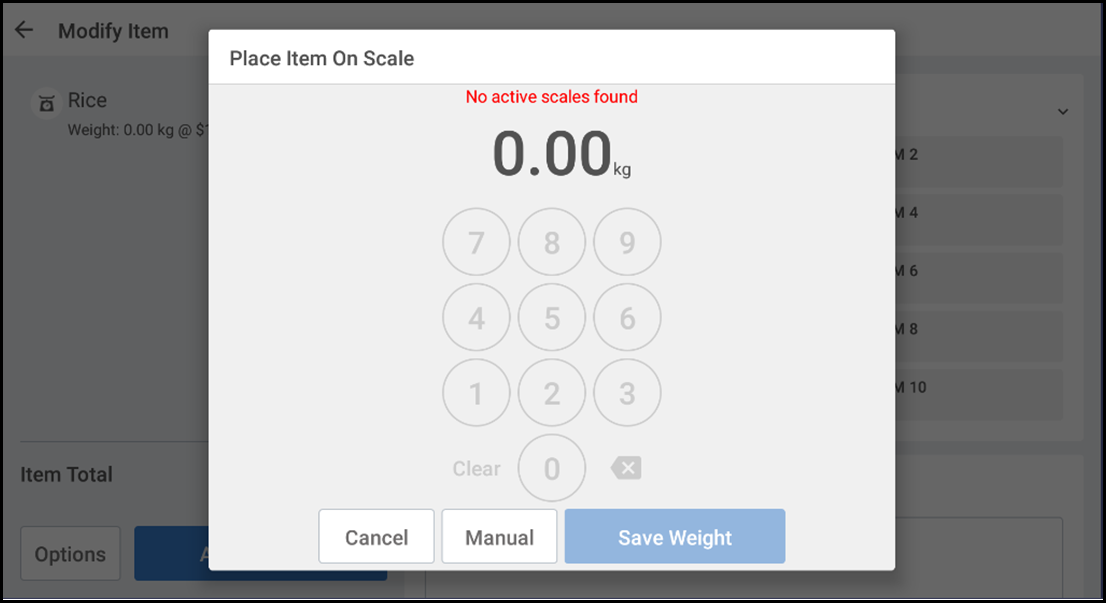
Selling items by weight using a scale
The scale must be set up ahead of time. Contact your customer care representative to get help with setting up your scale. Once you select an item on the POS and place the item on the scale, the scale sends the weight of the item to the POS. If necessary, you may reweigh the item or enter a manual weight for the item.
If you need to delete a weighed item, swipe the item to the left, a popup appears, and tap Delete.
If the item for sale is set to a different weight measurement than the scale, the POS converts the measurement to the correct weight and quantity on the POS.
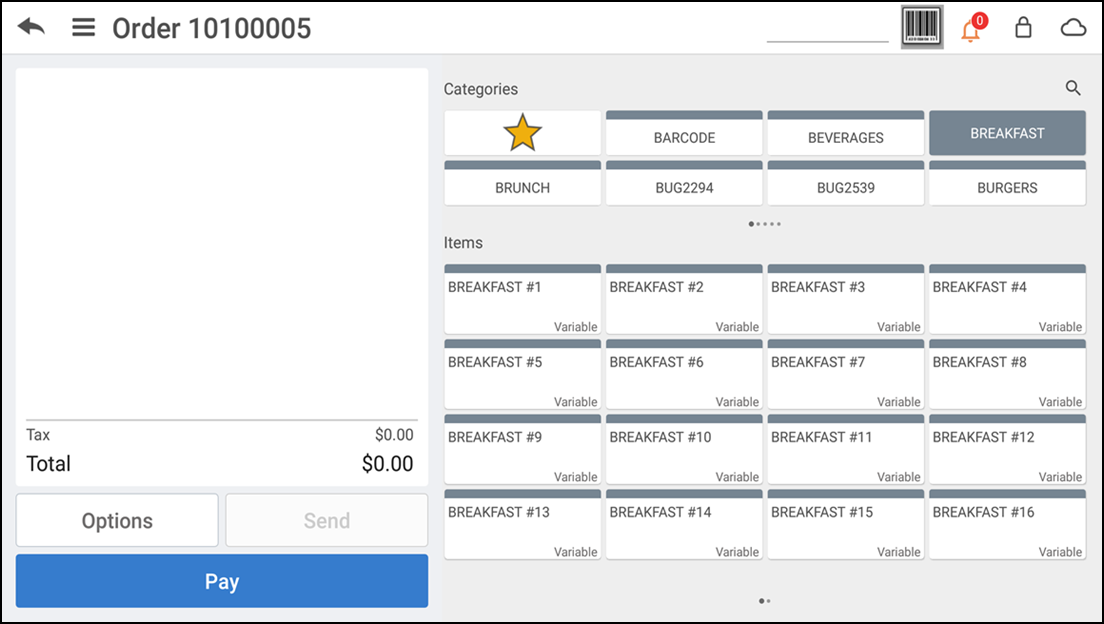
To add an item sold by weight to the guest check:
-
At the guest check screen, select the item. The quantity screen appears and the quantity amount appears as 0.00. To the right of the item name is the tare weight of the item.
-
Place the item on the scale. The scale sends the data to the POS. The Quantity amount is the actual weighed amount.
-
Tap Done. Once you tap Done, the POS adds the item to the guest check. The quantity that appears on the POS is the net weight (gross weight minus the tare weight).
If after receiving a weighed quantity from the scale AND prior to tapping Done, you add or remove more of the same item from the scale, the scale recalculates and send the updated weight to the POS.
If you tap Done and need to reweigh the item, delete the item from the guest check, select the item again, and place the item on the scale.
The final weight is listed as the quantity to the left of the item.
-
Continue the transaction as normal.
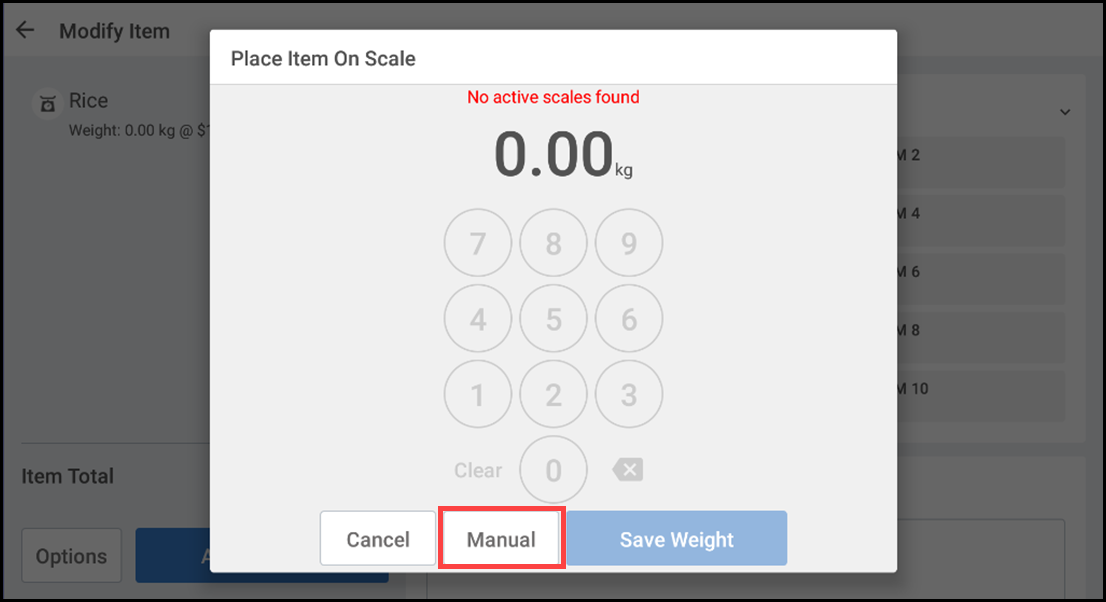
To enter a manual amount for the item sold by weight:
In some instances, you may decide to enter a manual weight for the item.
-
At the Quantity screen, after the POS receives the data from the scale, tap Manual.
If your user role does not contain the permission to enter a manual weight for an item, the supervisor' s approval screen appears.
-
Type the new amount.
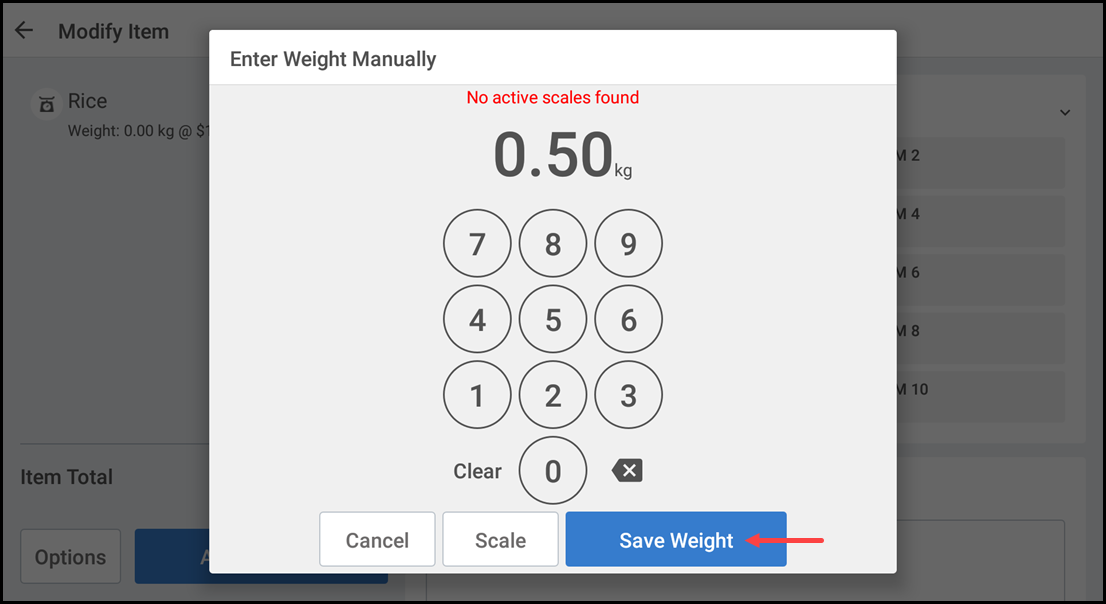
-
Tap Save Weight. The POS adds the item to the guest check and the weight of the item is listed as the quantity to the left of the item.
Note: You can also override the weight of the item by increasing or decreasing the item quantity at the order entry screen.
-
Continue the transaction as normal.
Linking barcode to an item
When you scan an item and, if the barcode is not found (not added at the Back Office), you can link the barcode to the existing item.
-
Log in to the POS. The ticket entry screen appears.
-
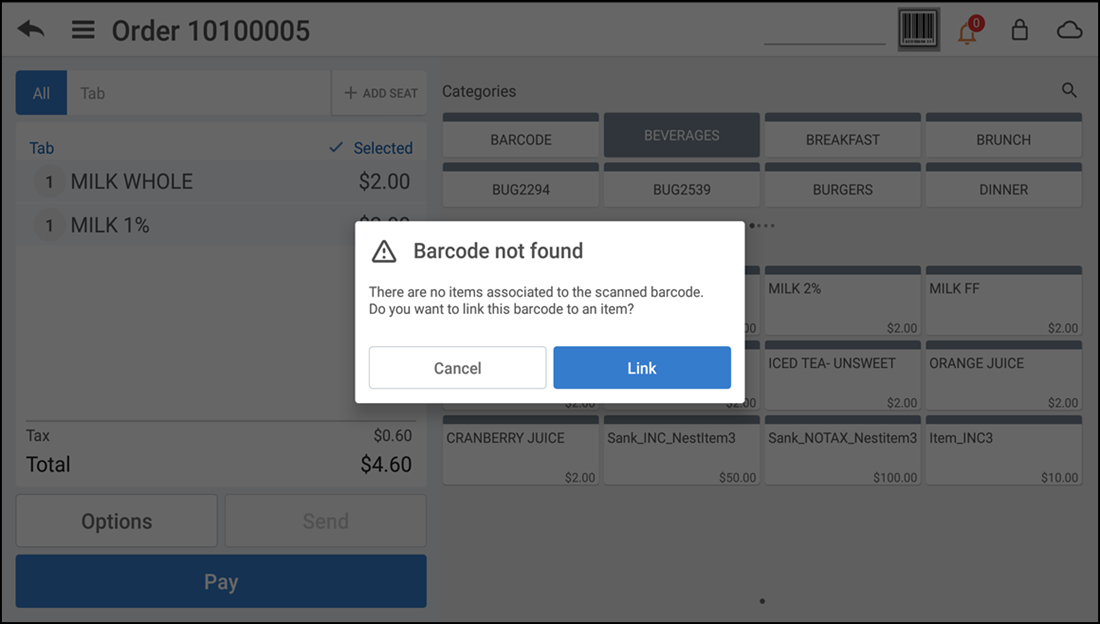
Scan the item barcode using a barcode scanner. This adds the item to the ticket, if the item barcode is available in Back Office.
Or else, the Barcode Not Found screen appears.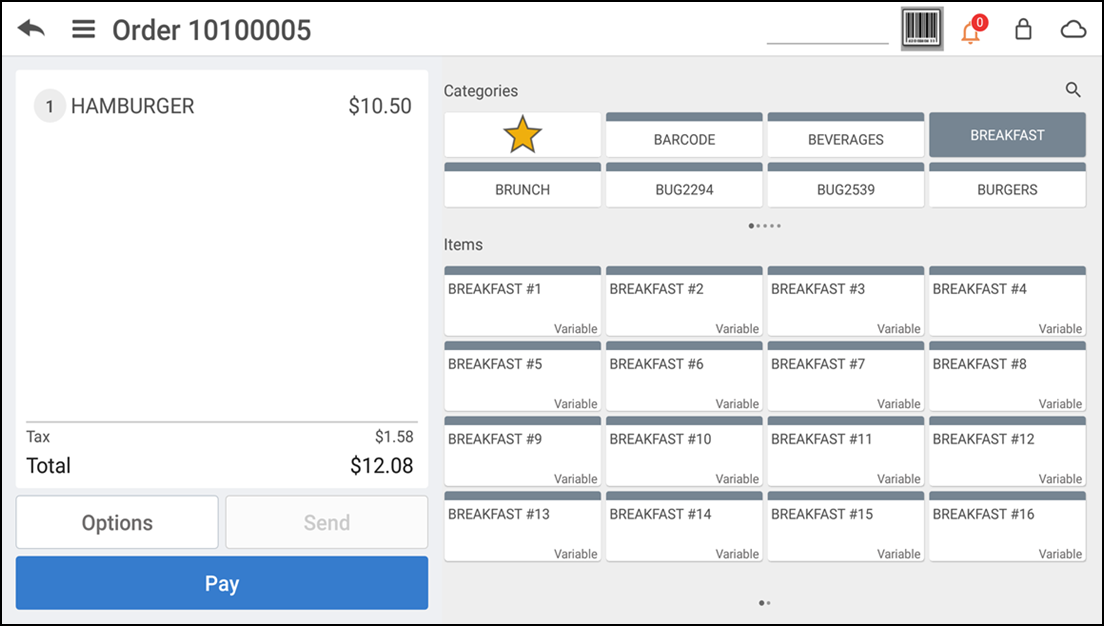
-
Tap Link to link the barcode to an existing item. The Link barcode screen appears.
-
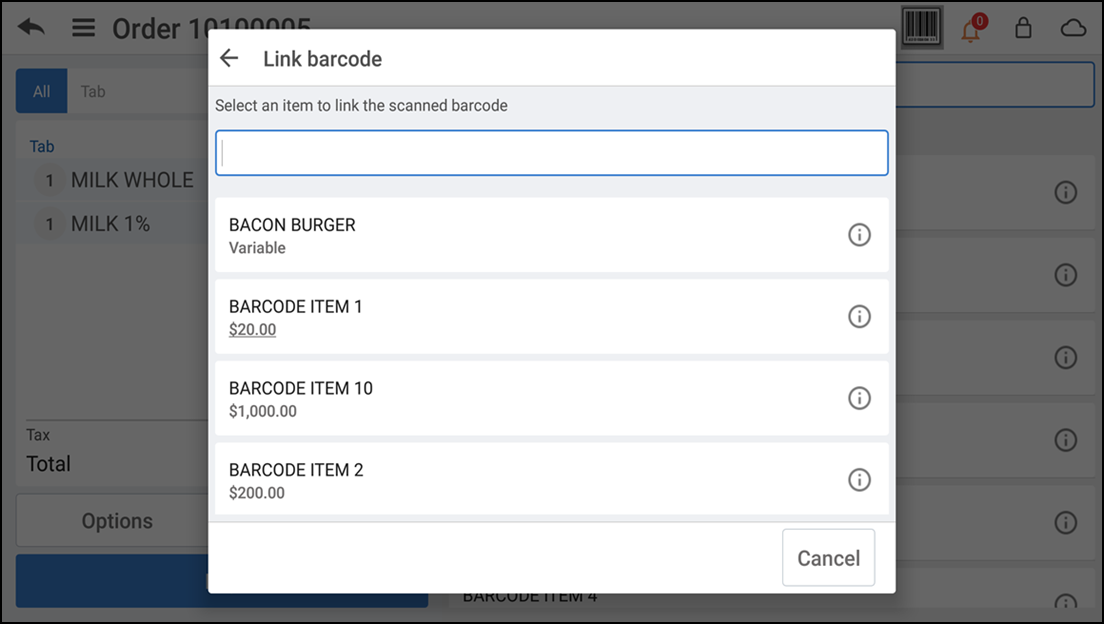
Search and tap the item to link the scanned bar code.
-
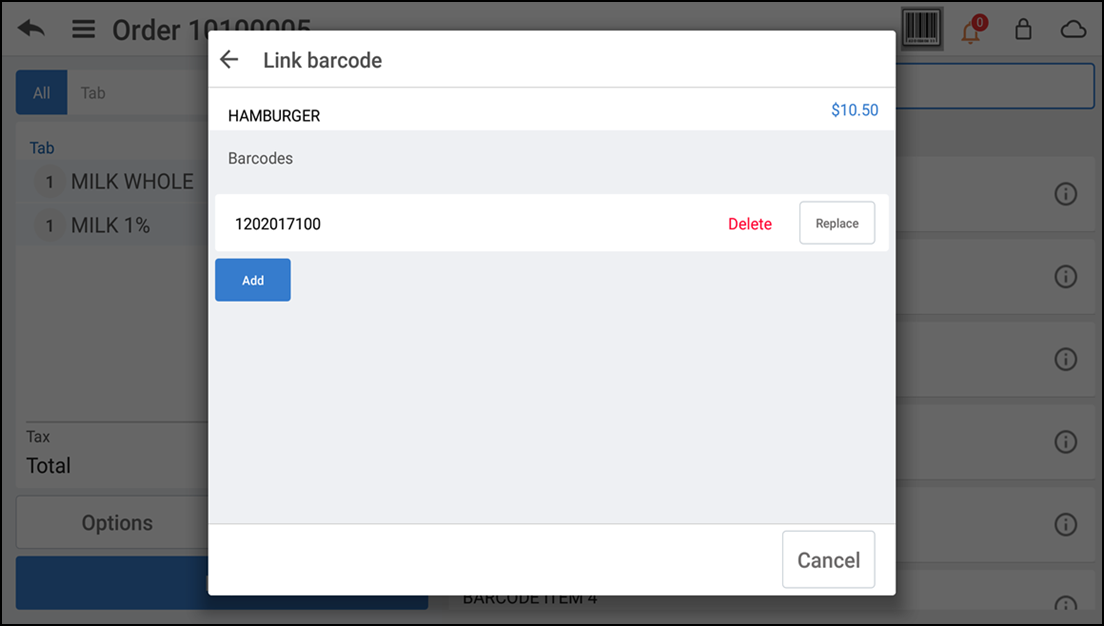
Tap Add to associate the scanned bar code with the item you selected.
You can associate a maximum of four barcodes to an item.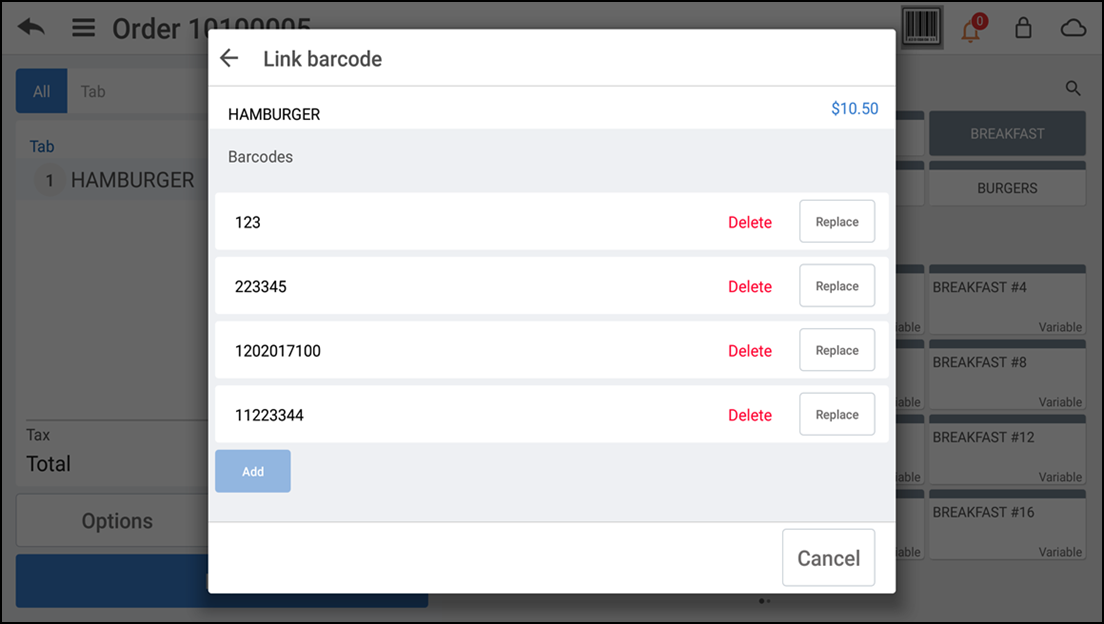
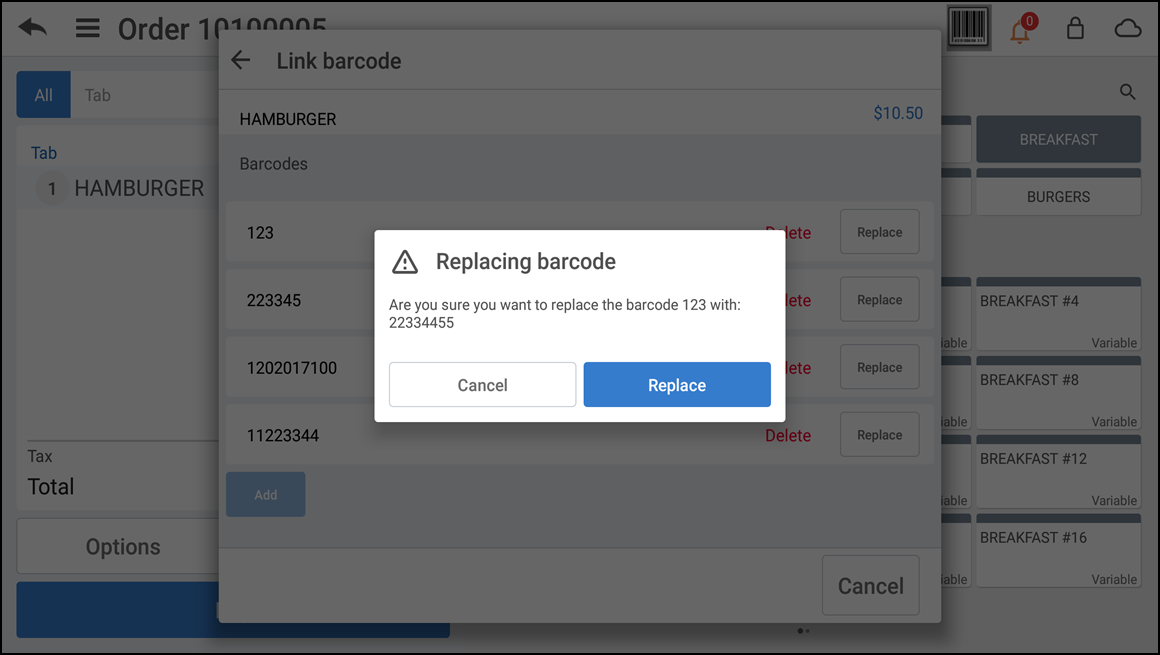
Note: You are allowed to replace the existing barcode of the selected item with a different barcode.
Note: Items added from a POS device are automatically updated to the Back Office and are available for sale on all other POS devices; however, you need to access the Back Office and update this item with additional information; such as vendor, cost, quantity on hand, and more.
Looking for resources or help with Silver? Click here.