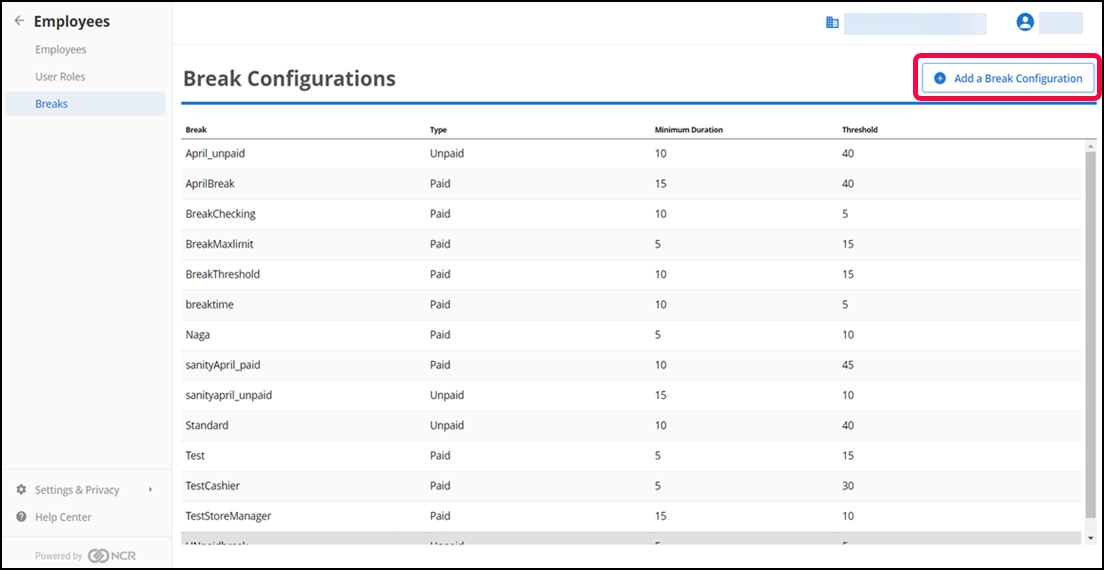
Configuring breaks
Use Employees > Breaks to configure breaks in Back Office. If configured, you are allowed to take a break with active tabs/tables and other employees may assist with an order without taking financial ownership of the ticket. Additionally, you must enable the user role permission 'Break with Active Tables' in Back Office.
Using this function, you can configure breaks to allow employees to receive pay while they are on a break by choosing the appropriate break option. Additionally, you are required to enable the user role permission 'Approve Early Break Return' in Back Office.
To configure breaks:
-
Log in to Back Office using Company View (All Stores), or select a specific store to add an employee at the site level.
-
Select Employees > Breaks.
-
Click Add a Break Configuration.
The Add Break Configuration screen appears.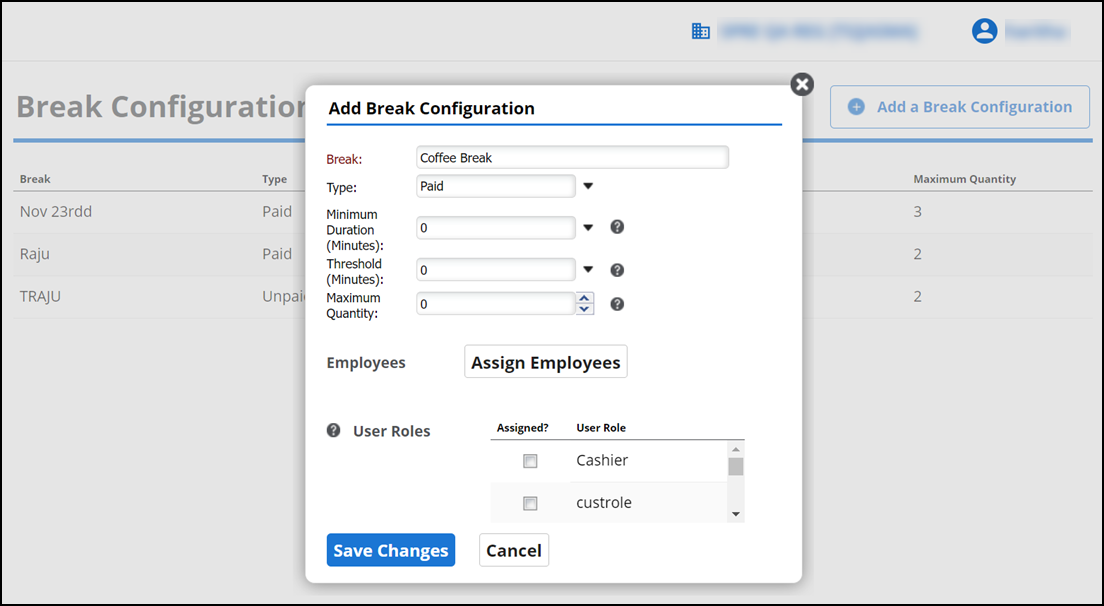
-
Enter a unique break name for easy identification.
-
Select the break type from the type drop-down list. The available break types are: Paid and Unpaid.
-
Select the minimum duration (in minutes) for which the employee is allowed to take a break.
Note: When an employee attempts to end the break before the configured minimum time, an error message appears on the POS preventing the employee from ending the break. A supervisor must approve the early return to continue.
-
Select threshold level (in minutes). This defines the minimum time the employee must work before taking a break.
-
Select the number of times that an employee is allowed to take a break in a shift, from the maximum quantity drop-down list.
-
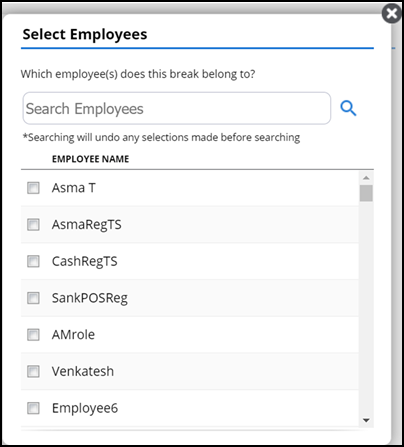
(Optional) Click Assign Employees. The Select Employees screen appears.
-
Select the employees for which to make the break available for use.
-
(Optional) In User Roles, select Assigned next to each user role type (such as cashier, manager) for whom to make the break available for use.
Note: If you assign a break to a specific employee and to a user role under which the employee logs in, the break configuration for the user role takes precedence.
-
Click Save Changes to confirm.