Managing teams
You must first assign employees to a shift or check team before the system can automatically perform sales and tip distribution for checks owned by the team. Typically, the a.m. manager and the p.m. manager create shift teams made up of employees who work an entire shift together, versus creating teams ahead of time for the entire day. A manager creates a check team when a group of employees work a single table, such as a large group where you combine one or more tables and assign two or more servers to work in cooperation with each other for the duration of the check. An employee must start the check before a manager can create the check team.
An employee must have order entry capability to be eligible for assignment to a team and the employee must be either scheduled to work or already on the clock. The function you use to create teams is only available on the FOH. Once you create a team, the system offers the flexibility of adding or removing employees from the team, as needed. Once every employee on a team clocks out, the system automatically removes the team.
Creating a shift or check team
For the system to automatically perform the sales and tip distribution, you must first create your daily shift or check teams. Create a shift team if you have a team of bartenders or servers for which you need to distribute all checks opened by one of the team members to all members of the team. Create a check team, if you have several employees servicing a large party and the employees also have their own individual tables.
-
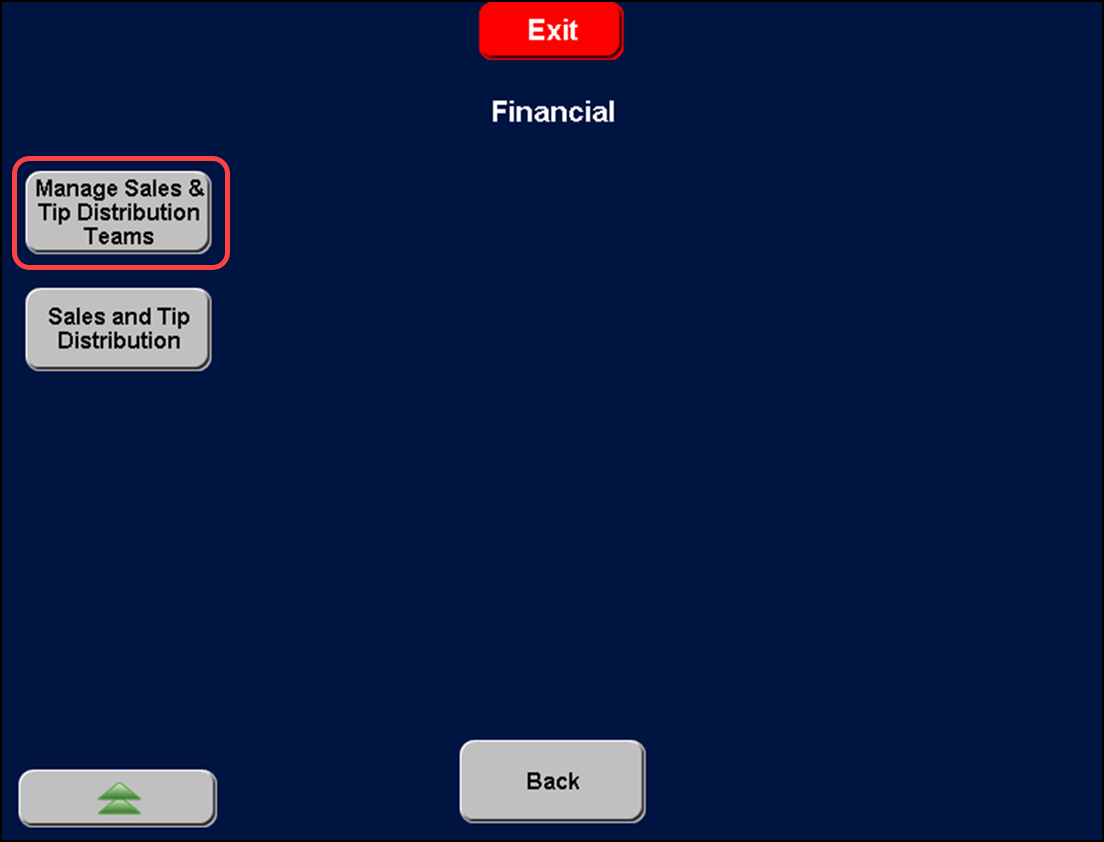
Using the FOH terminal, touch Functions > Special Functions > Financial to access the first page of the Financial screen and then touch the double down arrows to access the second page.
-
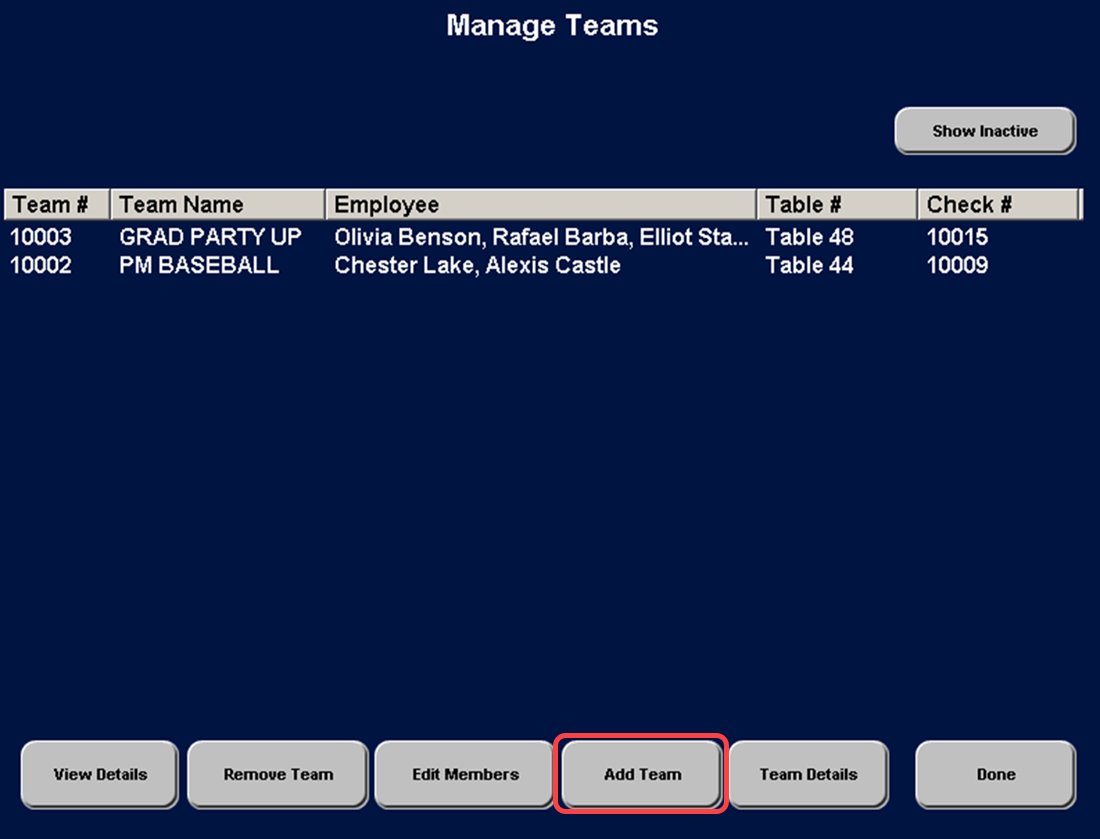
Touch Manage Sales & Tip Distribution Teams. If no teams exist, the screen is blank. If there are existing teams, the screen lists all of the shift and check teams available.
-
Touch Add Team. The Enter Name for Team screen appears.
-
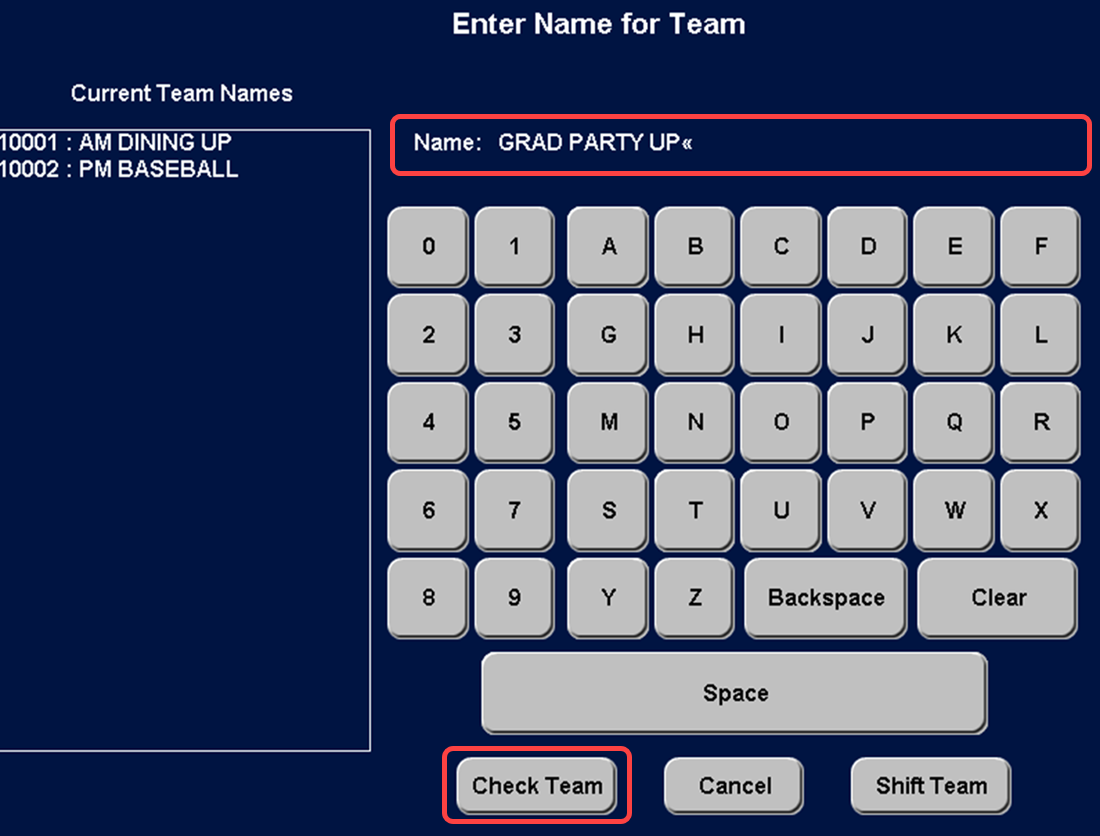
Enter a team name, up to 15 characters, including spaces. For example, for a check team working a graduation party using the upstairs bar and dining area, type 'Grad Party Up.'
Tip: You must enter a name; the name cannot be left blank. Also, duplicate team names are not allowed.
The system assigns a unique five-digit number to the team.
-
Touch Shift Team or Check Team to determine the type of team you are creating.
If you want to create a team of bartenders or servers where you need to distribute all checks opened by one of the team members to all members of the team, touch Shift Team. The Edit Members screen appears. Continue to step 7.
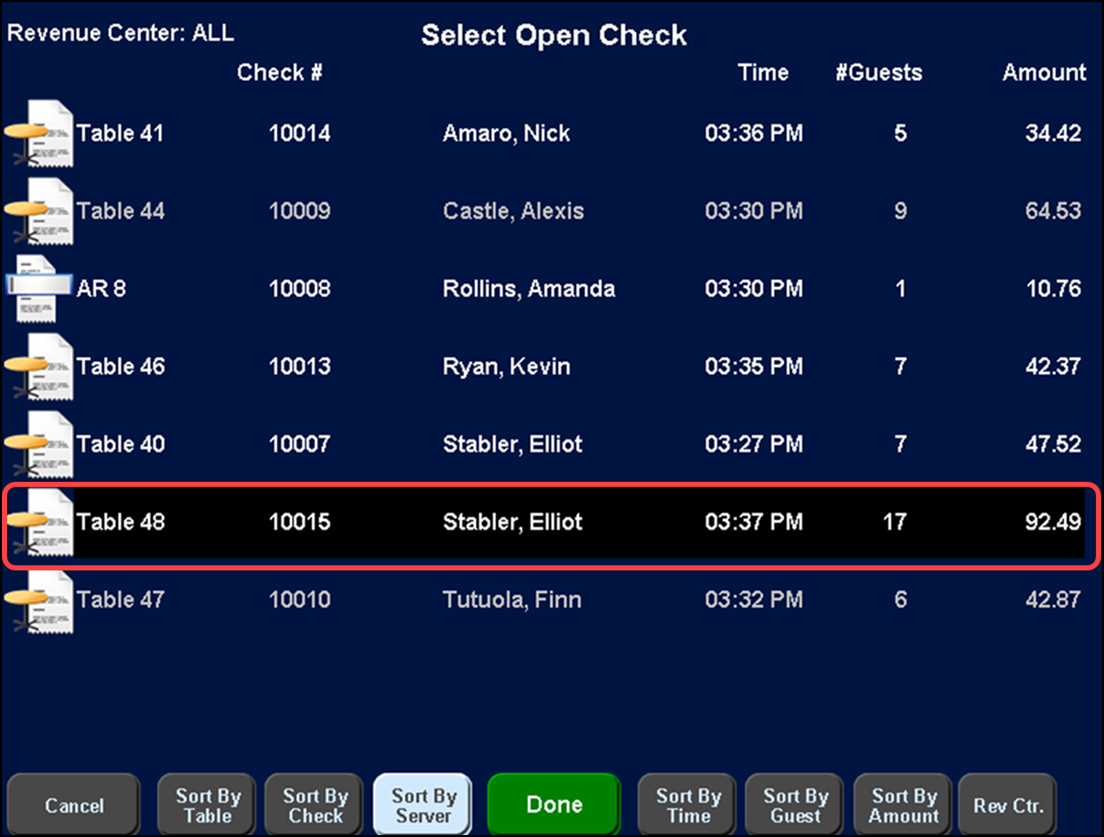
If you have several employees servicing a large party and the employees also have their own individual tables, touch Check Team. The Select Open Check screen appears listing checks not already assigned to a shift or check team.
-
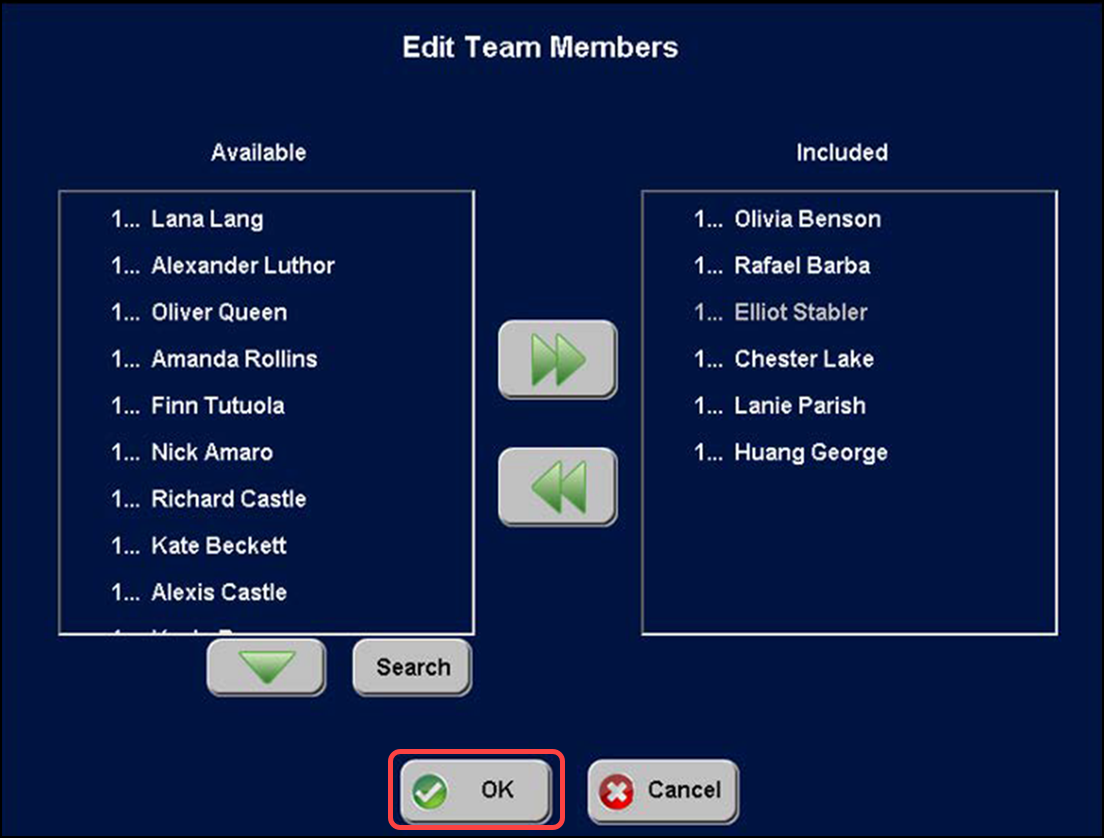
Touch one or more open checks and then touch Done. If you select a check that is part of a table with multiple split checks, the system assigns all checks to the team. The Edit Team Members screen appears.
-
Touch the employee names in 'Available' and then touch >> to move the employees to 'Included.' You can select multiple employee names at a time.
Whether creating a shift or check team, the employees appear in 'Available' if (1) the employee has order entry capability and they are clocked in to the system, or, (2) the employee is scheduled to work today using either the basic labor scheduler available in the Aloha POS system or Back Office (NBO), and (3) the employee is not currently assigned to a shift or check team. You cannot add an employee to the team if the employee is already assigned to another team; you must remove the employee from the first team prior to adding the employee to the new team.
-
Touch OK to save the team and return to the Manage Teams screen.
-
Touch Done to exit the Manage Teams screen.
-
Touch Exit to exit the Financial screen.
-
Touch Exit to return to the Main Menu screen.
Tip: You must create teams as they are needed, per shift. If an employee will be on two teams, such as an AM team and PM team, in one day, you must remove the employee from the first (AM) team prior to assigning to the second (PM) team.
Editing or removing a shift or check team
You can add or remove an employee from a team based on your changing business needs. You can also remove a team completely, if needed.
-
Using the FOH terminal, touch Functions > Special Functions > Financial to access the first page of the Financial screen and then touch the double down arrows to access the second page.
-
Touch Manage Sales & Tip Distribution Teams.
-
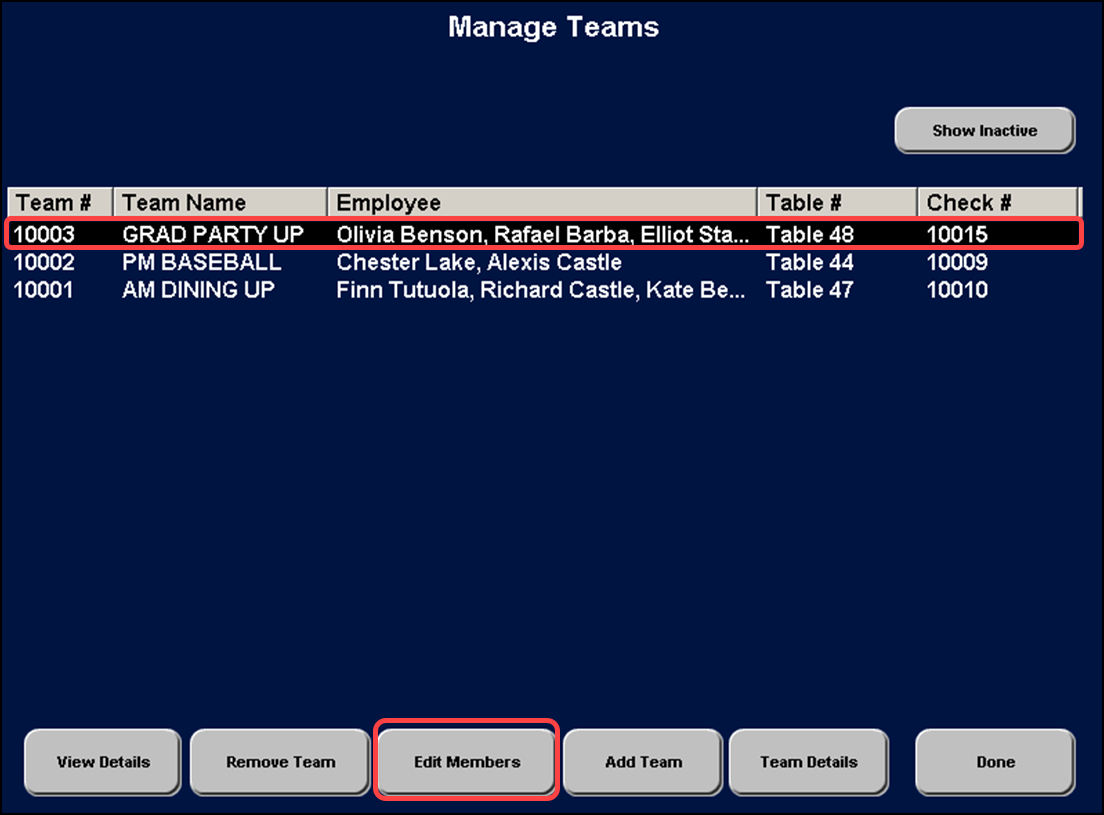
Touch the team name in the list. To add or remove an employee, continue to step 4. To delete the team, continue to step 8.
-
Touch Edit Members. The Edit Team Members screen appears.
-
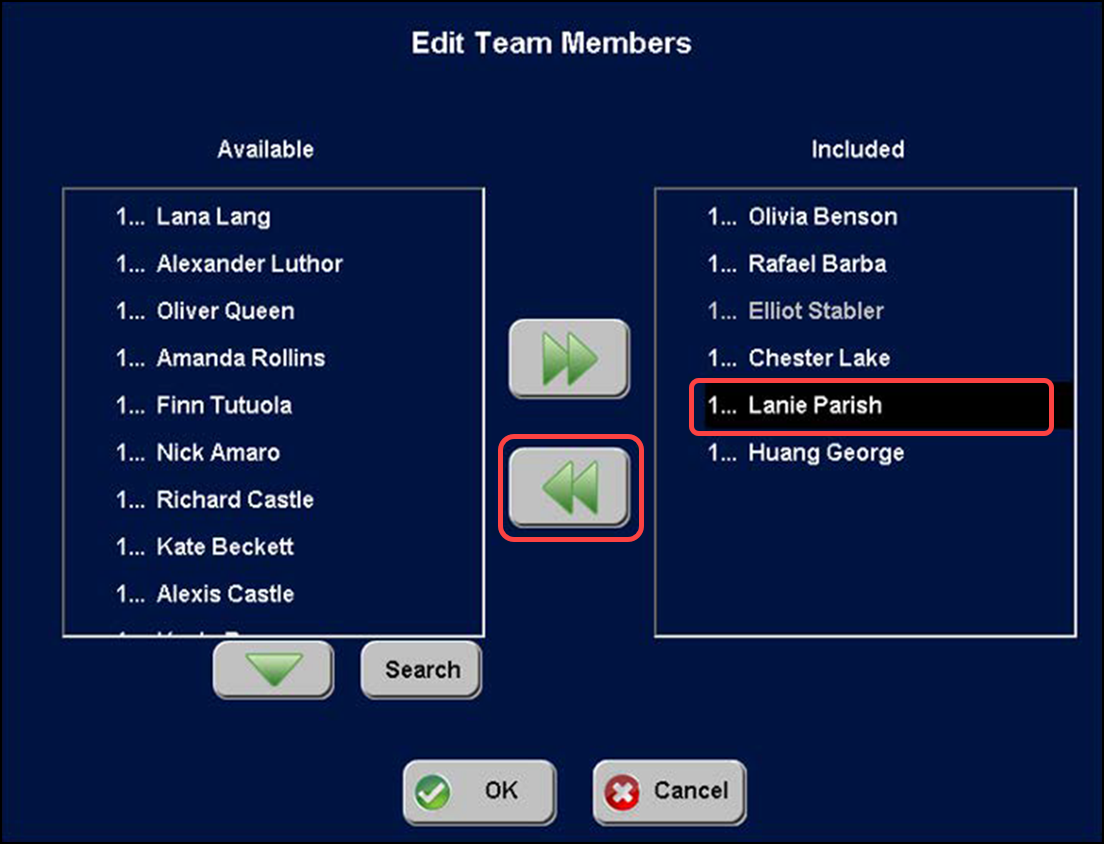
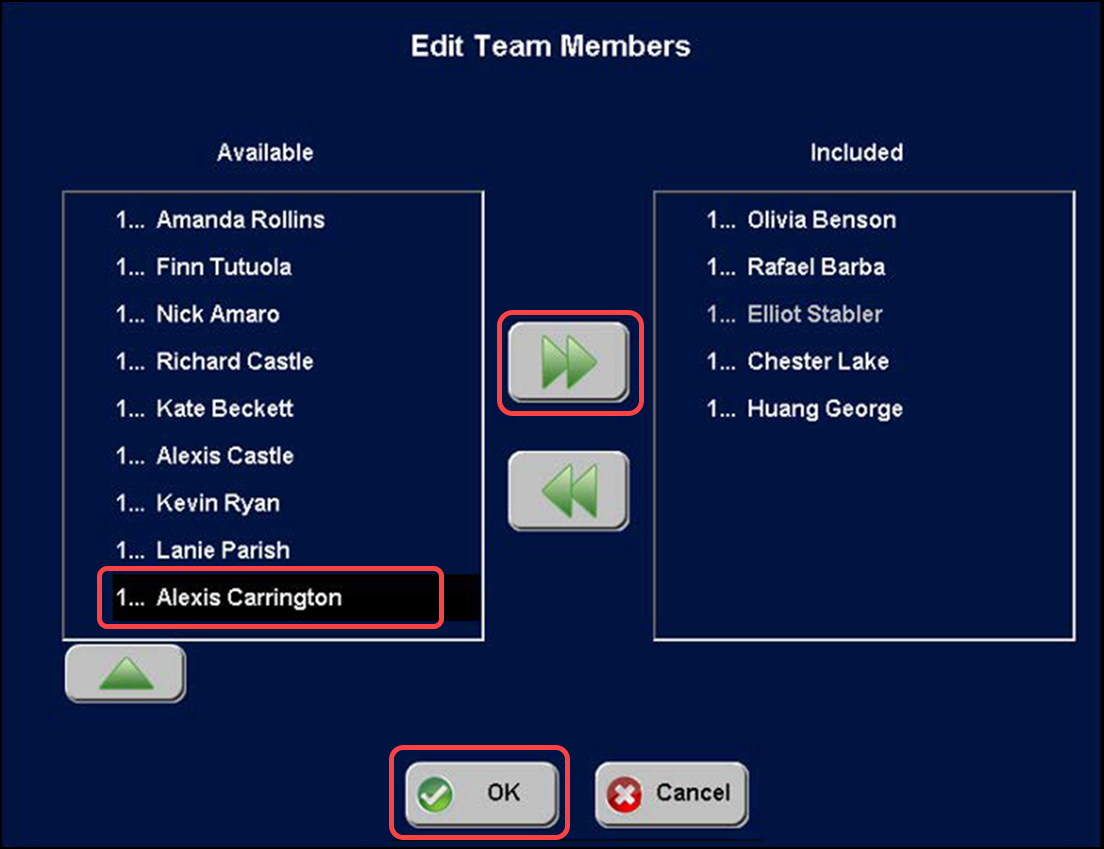
Touch the employee name to remove in the 'Included' list box and then touch << to move the employee to the 'Available' list box.
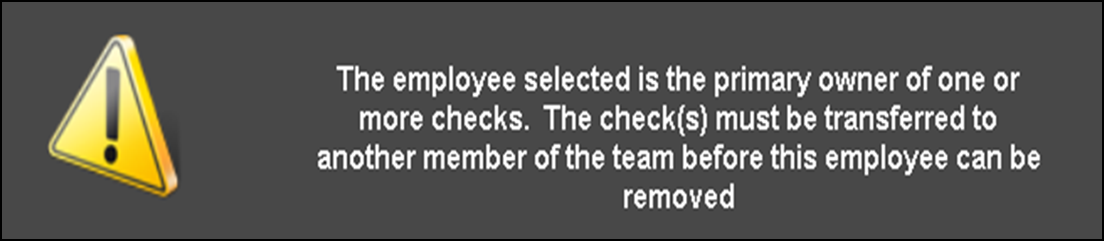
If the employee is the financial owner of the check, an error message appears, 'The employee selected is the primary owner of one of more checks. The check(s) must be transferred to another member of the team before this employee can be removed.'
If the employee is not the financial owner of the check, the system automatically removes the employee from the team. The employee keeps their portion of the sales up to the time they are removed from the team, and will not share in the distribution of any new checks started by the team from this point forward.
-
To add an employee to the team, touch the employee name in the 'Available' list box and then touch >> to move the employee to the 'Included' list box.
-
Touch OK to save the changes to the team and return to the Manage Teams screen. Continue to step 10.
-
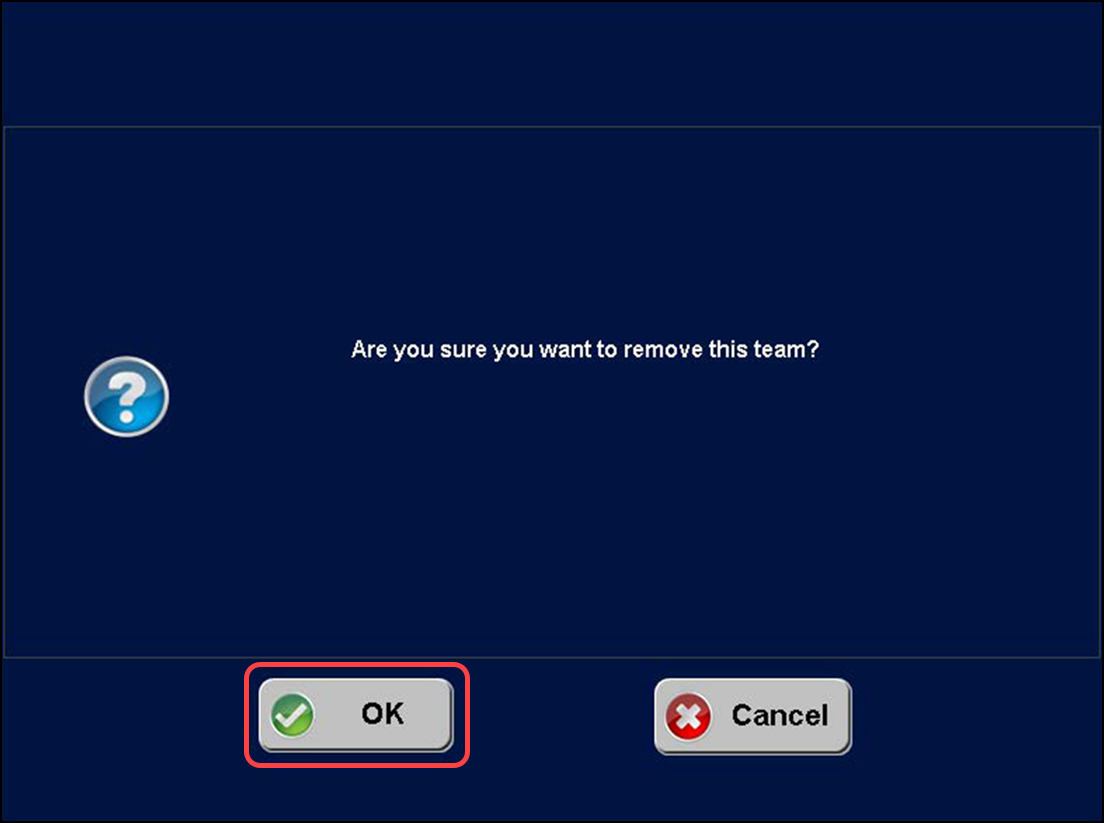
Touch Remove Team to delete the team. A confirmation message appears.
-
Touch OK to approve the removal of the team.
The team no longer appears on the Manage Teams screen.
-
Touch Done to exit the Manage Teams screen.
-
Touch Exit to exit the Financial screen.
-
Touch Exit to return to the Main Menu screen.
Viewing the details of a team
During a shift change, as the new manager coming on duty, you may want to review which employees are assigned to a particular team, particularly if a large party is seated, and to get an idea of the status of each active team.The system provides two buttons that allow you to view details. regarding your teams. You can choose to view a single team, or get a snapshot view of all active teams.
-
Using the FOH terminal, touch Functions > Special Functions > Financial to access the first page of the Financial screen and then touch the double down arrows to access the second page.
-
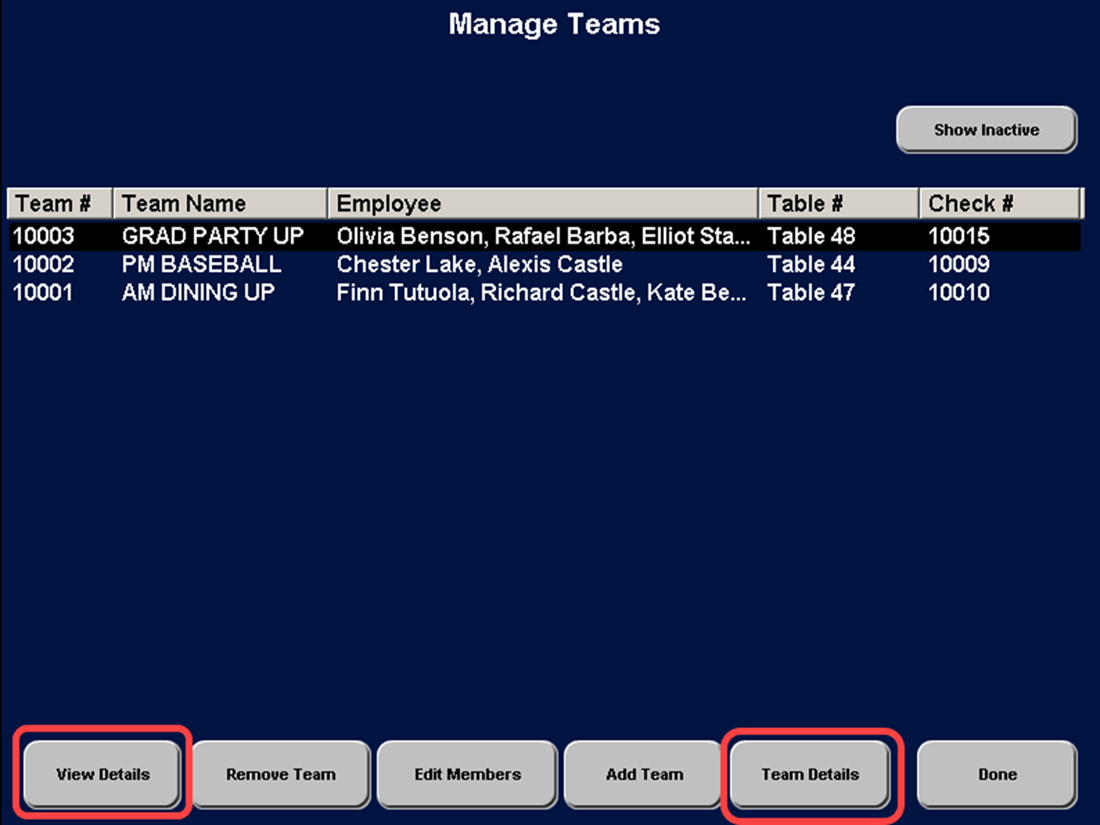
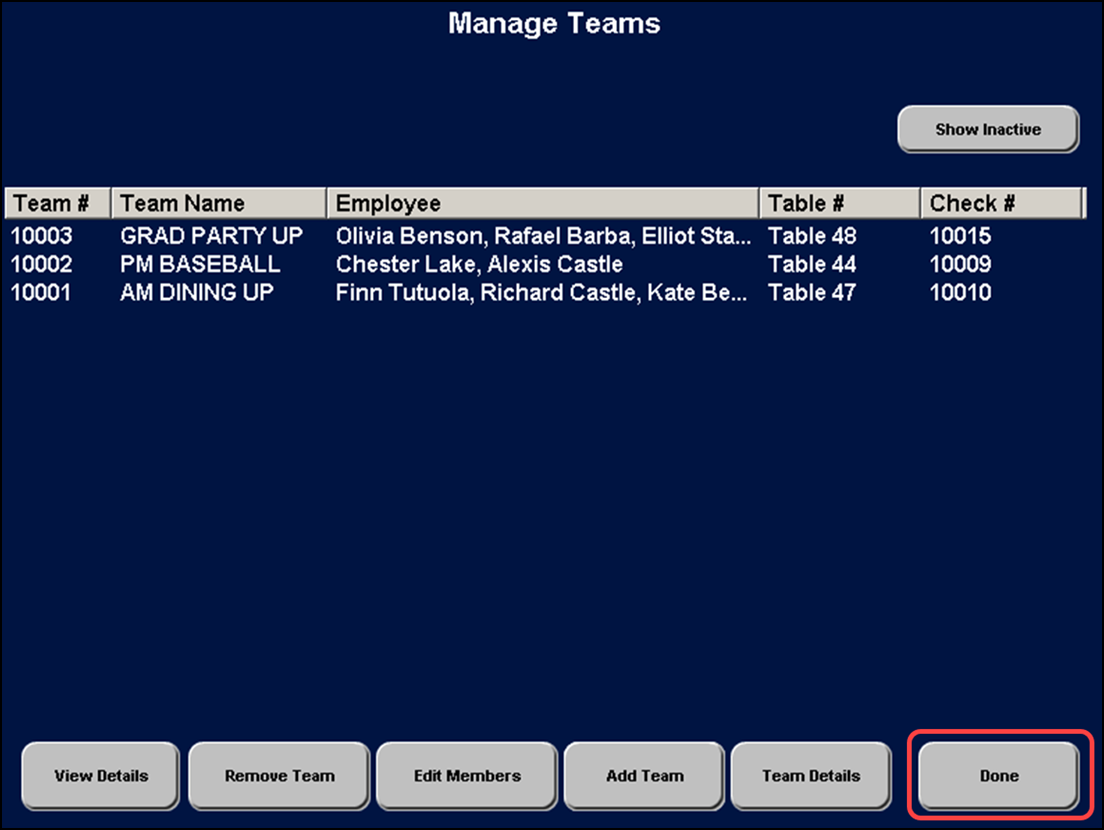
Touch Manage Sales & Tip Distribution Teams. The Manage Teams screen appears.
-
To get a snapshot view of all currently active teams, touch Team Details.
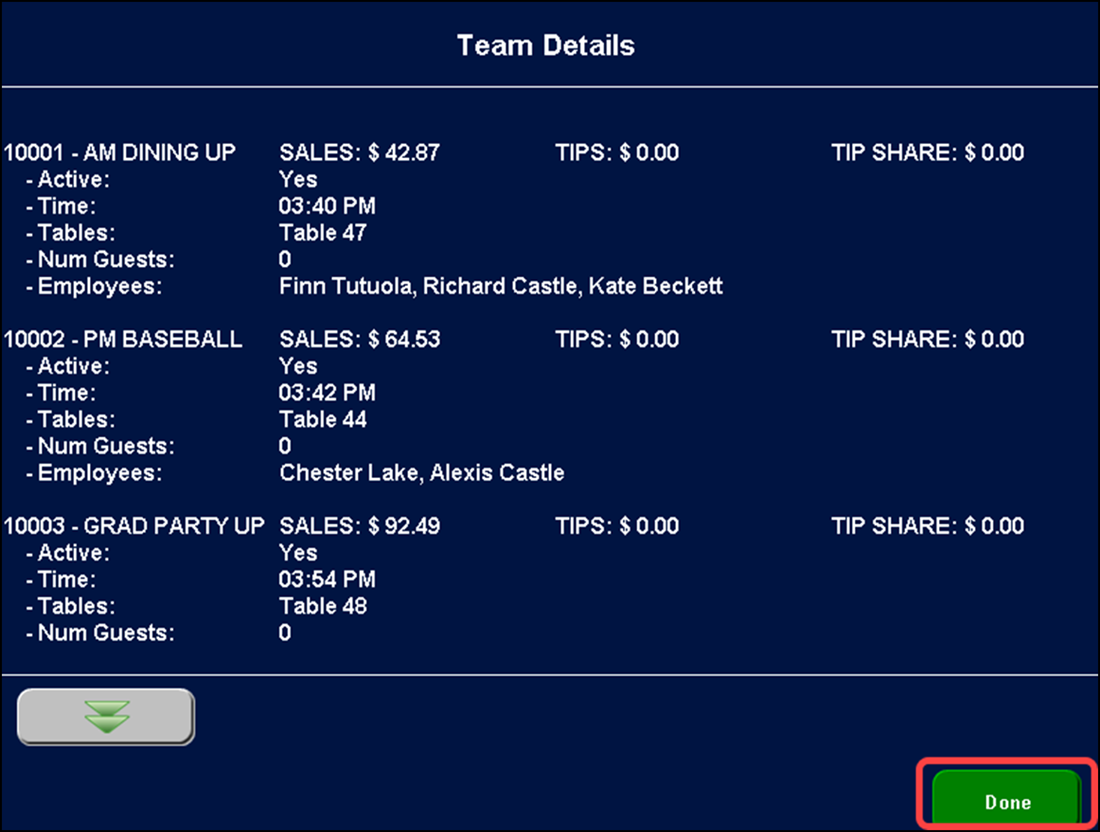
To view more teams, touch the double down arrows to view more teams and the double up arrows to return to the first team.
Touch Done to return to the Manage Teams screen.
-
To see the details about a specific team, touch the team name in the list, then touch View Details The system provides the team name, team number, the type of team, the list of employees assigned to the team, and the checks they are currently working.
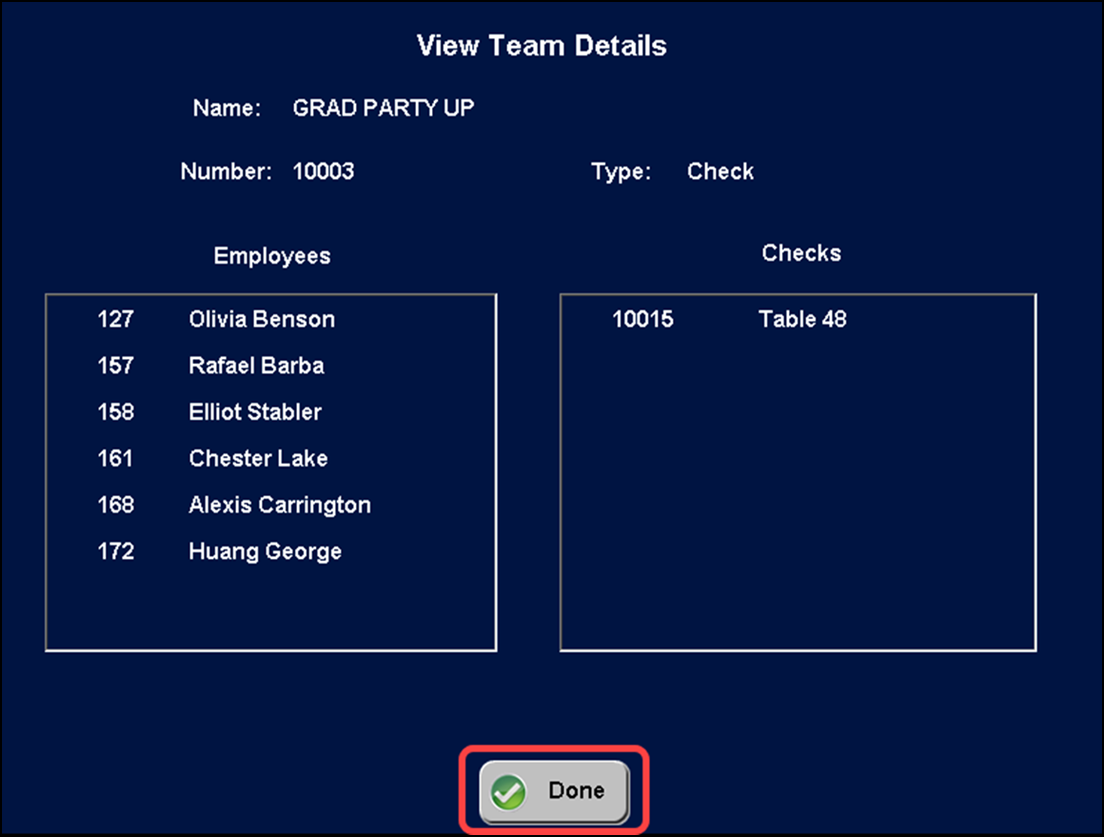
If the employee name appears in red font, this indicates that the employee clocked in under a job code for which the configuration of tip share does not match the other members of the team.
If an employee assigned to the team does not appear in the list, this indicates the employee is no longer on the clock.
Touch Done to return to the Financial screen.
-
Touch Exit to return to the Working with Tables screen.
-
Touch Exit to return to the floating logo screen.
Viewing an inactive team
The system offers you the ability to view teams whose checks are closed and whose members have all clocked out for the day, referred to as Inactive teams. This is helpful when reviewing the teams created for that business day. Any teams you remove from the system also appear when using this function.
-
Using the FOH terminal, touch Functions > Special Functions > Financial to access the first page of the Financial screen and then touch the double down arrows to access the second page.
-
Touch Manage Sales & Tip Distribution Teams. The Manage Teams screen appears.
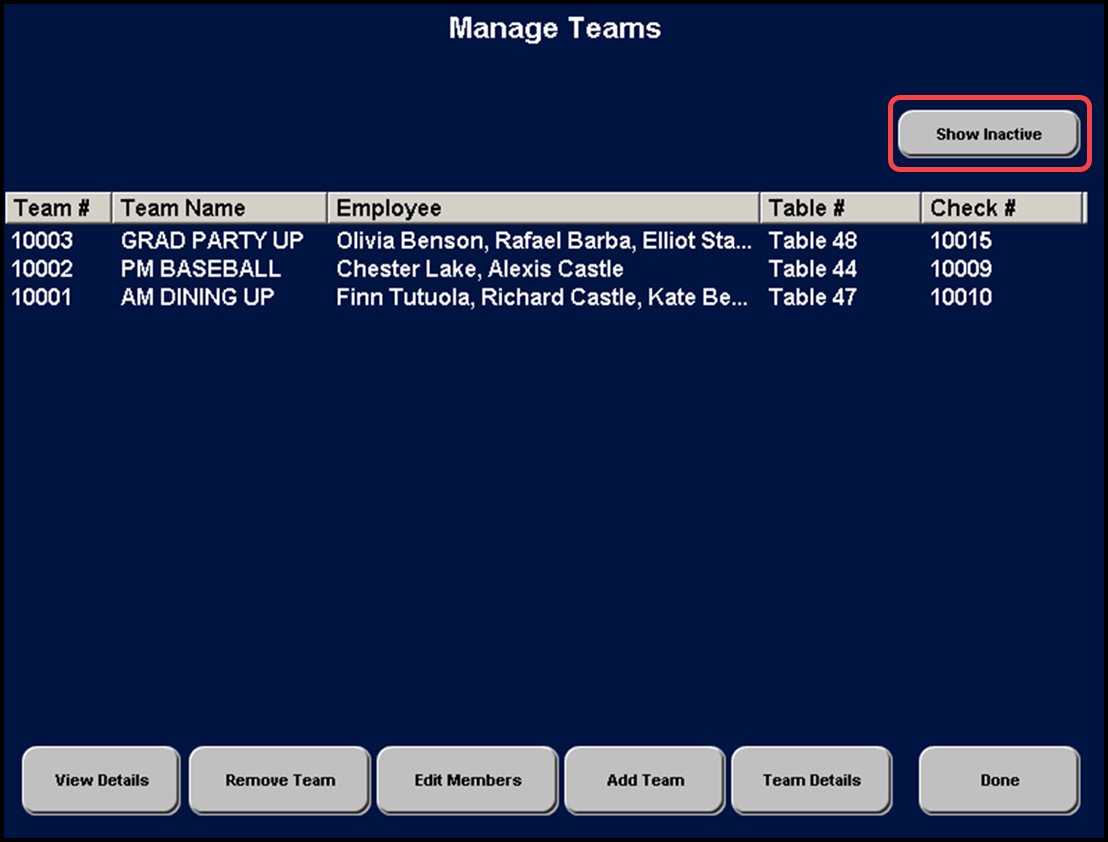
-
Touch Show Inactive. The Show Inactive button acts as a toggle, switching between the active and inactive teams.
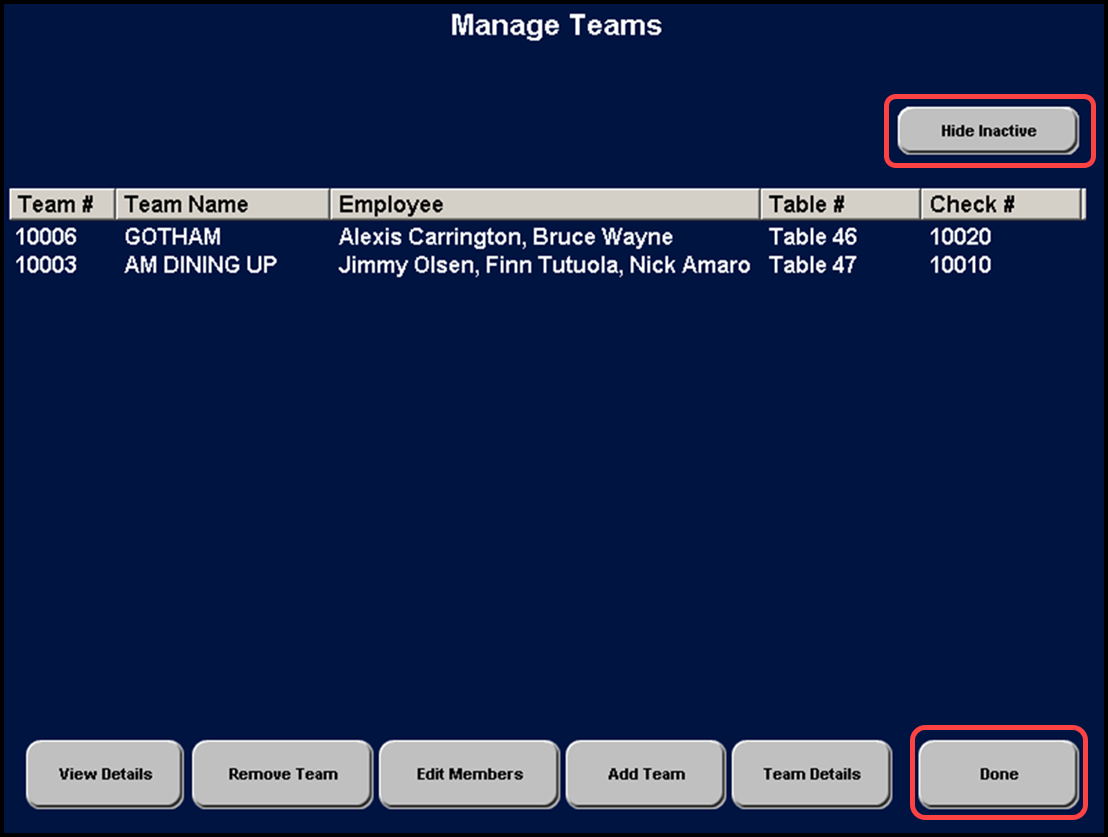
If inactive teams are available, they appear in the list on this screen. If there are no inactive teams, the list is blank.
-
Touch Hide Inactive to return to the active teams.
-
Touch Done to return to the Financial screen.
-
Touch Exit to return to the Working with Tables screen.
Continue to "Performing sales and tip distribution," or return to "Implementing Sales and Tip Distribution."