Context Panels
Core Product: Aloha Quick Service
Complimentary Products: No
Separate License Required? No
Other References: Aloha Quick Service Reference Guide, Aloha Quick Service Screen Designer Guide
View/Download/Print: Context Panels Feature Focus Guide - HKS346
About Context Panels
In the current Aloha® Quick Service environment, you must force either the 'classic' or 'system-generated' modifier screen to appear, when you add an item to the guest check, to allow guests to make additional selections for the item, or you can script the item button so that it chains to another panel from which you can make additional selections; however, both of these methods require you to respond to the screen prompts as they appear before you can continue entering the order, requiring you to interrupt the guest while they are ordering.
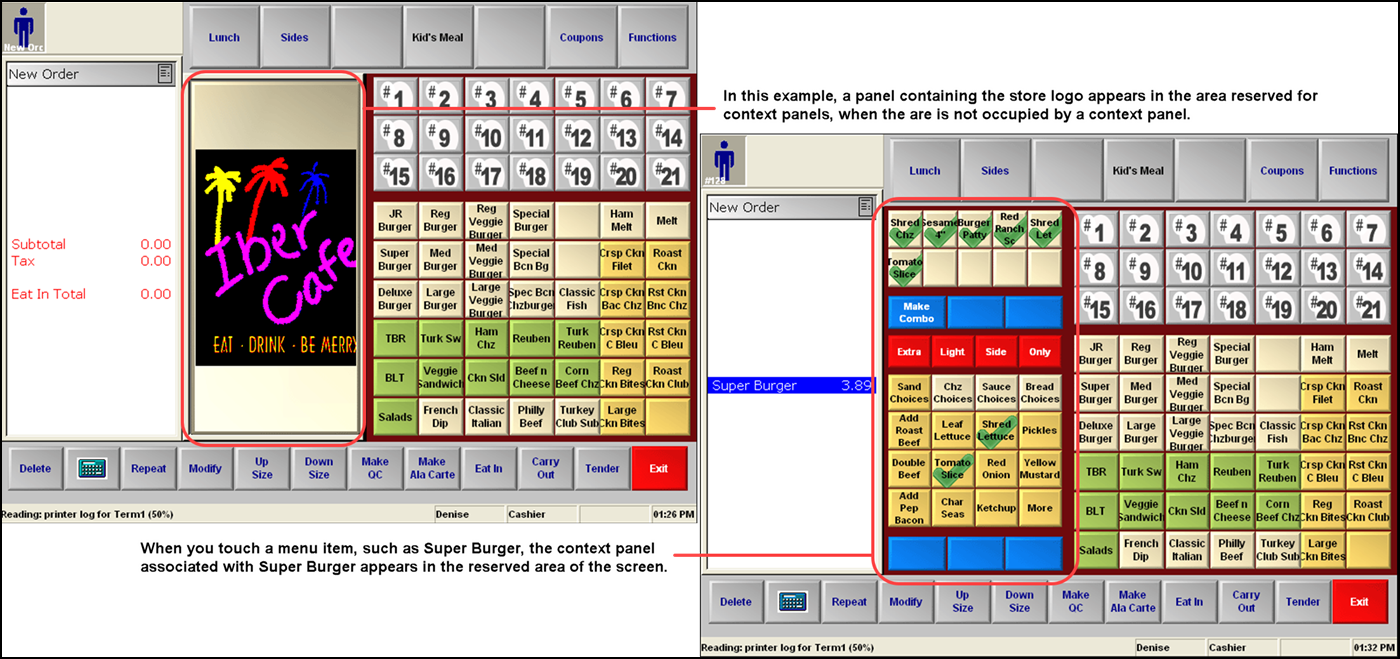
Aloha Quick Service v6.7 introduced a new concept called context panels, from which you can also make additional selections, but context panels appear on the screen at the time you add an item to the guest check, and again if you select the item from the guest check window. This allows you to make additional selections right then, or you can let the guest continue placing their order without interruption, and address their selections on demand later in the order entry process. Simply select the item requiring additional selections from the guest check window and the associated context panel reappears on the screen, allowing you to enter guest selections at your convenience.
As a best practice, we recommend reserving an area, such as the center of the screen, for displaying your context panels. Each time you select an item with an associated context panel, the new context panel replaces the prior context panel, allowing you to make selections for the currently selected item.
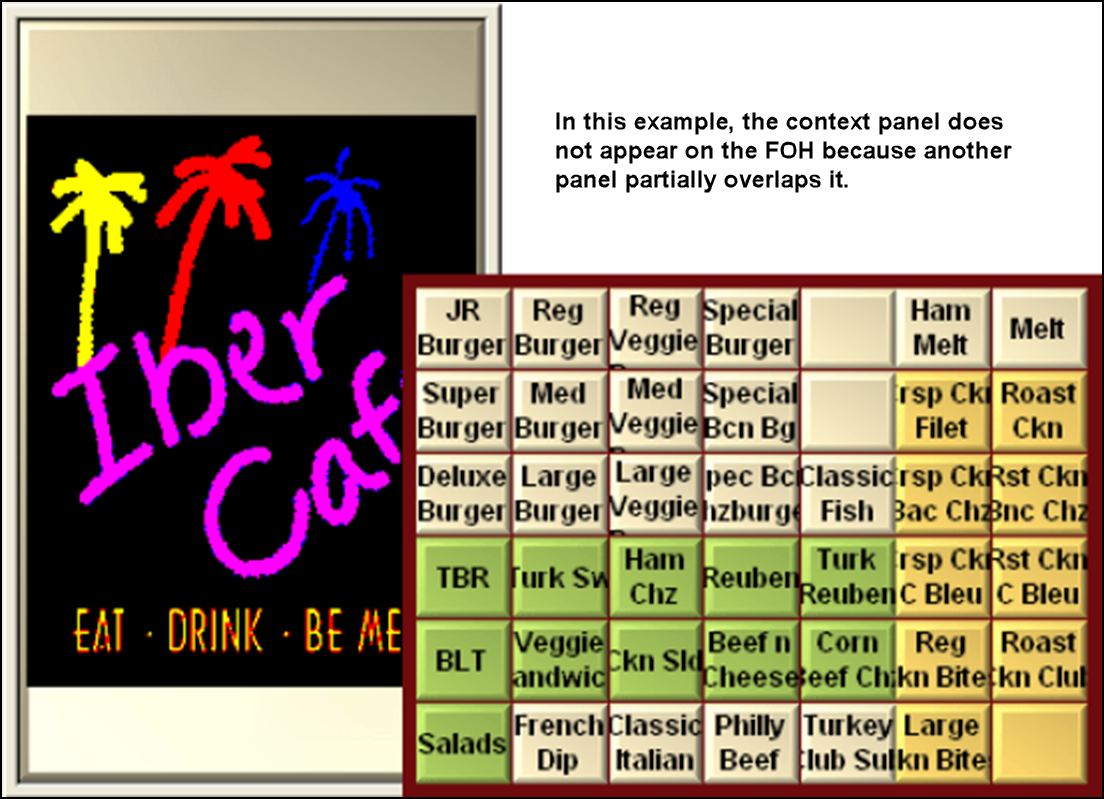
As with any panel you create, panels must never partially overlap another panel. Each panel must cover edge to edge, or the Aloha Front-of-House (FOH) does not display the overlapped panel.
Incorporating context panels into your database allows you to be more flexible when entering guest selections, which reduces errors during order entry and increases customer satisfaction.
You need to analyze your order entry needs and make some determinations before implementing context panels:
- Determine the maximum number of modifiers you allow for any one item or like items.
- Determine how much screen real estate is available for displaying a context panel and how many buttons you can put on a panel of that size.
- You may need to create a context panel for each group of like items, such as sandwich modifiers, item substitutions, pizza toppings, and more.
- If you need to create multiple context panels to accommodate your needs, devise a naming convention so that you can easily identify the appropriate panel when associating it with an item. Once you complete this analysis, you are ready to begin your configuration.
Additional features you can use with Context Panels
You can also implement these features in conjunction with context panels:
- Supporting Dynamic Item Substitution
- Supporting Dynamic Included Modifiers
- Substituting Included Modifiers with Context Panels
- Toggling Between Adding and Removing a Modifier
Configuring Context Panels
The instructions in this section use the concept of reserving an area of your order entry screen for displaying context panels. This allows you to create and size a context panel using the dimensions and number of buttons you need, and then copy it, for consistency across your order entry panels and screens. You also need to create a regular Quick Service panel, to appear in the reserved area immediately upon login, and when you select an item that does not have an associated context panel.
- Exposing context panels in the user interface
- Activating the use of context panels
- Creating a context panel
- Associating a context panel with an item or modifier
- Associating a context panel with a quick combo
- Refreshing POS data
Using Context Panels
Learn how to perform procedures related to using context panels.