Configuring label printing in Aloha POS
This section guides you through the configuration in the POS to support label printing functionality.
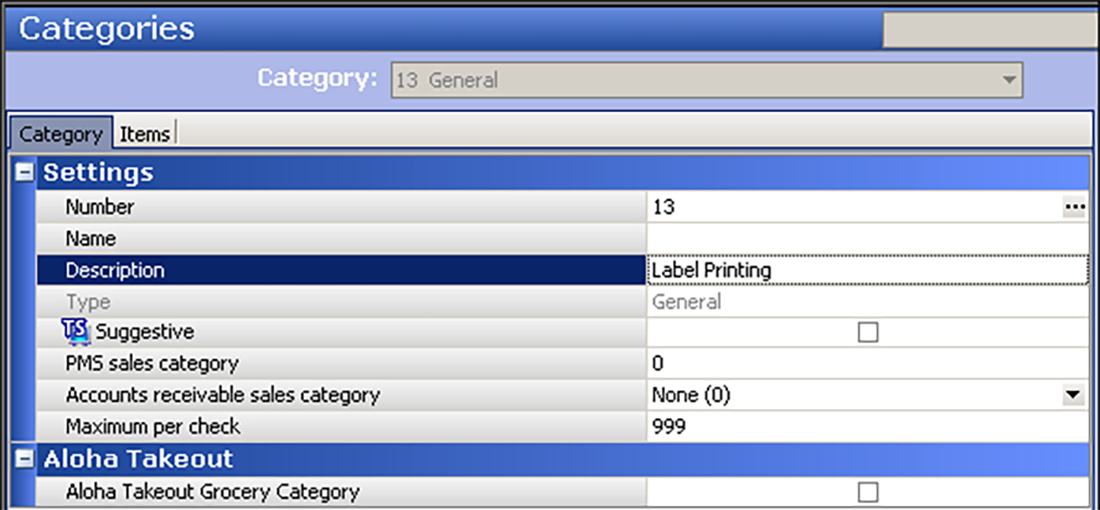
Creating a label printing category
You typically do not print a label for every item. For example, beverage cans and sauce cups usually do not require a printed label; however, entrées and other kitchen produced items require a label. Create a non-sales category that consists of items that require a printed label, using the following guidelines:
- If all items requiring a printed label print to a single label printer, you only need one category.
- Similar to kitchen printing, sites using multiple label printers should create a category for each location in which a label printer resides and items are produced.
If you use multiple label printers, type a logical name for each category you create for label printing, such as "Grill Label," "Pizza Label," or "Salad Label," to help with configuration. See "Creating a Label Printer in Aloha POS" to define label printing categories in Hardware > Printer configuration.
Note: Do not select 'Aloha Takeout Grocery Category' for label printing categories. Aloha Takeout uses this option for the grocery category feature.
To create a label printing category:
-
With Takeout selected in the product panel, select Maintenance > Menu > Categories.
-
Click the New drop-down arrow, select General as the category type, and click OK.
-
Type a name and description that easily identifies this category for label printing.
-
Clear Aloha Takeout Grocery Category.
-
Select the Items tab.
-
Select the items for which you want to print labels in the 'Available' list and click the right arrow to move the items to the 'Included' list.
-
Repeat this procedure for each label printing category you need to create.
-
When finished, click Save and exit the Categories function.
Obtaining Epson L90 settings prior to configuring
If you are using the Epson L90 printer, you can connect through the network. It is helpful to obtain the necessary information for the printer prior to making your configuration in your configuration management tool. If you are connecting through the network, you must obtain the IP address of the printer with the EpsonNetConfig utility.
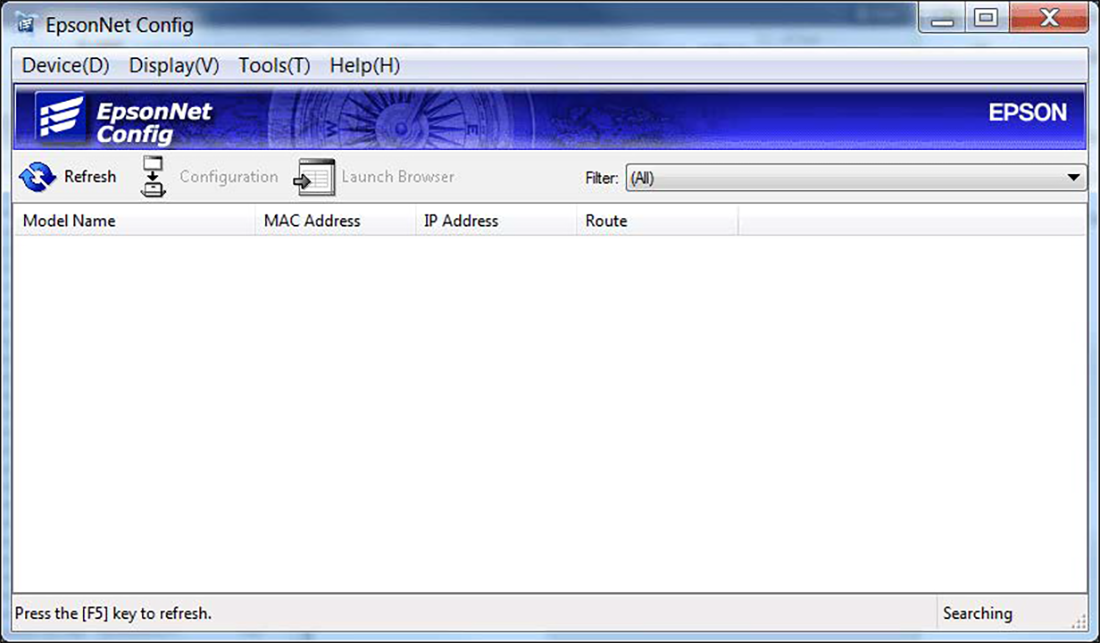
To obtain the IP address for the Epson L90 printer:
- Navigate to http://download.epson-biz.com/modules/pos/index.php?page=single_soft&cid=5302&pcat=4&pid=27.
- Follow the instructions provided by Epson.
If you are connecting through a serial port, you must obtain the baud rate, parity, data bits, and stop bits using the Memory Switch Setting utility. Typically, the requirements are the following:
Baud rate = 115200
Parity = None
Data bits = 8
Stop bits = 1
Handshake = XON/XOFF

To obtain the serial port information for the Epson L90 printer:
- Navigate to https://download.epson-biz.com/modules/pos/index.php?page=single_soft&cid=4451&pcat=4&pid=27.
- Follow the instructions provided by Epson.